Saving images to a computer, Install the files, Connect the camera to the computer – Canon A4050 IS User Manual
Page 33
Included Software, Manuals
33
z
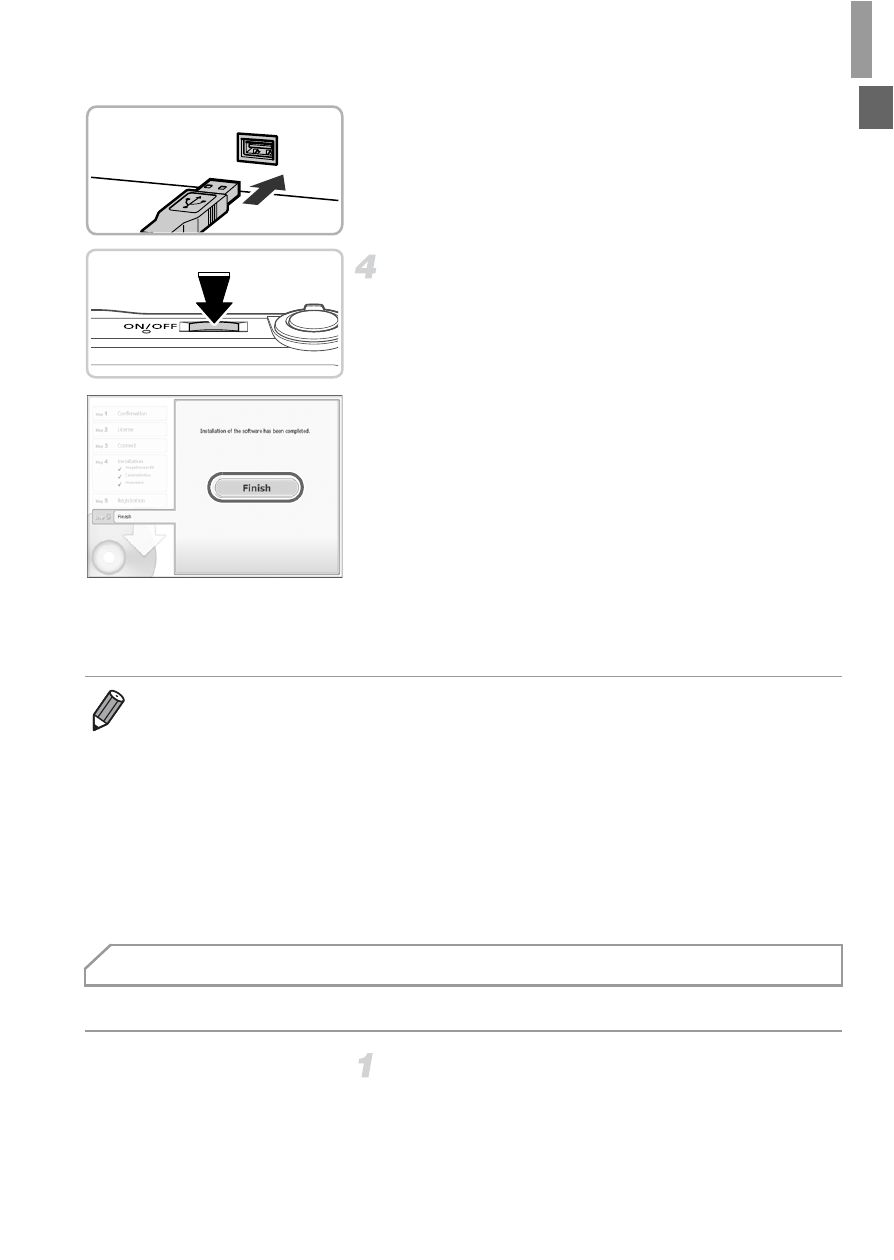
Insert the larger plug of the interface cable in
the computer’s USB port. For details about
USB connections on the computer, refer to
the computer user manual.
Install the files.
z
Turn the camera on, and follow the on-screen
instructions to complete the installation
process.
X
The software will connect to the Internet to
update to the latest version and download
new functions. Installation may take some
time, depending on computer performance
and the Internet connection.
z
Click [Finish] or [Restart] on the screen after
installation and remove the CD-ROM when
the desktop is displayed.
z
Turn the camera off and disconnect the
cable.
Windows 7 and Mac OS X 10.6 are used here for the sake of illustration.
Connect the camera to the
computer.
z
Follow step 3 on p. 32 to connect the camera
to a computer.
•
When not connected to the Internet, there are the following limitations.
-
The screen in step 3 will not be displayed.
-
Some functions may not be installed.
-
The first time you connect the camera to the computer, drivers will be installed,
so it may take a few minutes until camera images are accessible.
•
If you have several cameras that were bundled with ImageBrowser EX on the
included CD-ROMs, be sure to use each camera with their included CD-ROM
and follow the on-screen installation instructions for each. Doing so will ensure
that each camera will receive the correct updates and new functions via the auto
update function.
Saving Images to a Computer