Finishing touches – Carl Goldberg GBGA1069 User Manual
Page 25
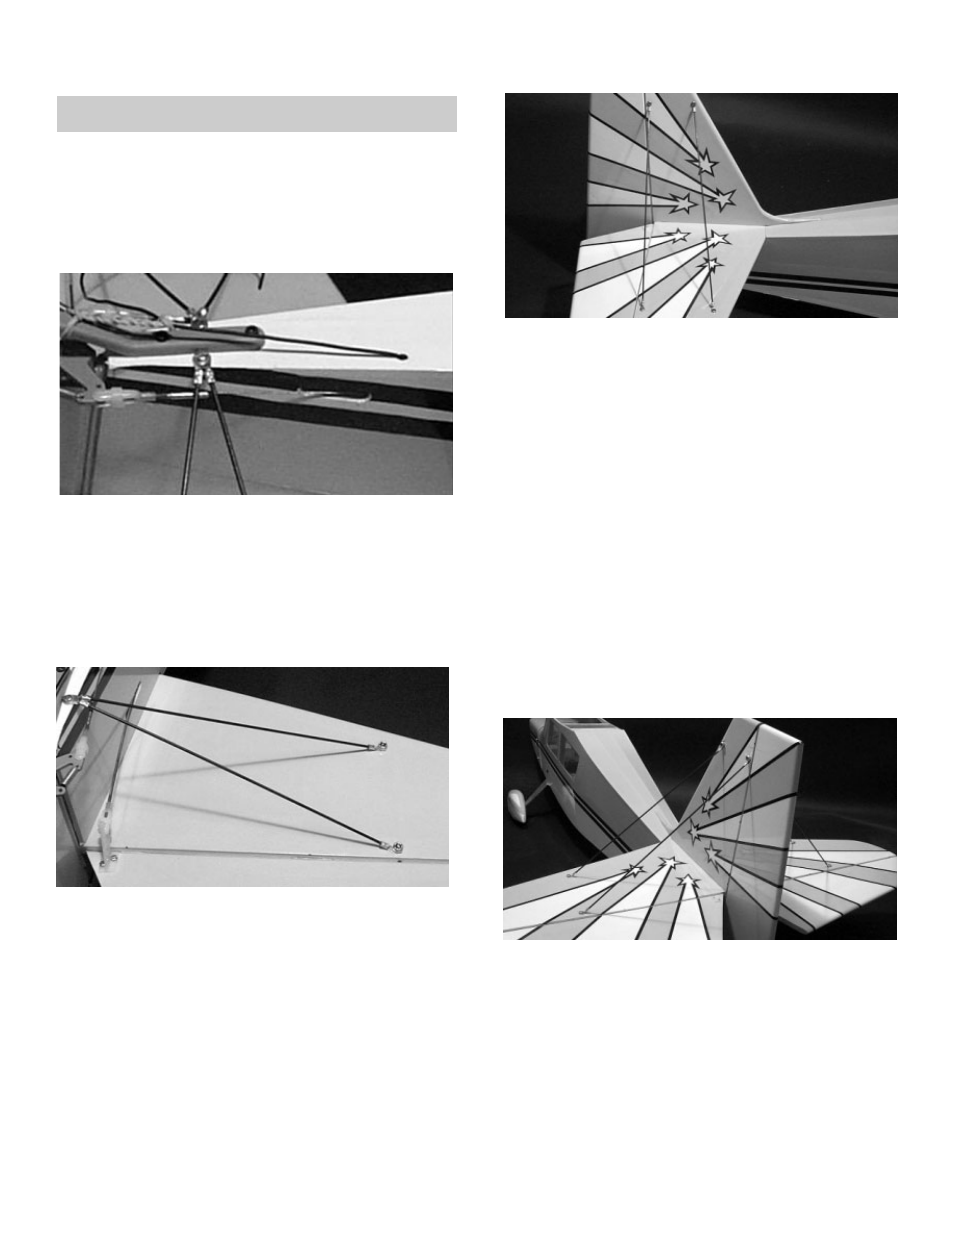
TAIL BRACING WIRE INSTALLATION
1.
!
Collect the following items:
(4).063 x 8-1/2” wire with eyelets
(4) .063 x 10-7/8” wire with eyelets
(2) #4 x 3/8” sheet metal screw
(6) 4-40 x 1/2” pan head screw
(6) 4-40 locking nut
2.
!
Turn the fuselage over and measure from
the back of the fuselage forward 1-1/4” and
make a mark.
!
Drill a 1/16” hole on the mark
!
Take two .063 x 8-1/2” wire and place a #4 x
3/8” screw into one end of each wire.
!
insert the screw into the hole in the fuselage.
3.
!
Bend the front wire down to the stab and
mark the hole location for the front wire 3/4”
back from the leading edge.
!
Bend the rear wire down to the stab and
mark the hole location 5/16” from the trailing
edge.
!
Drill an 1/8” hole on both marks.
!
Insert a 4-40 x 1/2” pan head screw through
the eyelet on each wire Then insert the
screw into the hole in the stab. Do not put a
nut on at this time.
!
Repeat the above steps for the other side of
the stab.
4.
!
Turn the fuselage right side up and insert the
10-7/8” wire on to the screws on the stab.
!
Install the 4-40 locking nuts on the screws
but do not tighten.
!
Bend the front wire towards the fin and mark
the hole location for the front wire 5/16” back
from the leading edge.
!
Bend the rear wire towards the fin and mark
the hole location 5/16” from the trailing edge.
!
Drill 1/8” hole on both marks.
!
insert a 4-40 x 1/2” pan head screw through
the eyelet on each wire Then insert the
screws into the holes in the fin.
5.
!
insert a 10-7/8” wire onto the screws in the fin
and the stab then install the 4-40 locking nuts
on the screws.
!
Tighten all locking nuts till the eyelets are just
dimpling the wood.
FINISHING TOUCHES
25