Carl Goldberg GBGA1069 User Manual
Page 20
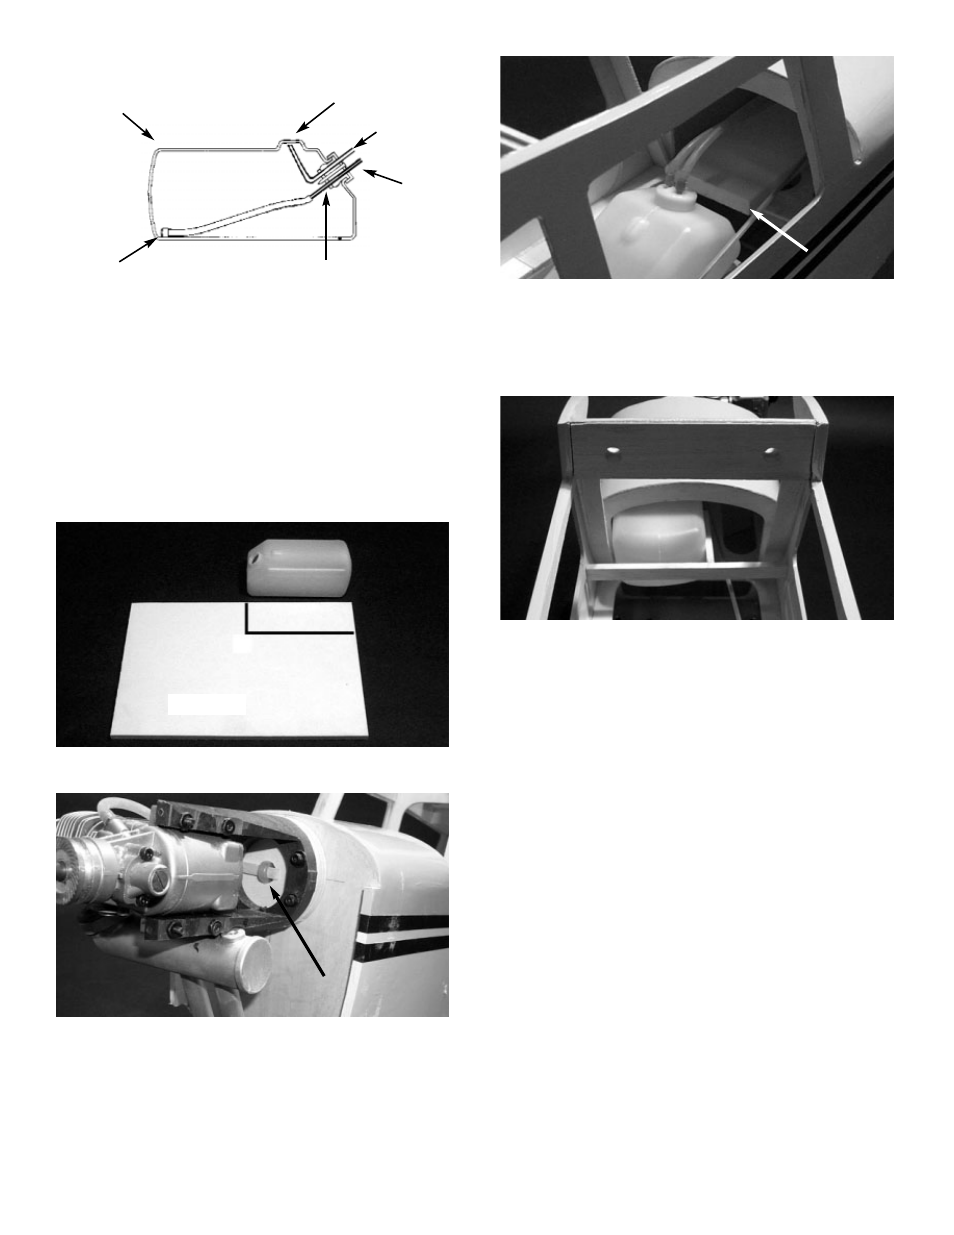
6.
!
Again place the stopper assembly into the
fuel tank. If the klunk is touching the back
wall of the tank, trim it as needed.
7.
!
Place the large nylon cap onto the two brass
tubes.
!
When satisfied with the fit of the entire stop-
per assembly, tighten the #4 x 1” screw into
the center of the stopper. Take care to not
over-tighten the screw.
8.
!
Cut a 2-1/2” x 5” fuel tank pad out of the foam
Not included in the kit.
9.
!
Fold the 20” fuel tubing in half and insert it
through the hole in the middle of the motor
mount.
HINT: insert a short stick or screw through the loop
to stop the fuel line from falling though the
firewall.
FUEL TUBING
10.
!
Place the foam pad into the front of the fuse-
lage underneath the fuel tank.
!
Put the fuel tubing onto the fuel tank bass
tubes. HINT: Keep track which tubing is on the
vent tube of the fuel tank.
FOAM PAD
11.
!
With the fuel line, pull the fuel tank up into the
fuselage till it stops at the firewall.
!
Cut the 3/16” x 1/2” x 7-3/4” balsa stick to fit
across the fuselage. This keeps the tank from
moving back.
!
When satisfied with the fit glue in place to the
side of the fuselage.
!
Take the piece of stick that was left over from
above and glue it to the stick to keep the tank
from sliding sideways.
!
Cut the fuel lines to fit to the engine.
20
TANK
KLUNK
TIGHTEN SCREW UNTIL
STOPPER COMPRESSES
AGAINST TANK
OUTLET
VENT
BEND TUBING TO TOP
OF BUMP IN TANK
Not Included