Avlink HDMI-E8 User Manual
Page 24
Distribution Amplifier (DA)—User Manual
23
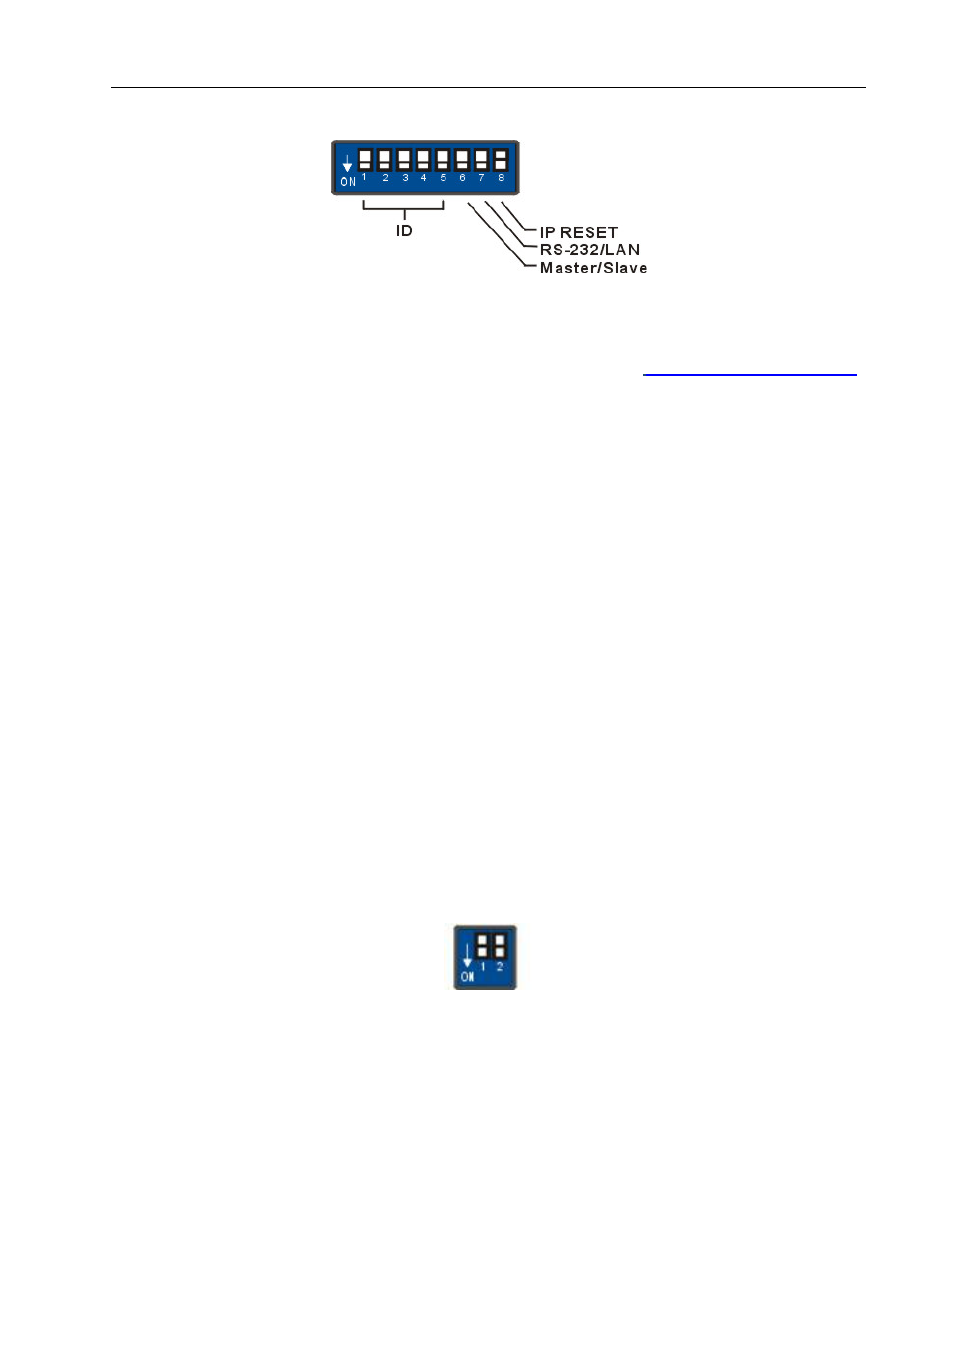
6.6.4 DIP Switcher 8 Pins
Figure 6-18 DIP Switcher
A. DIP Switcher Pin 1 to 5:
Switch to down (ON) is specified for “0”, on the other hand
to up (OFF) is specified for “1”. For Device ID settings refer to
6.6.6 Device ID Settings.
B. DIP Switcher Pin 6:
Mater/Slave Enable/Disable. Only one device can be connected
to the PC via RS-232/LAN that is specified as Master, others are specified as Slave.
ON: RS-485 Serial Master and RS-232 / LAN Enable.
OFF: RS-485 Serial Slave and RS-232 / LAN Disable.
C. DIP Switcher Pin 7:
Switch between RS-232 port and LAN port connection.
ON: RS-232
OFF: LAN
D. DIP Switcher Pin 8:
Reset the web server IP address to 192.168.0.3
The steps are as below:
1. Please adjust the pin8 to ON and re-start the Distribution Amplifier (DA).
2. After the Distribution Amplifier (DA) re-starts about 10 seconds, shut down it.
3. For a normal operation, please adjust the pin8 to OFF, then power on the
Distribution Amplifier (DA) again. The IP address will be restored to the default value:
192.168.0.3
6.6.5 DIP Switcher 2 Pins
Figure 6-19 RS-485 Terminal Switcher
DIP Switch RS-485 Terminator:
RS-485 Terminator for ON/OFF
ON: RS-485 Terminator ON.
OFF: RS-485 Terminator OFF.
Proceed Multi devices connections, the RS-485 Terminator for the last device must be
set to ON. Others must be set to OFF.