2 configuring your network – Agasio A622W User Manual
Page 11
Page | 10
713-893-4514
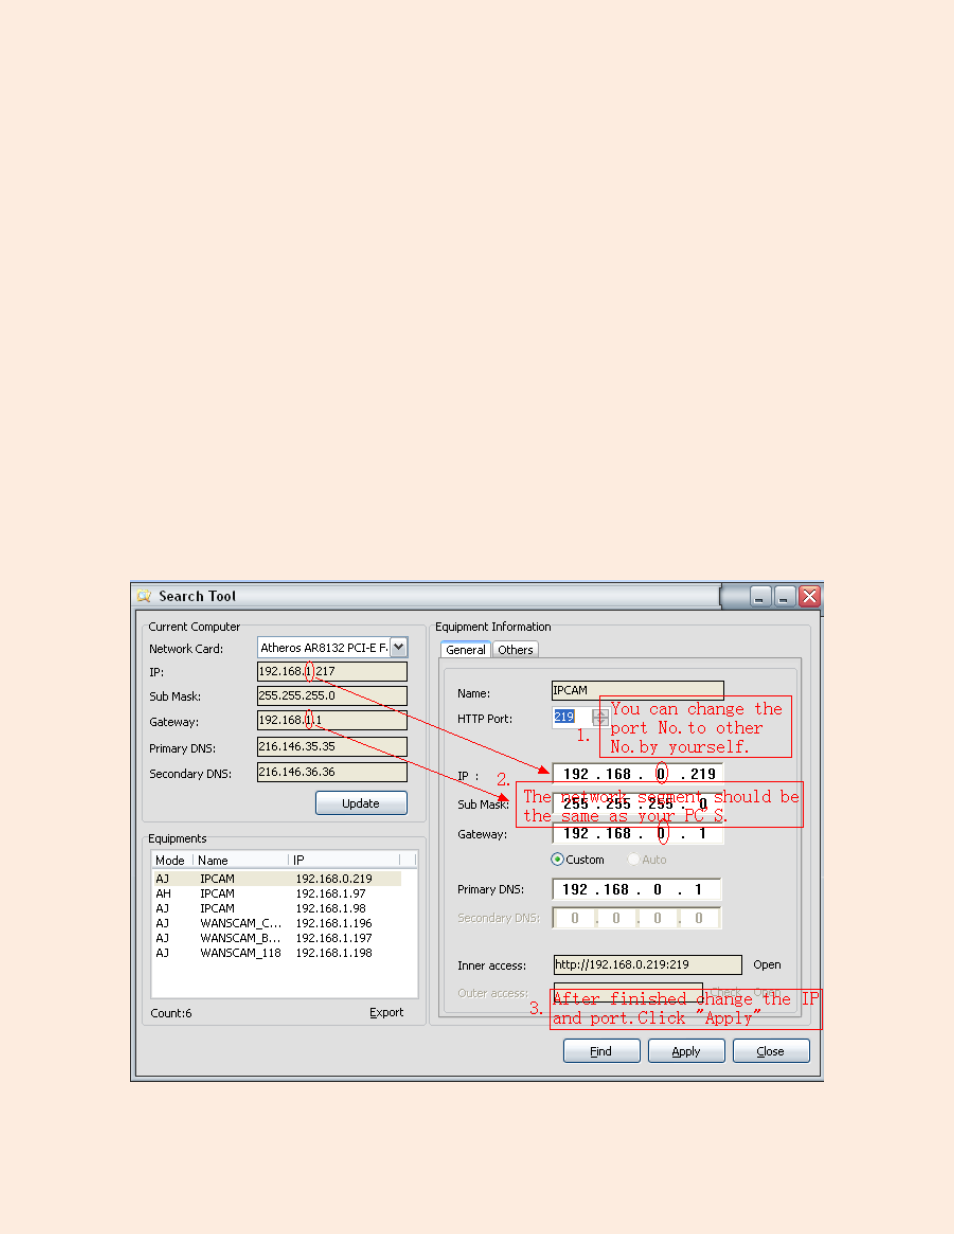
5.2 Configuring Your Network
Once your camera’s IP address’ Subnet Mask, Gateway, DNS Server is the same as your PC or router,
you need configure the camera’s network parameters manually.
IP address: Fill in the IP address assigned and make sure the first three sections of the IP are the same
as the IP listed under the “Current Computer” section. For example, in Figure 5.2, the first three sections
of the IP that need to be entered under “Equipment Information” where the “IP” field is should be
192.168.1. These numbers were taken from the IP field under “Current Computer.”
Subnet Mask: The default subnet mask of the equipment is almost always: 255.255.255.0. You can find
the subnet mask
under the “Current Computer” section of the software in the field “Sub Mask.”
Gateway: Just like the IP address, make sure all four sections of the Gateway are exactly the same. For
example, in Figure 5.2, the Gateway IP that should be manually typed in is 192.168.1.1. This information
is found under the “Current Computer” section in the field “Gateway.” The Gateway is the LAN IP of your
router.
Primary DNS: IP address of ISP network provider. You can also set it as the same as the Gateway. For
example, in this case it would be set as 192.168.1.1.
HTTP Port: You can enter a custom port number in this field for the camera; default port number is set to
99. You can change the port number to any number you would like, such as: 98, 211, 9999 etc.
Figure 5.3
– Manually set the camera’s information to that under the “Current Computer” section