Section 7a: electric motor installation, Section.7a:.electric.motor.installation – Hangar 9 Pulse XT 40 ARF User Manual
Page 26
26
Required Parts
•.Fuselage.
•.Plywood.battery.tray
•.Hook.and.loop.strap.
•.Cowling
•.4-40.x.3/8".socket.head.screw.(2)
•.6-32.x.1
.
7
/
8
".screw.(4)
•.1".(25mm).aluminum.motor.spacer.(4)
•.Hook.and.loop.(adhesive.back)
•.#2.x.1/2".sheet.metal.screw.(2)
Required Tools and Adhesives
•.Phillips.screwdriver.
•.Threadlock
•.Hex.wrench:.3/32".
•.Drill
•.Male.Deans.connector.(3). •.Soldering.iron
•.Drill.bit:.9/64".(3.5mm)
•.Female.Deans.connector.w/wire
•.Solder
•.4200mAh.2S2P.7.4V.Li-Po.(2)
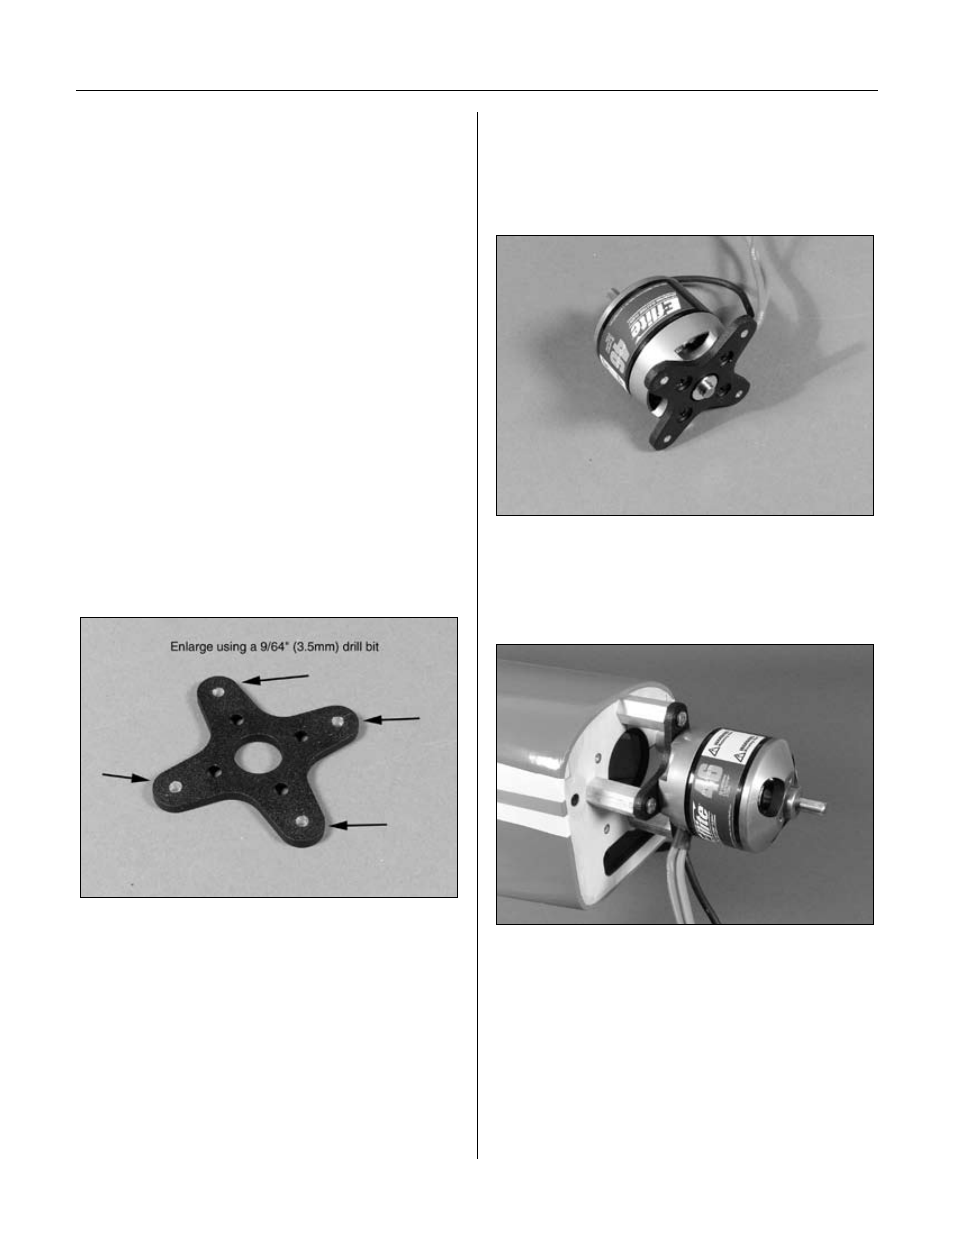
.Step 1
Enlarge.the.outer.mounting.holes.in.the.X-mount.of.the.
motor.using.a.9/64".(3.5mm).drill.
.Step 2
Attach.the.X-mount.to.the.back.of.the.motor.using.the.
hardware.provided.with.the.motor..Remember.to.put.a.
drop.of.threadlock.on.each.of.the.screws.to.prevent.them.
from.vibrating.loose.
.Step 3
Attach.the.motor.to.the.firewall.using.the.1".(25mm).
spacers.and.6-32.x.1
.
7
/
8
".screws..Use.threadlock.on.the.
screws.here.as.well.
Section 7A: Electric Motor Installation