Section 6b: gluing the tail (optional), Section.6b:.gluing.the.tail.(optional) – Hangar 9 Pulse XT 40 ARF User Manual
Page 25
25
Required Parts
•.Fuselage.w/tail.installed
Required Tools and Adhesives
•.Adjustable.wrench.
•.Felt-tipped.pen
•.Hobby.knife.
•.30-minute.epoxy
•.Straight.edge
This.section.is.optional.and.describes.how.
to.permanently.glue.the.tail.section.to.the.
fuselage..If.you.do.not.want.to.glue.the.
tail.to.the.fuselage,.feel.free.to.continue.
to.Section.7:.Engine.Installation.
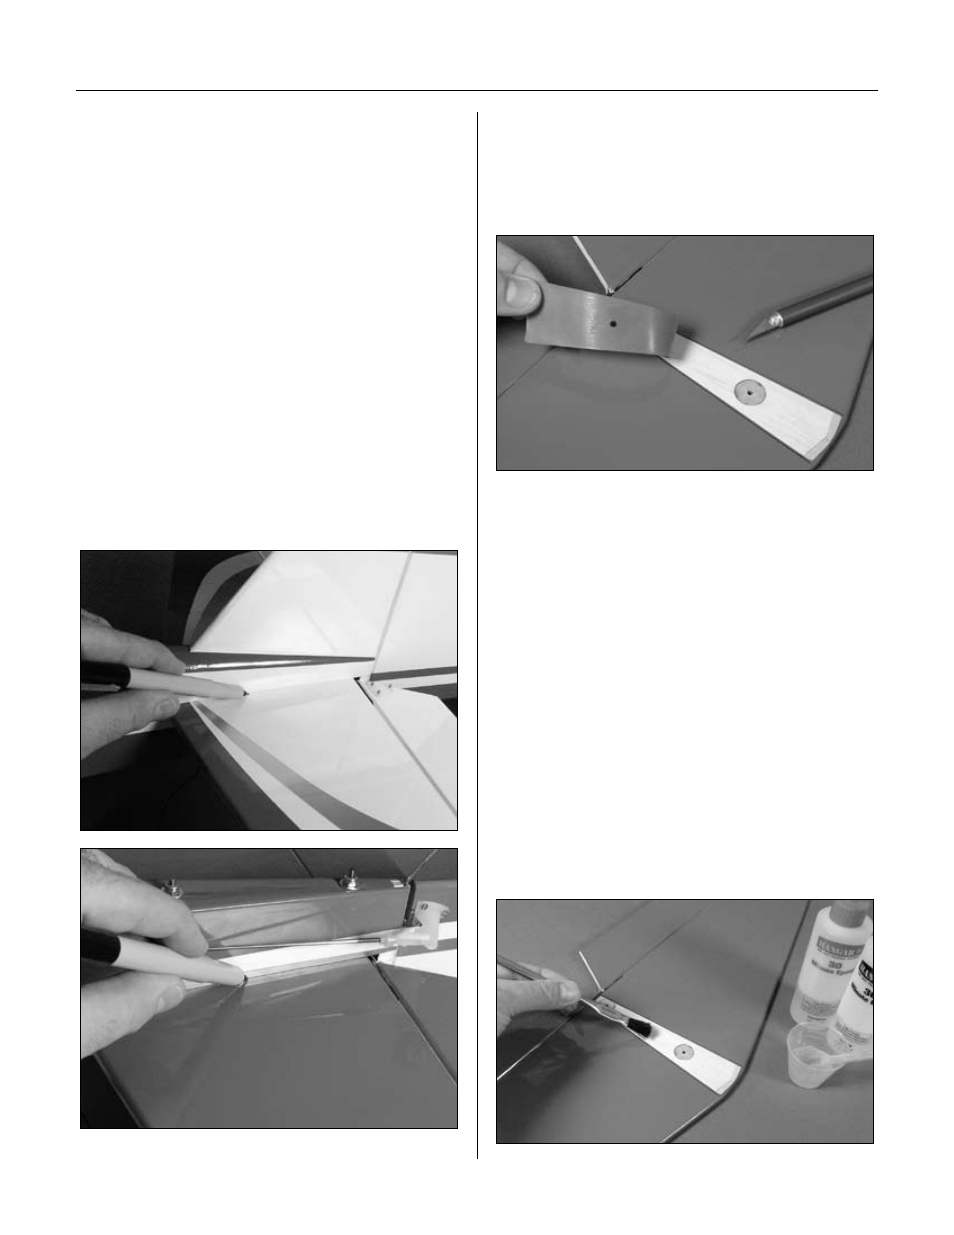
.Step 1
Use.a.felt-tipped.pen.to.trace.the.outline.of.the.fuselage.
onto.the.bottom.of.the.stabilizer..Also.trace.the.outline.of.
the.fin.fairing.onto.the.top.of.the.stabilizer.using.a.felt-
tipped.pen.
.Step 2
Remove.the.tail.from.the.fuselage..Use.a.straight..
edge.and.hobby.knife.to.trim.the.covering.about..
1/16".(1.5mm).inside.the.lines.drawn.on.the.top.and.
bottom.of.the.stabilizer.
Note:.Be.very.careful.when.cutting.the.
covering..Using.too.much.pressure.
can.through.the.covering.and.into.
the.stabilizer..Doing.so.will.score.the.
stabilizer.and.it.may.fail.in.flight.
Hint:.Use.a.soldering.iron.or.hot.knife.to.
trim.the.covering.on.the.stabilizer..This.will.
lower.the.chances.of.scoring.the.stabilizer.
.Step 3
Mix.about.1/2.oz.(15ml).of.30-minute.epoxy..Apply.the.
epoxy.to.the.exposed.wood.on.both.the.top.and.bottom.
of.the.stabilizer..Install.the.tail.back.onto.the.fuselage.as.
described.in.Section.6..Use.a.paper.towel.and.rubbing.
alcohol.to.remove.any.excess.epoxy.before.it.has.a..
chance.to.cure.
Section 6B: Gluing the Tail (Optional)