Section 3: hinging the rudder, Section.3:.hinging.the.rudder – Hangar 9 Pulse XT 40 ARF User Manual
Page 15
15
Required Parts
•.Rudder.
•.Fin
•.Tail.wheel.assembly.
•.Tail.wheel.1".(25mm)
•.CA.hinge.(2)
•.2mm.wheel.collar.w/setscrew
•.Control.horn.w/backplate
•.2mm.x.12mm.screw.(3)
Required Tools and Adhesives
•.Thin.CA.
•.Drill
•.Hobby.knife.
•.Felt-tipped.pen
•.6-minute.epoxy.
•.Ruler
•.Sandpaper.
•.Paper.towel
•.Rubbing.alcohol.
•.Mixing.stick
•.T-pin.
•.Hex.wrench:.1.5mm
•.Phillips.screwdriver.
•.Threadlock
•.Drill.bit:.1/16".(1.5mm),.5/64".(2mm)
.Step 1
Locate.the.tail.wheel.assembly..Fit.the.nylon.bushing.into.
the.rudder.post..Use.a.felt-tipped.pen.to.mark.the.nylon.
bearing.where.it.protrudes.from.the.rudder.post.
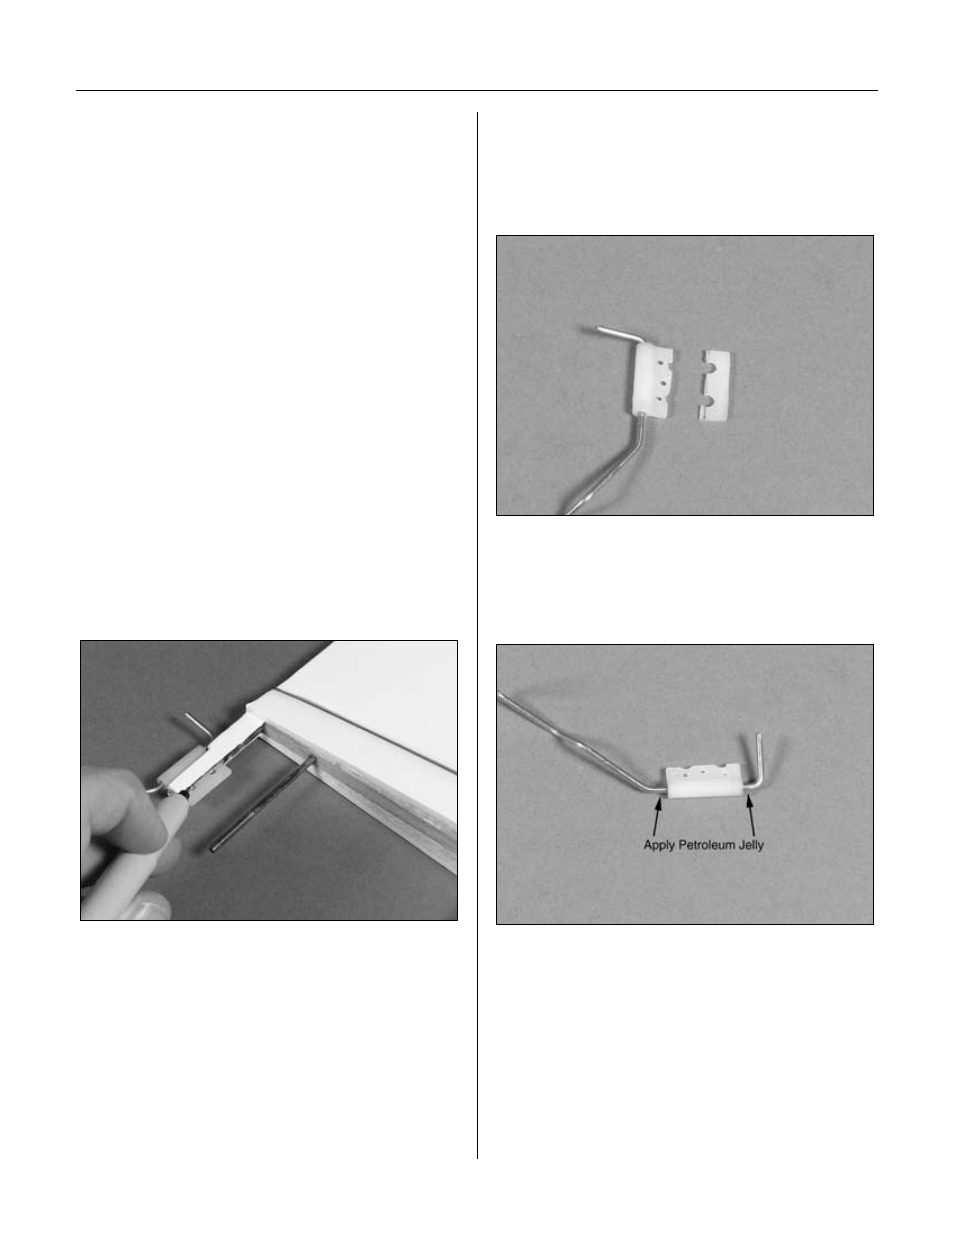
.Step 2
Use.a.hobby.knife.or.side.cutters.to.trim.the.nylon.bearing.
as.shown..Drill.three.5/64".(2mm).holes.in.the.bearing.to.
give.the.epoxy.something.to.grab.on.to.when.it.gets.glued.
into.the.rudder.post.
.Step 3
Apply.a.thin.coat.of.petroleum.jelly.to.the.wire.and.work.
it.onto.the.nylon.bearing..This.will.help.prevent.the.epoxy.
from.gluing.the.wire.to.the.bearing.
.Step 4
Use.a.small.amount.of.6-minute.epoxy.to.glue.the.bearing.
into.the.rudder.post.
.Step 5
Prepare.the.hinge.slots.in.the.rudder.and.fin.by.drilling..
a.1/16".(1.5mm).hole.in.the.center.of.each.slot..Prepare.
the.last.two.CA.hinges.by.placing.a.T-pin.in.the.center..
of.each.one.
Section 3: Hinging the Rudder