Cub Cadet CC 4BP 32cc User Manual
Page 26
FUEL SYSTEM AND CARBURETOR
23
7b. Remove the four screws going through the
primer bulb housing with a #0 phillips
screwdriver.
7c. Separate the carburetor, placing each part
on the bench in the order they came
apart.
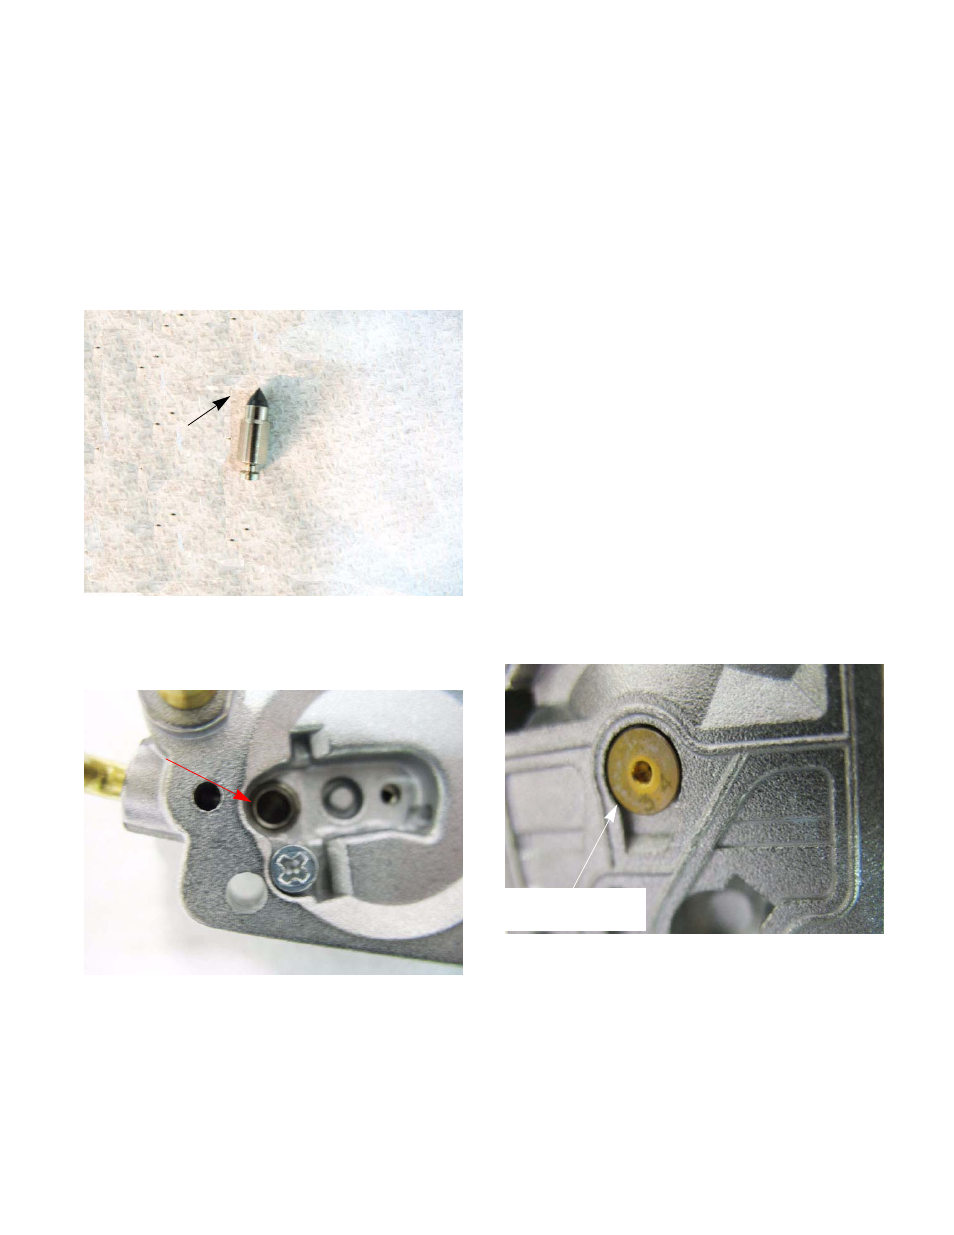
7d. Inspect the metering valve and the metering
valve seat for dirt and/or pitting.
See Figure 5.11.
7e. If the metering valve seat is damaged
replace the carburetor. See Figure 5.12.
Figure 5.11
Inspect for dirt
or damage
Figure 5.12
Needle valve
seat
7f. Inspect the metering valve body, primer
pump body and the venturi housing for dirt
and/or varnish.
NOTE: If there is a minor amount of dirt/varnish
in the carburetor it would be worth while to clean
and rebuild the carburetor by following the pro-
cedures recommended by the carburetor manu-
facturer.
NOTE: If there is a lot of dirt/varnish in the car-
buretor, replace the carburetor.
7g. Clean the venturi and the metering valve
housings.
7h. Inspect the diaphragms for brittleness and/
or damage.
NOTE: The carburetor used in this manual is a
Walbro. Depending on the application the
engine may have a different carburetor. All car-
buretors have a manufacturer name cast on
them. It is advisable to contact the carburetor
manufacturer for the proper rebuild procedure.
7i. Clean the metering orifice with carb cleaner.
CAUTION: Do not insert anything into the orifice
to clean it. That will damage the orifice resulting
in the carburetor being unrepairable. See Figure
5.13.
Figure 5.13
Orifice from the
Venturi side