Check the following before testing – Checkline MX2 User Manual
Page 3
3
14
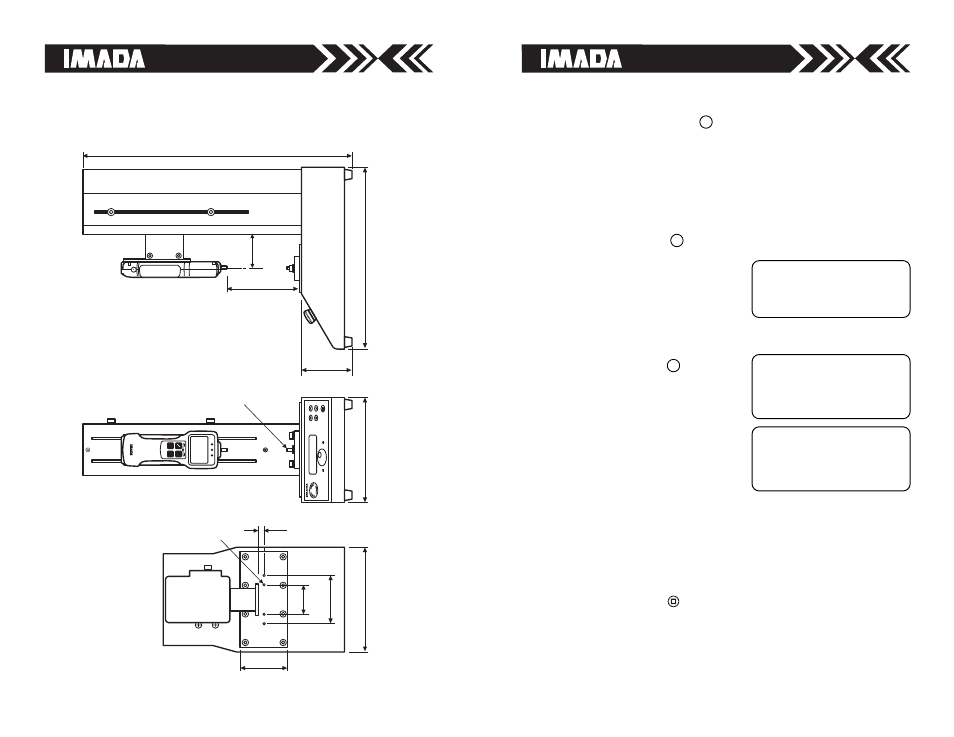
DIMENSIONS
MX2-110
71
(2.79")
220
(8.66")
200
(7.87")
380
(14.9")
562
(22.1")
110
(4.33")
0~240
(0~9.44")
M6
12
(.47")
100
(7.87")
60
(2.36")
M8
100
(3.93")
DIGIT
AL FORCE GA
UGE
00.0
NG
Lb
OK
+NG
O
VERLO
AD
ZER
O
SEND
PEAK
ON
OFF
Select
Enter
Bac
k
Changing Speed Units
1. Press the Back button
to
change to Cycle Mode.
2. Press and hold the dial until the
Config Mode screen appears.
3. Turn the dial until Extra Config
appears (arrows
< >
indicate
current selection).
4. Press the dial to enter Extra
Config Mode.
5. Turn the dial in Extra Config
Mode until Unit Select appears.
6. Press the dial to enter.
7. Turn the dial to select inch or
millimeter.
8. Press the Back button
twice to
exit Extra Config Mode and return
to Cycle Mode. Unit selection is
then retained in memory for
future tests.
5
Check the following before testing
1. Turn the
Emergency Stop
clockwise to make sure it is
released. Press it whenever you are in an emergency situation.
2. Move the
Upper and Lower Travel Limits so that there is
separation between them or the cross head will not move and
and a limit error is displayed on the LCD screen (see page 5).
3. Connect the power cord to the proper AC power.
4. Turn on power switch
on the back of the test stand.
When the power is turned on Manual
Mode/Speed Adjust is the startup
screen. The default speed unit is
mm/min.
6
7
MANUAL MODE
5.50 mm/min
# SPEED ADJUST
CONFIG MODE
< EXTRA CONFIG >
ENTER EXTRA CONFIG
EXTRA CONFIG MODE
UNIT SELECT
< INCH