Panasonic NV-H65 Series User Manual
Page 25
Attention! The text in this document has been recognized automatically. To view the original document, you can use the "Original mode".
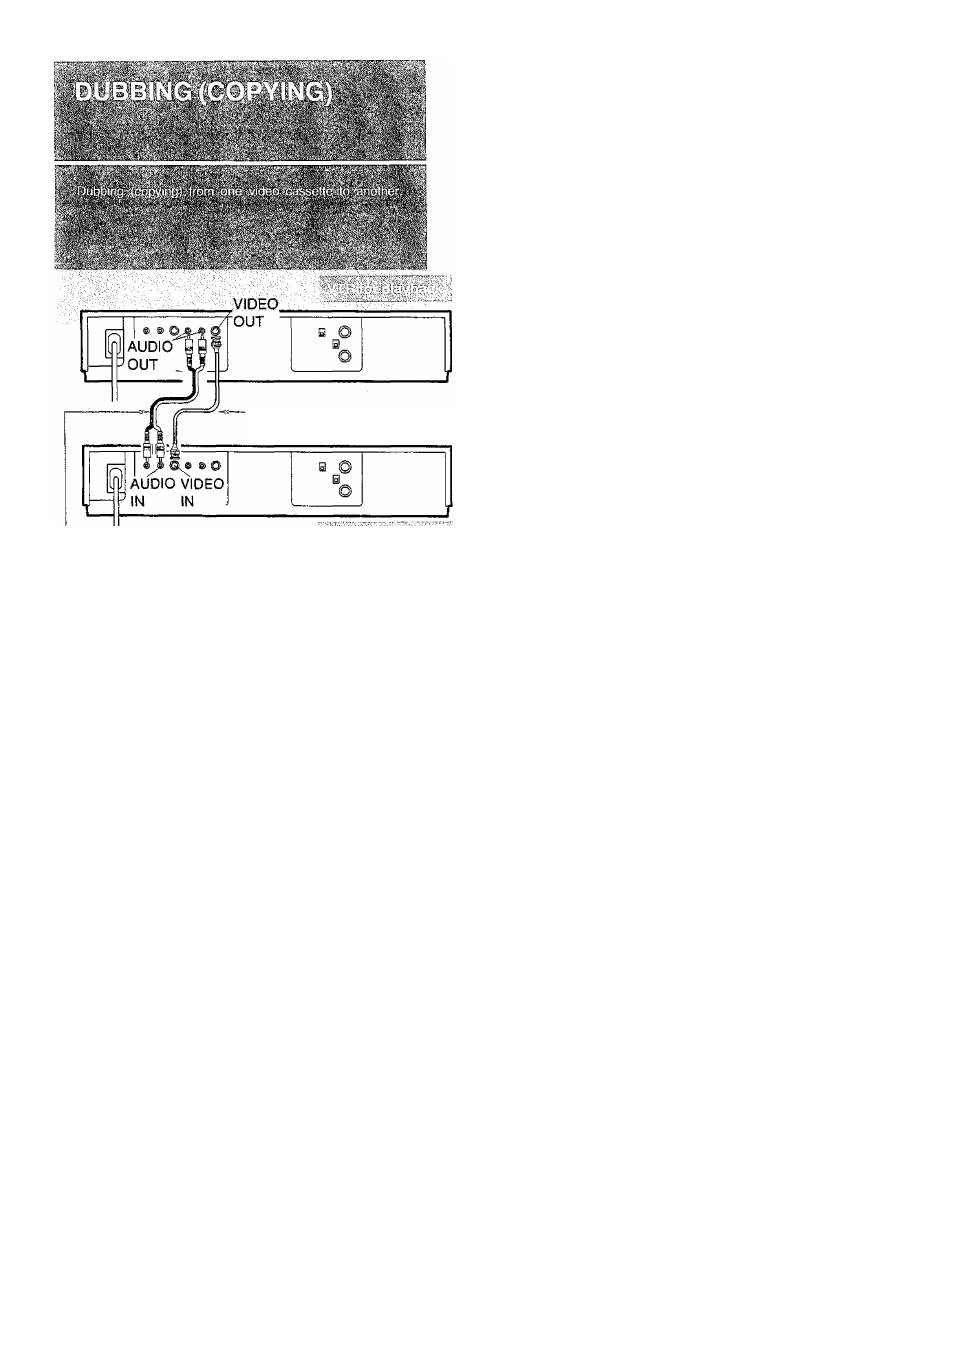
75 ohm type coaxial cable (Optional)
Stereotype PHONO Cable (Supplied) T;; i ; ■
Preparation
•Press the VTR On/Off Switches to turn both VTRs On.
•Set the Input Signal Selector to “Line/Audio”. (Recording
VTR)
•Connect the Audio Output Sockets on the playback VTR
to the Audio Input Sockets on the recording VTR with a
stereo type PHONO cable.
•Connect the Video Output Socket on the playback VTR to
the Video Input Socket on the recording VTR with a 75
ohm type coaxial cable (BNC connector).
•Make sure that the Edit Switches of both the recording
and playback VTRs (if equipped) are in the “On” position.
Set these switches to “Off" for ordinary use of the VTRs.
(The Edit Switch is on the front panel.)
^ Place the recorded cassette in the playback VTR and a
blank video cassette with the erasure prevention tab
intact in the recording VTR.
Press the Record Button (®) on the recording VTR.
REC«
REC
Press the Play Button (►) on the playback VTR.
PLAY
>
Press the Stop Button (S) on both VTRs to stop the
dubbing.
STOP
•To assure smooth, noiseless cuts when interrupting
the recording, always use the Pause/Still Button
(11).
•To obtain smooth cuts when starting the recording
from the stop mode:
1. Play back the last part of the previously recorded
material to confirm its ending point, and then
press the Pause/Still Button
(II).
2. Press the Record Button (•).
(The VTR is still in the pause mode.)
3. To start recording, press the Pause/Still Button
(II)
again.
•The picture quality of a re-recorded tape is not as
good as that of the original.
•To dub from a Hi-Fi VTR to a conventional Mono
VTR, press the “Audio Playback Mode Selector
Button" repeatedly until the “Left” and “Right"
audio playback mode indicators go out.
25