Panasonic DVD-RV40 EN User Manual
Page 36
Attention! The text in this document has been recognized automatically. To view the original document, you can use the "Original mode".
Home theater
E
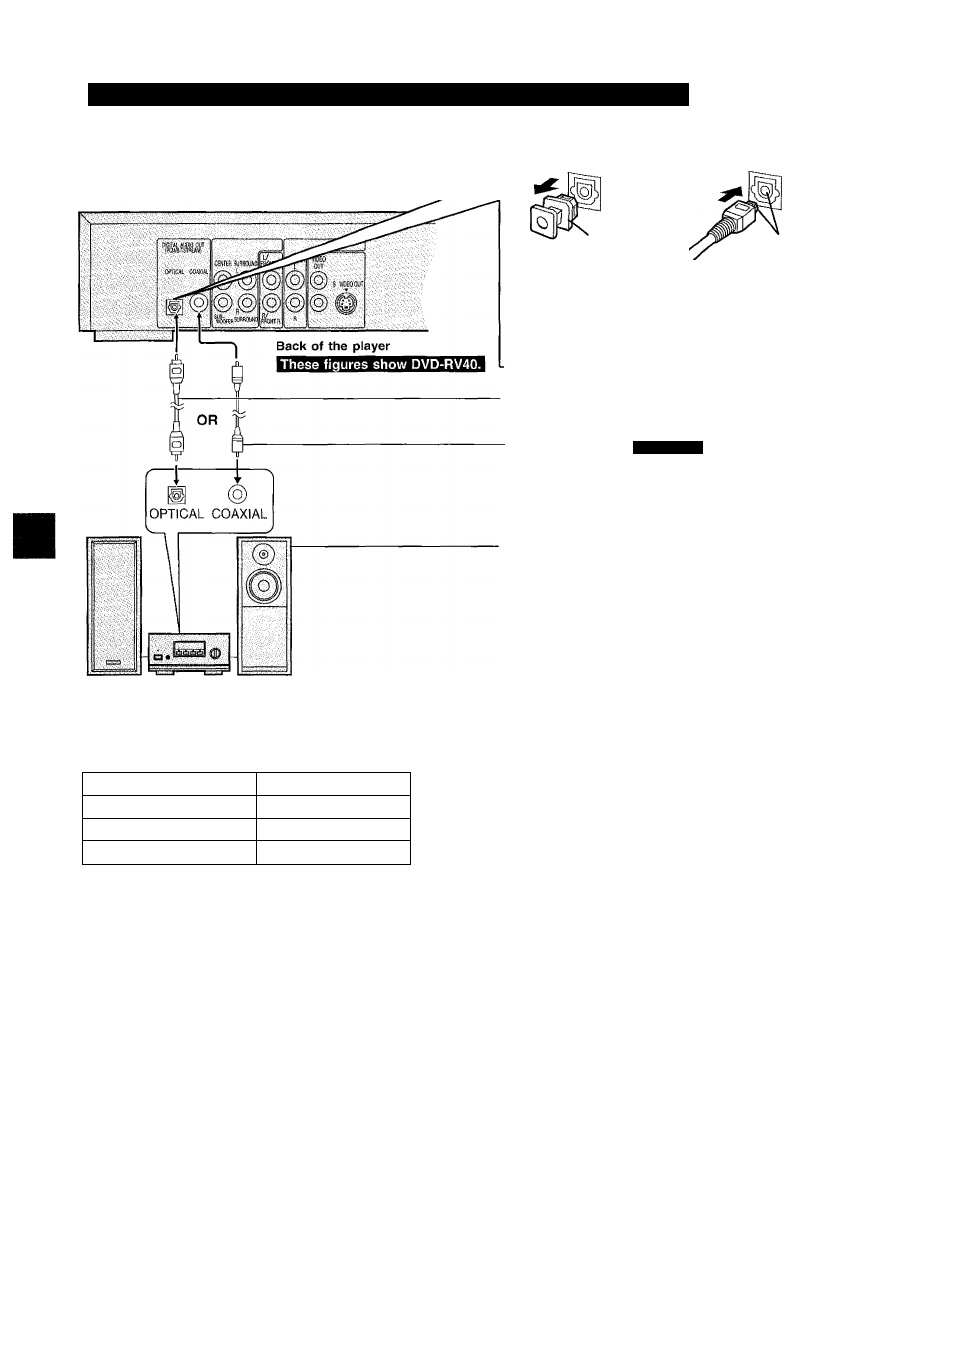
Connecting audio equipment with digitai audio input terminais
S
iS
Q)
I
Note when connecting the optical digitai audio cabie
Dust protection
cap
Align the plug with
the terminal
• Remove the dust protection cap from the optica! digital audio out
put terminal and connect the cable firmly so that the configurations
of both the cabie and the terminal match.
• Keep the dust protection cap and reattach when not using the
terminal.
Optical digital audio cable
• Do not bend the optical digital audio cable when connecting it.
Coaxial audio cable
DVD-RV40
System component or amplifier with digital audio input
terminals and speakers
• Read the instructions for the amplifier and speakers or system
component for connection details.
When you have finished connection
• Make changes to “7 Digital Audio Output” as shown (■♦ page 37),
PCM Down Conversion
Yes*
Dolby Digital
PCM
DTS Digital Surround
Off
MPEG
PCM
iiilf this is set to “No”, no audio will be output when DVDs recorded in 96 kHz linear PCM are played. (Audio will be output as it is if the DVD does
not have copyright protection recorded on it.)
•These changes to digital audio output must be made, otherwise signals the equipment cannot handle, bitstream, will be output.
If the signals are output as bitstream, “noise” will be output which can cause harm to your ears and speakers.
DVD-RV40
• In ‘‘8 Speaker Setting”, select “2 2-channel” page 39).
The sound for speakers other than the front left and right speakers will not be heard if you do not select
“2
2-channel”.
►Additional equipment and cables are not supplied.
VQT6633