OFNA Racing Jammin CRT .5 Mini User Manual
Page 17
33
34
35
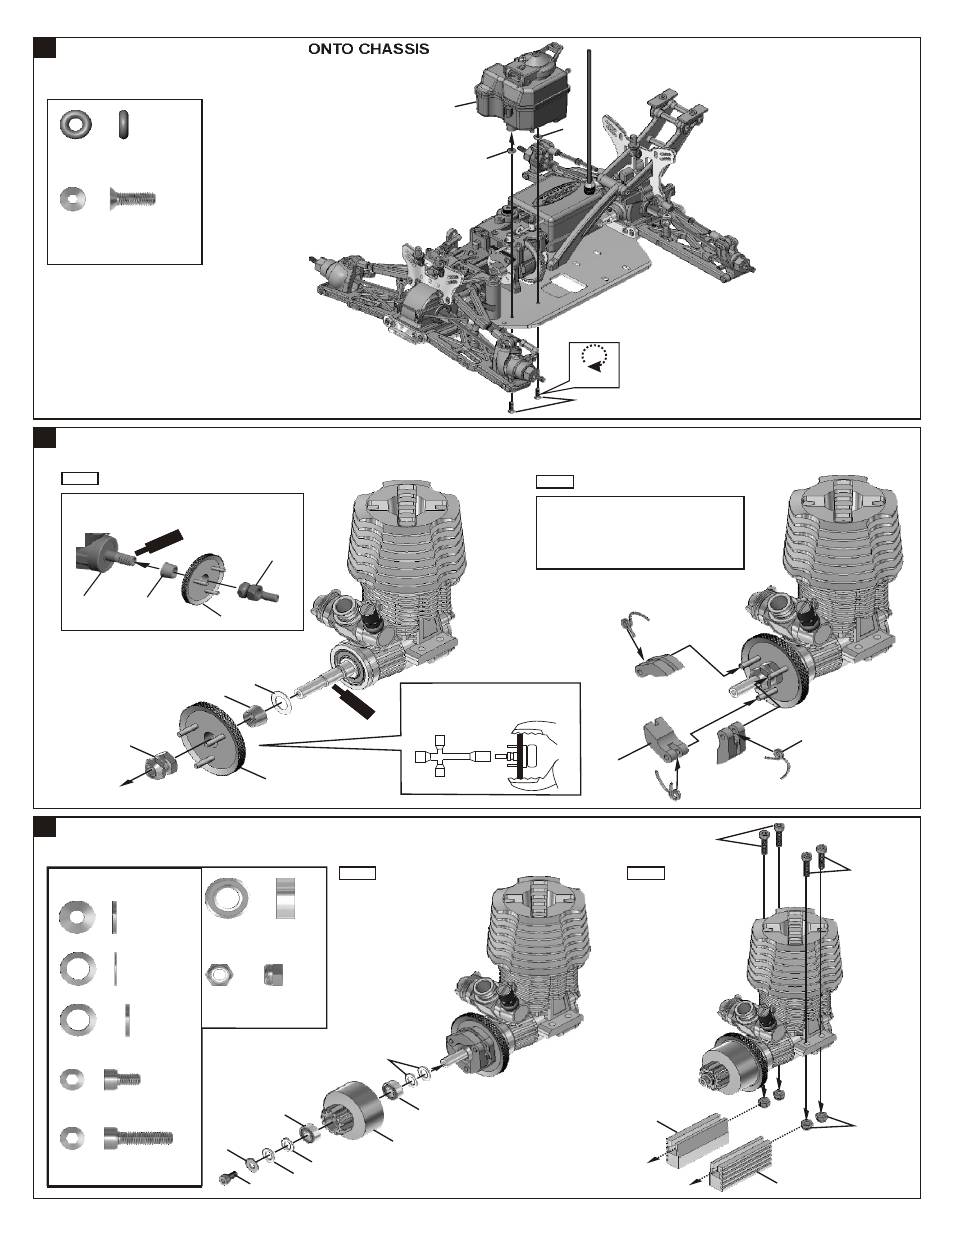
ASSEMBLY OF THE FUEL TANK ONTO CHASSIS
²Õ¦Xªo½c¦Ü©³½L
ASSEMBLY OF THE CLUTCH
ASSEMBLY OF THE CLUTCH AND ENGINE MOUNT
Step 1
Step 2
Step 1
Step 2
3x10mm
*Put the P3 O-Ring under the fuel
tank before assembly.
TM-47
37070
10098
40814
10330
10010
10102
10399
34110
34110
3x8mm
3x5mm
5x8x0.3mm
5x8x0.8mm
5x8x0.8mm
3mm
40864
40864
3x12mm
3x12mm
94019
3x10mm
Flat Head Hex Screw
.....x2
37070
P3 O-Ring
.....x2
.....x2
.....x1
.....x1
5x8x0.3mm Washer
34110
5x10x4mm Ball Bearing
3x8mm Washer
3x5mm Cap Screw
.....x2
5x8x0.8mm Washer
3x12mm Cap Screw
.....x1
.....x4
*Fit the flywheel using a pair of the
plIer and cross wrench.
*Place the clutch shoes with the clutch
springs over the 3 pins of the flywheel.
*Using a phillips screw driver or needle
nose pliers and bend the small end lf
the clutch spring behind the pilot shaft
#174C than press down.
35313
3mm
Nylon Nut
.....x4
10091
Pilot Shaft
(Not Included)
Threaded
Crank Shaft
* Only use the #174D pilot shaft for threaded crank
shaft engine.
Scr
ew
Cem
ent
40814
cr
S
ew
m
t
Ce
en
Do Not
Over Tighten
37070
*Slide the 3mm nylon
nut into engine mount.
7x12x0.5mm
10330
* Use the 7x12x0.5mm washer
only according to use different
engine.
*Useing the washer according
to the engine you use.
10099