System set-up and operation (contd.), User maintenance – Welch Allyn ELSV-24 Hi-Lux Light Source - User Manual User Manual
Page 8
p.5
SYSTEM SET-UP AND OPERATION (contd.)
For Use With BCAM 1000 C-mount Video Camera
Video Connector
The video connector is used when the Everest VIT BCAM 1000 c-mount camera is
being used with the rigid borescope or fiberscope. The BCAM camera cable con-
nects directly to this light source connector to provide simplified, one-cable hookup.
This customized cable provides power to the camera from the light source, and
relays the camera video to the light source, where is can be accessed through the
S-video and/or composite video output connectors on the back panel.
Video Outputs
S-video and composite BNC connectors are provided on the back panel of the light
source. When the light source is connected to the BCAM c-mount camera, the
camera video can be displayed and/or recorded by connecting a video cable from
one of these video outputs to a monitor and/or VCR.
BCAM 1000
Video
Connector
Video
Output
Camera
C-Mount
Coupler
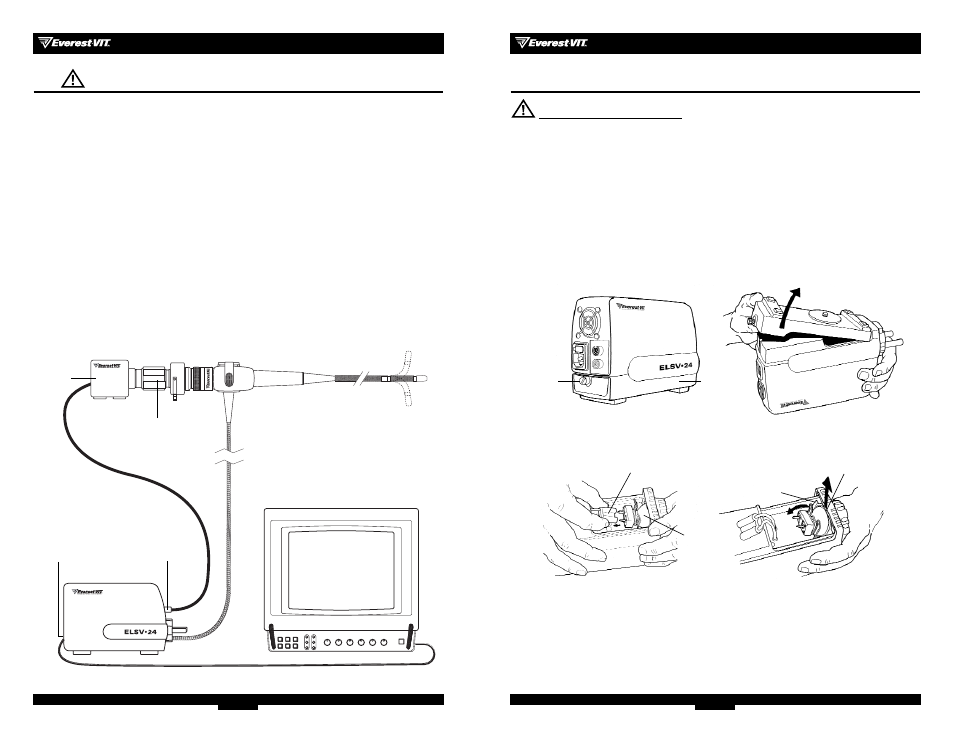
p.6
USER MAINTENANCE
LAMP REPLACEMENT
CAUTION: Lamp may be Hot! Allow the lamp to cool before replacing.
Note: Use only Everest VIT replacement lamp SPL240.
DO NOT touch the lamp itself or the interior reflective surface, because skin oils will
cause premature lamp failure. If necessary, clean fingerprints with an alcohol
dampened cotton swab. Do not leave lint on the lamp.
1. Turn the unit off and disconnect the power cord from both the wall outlet and the light
source.
2. Remove the lamp access door from the bottom of the unit by unscrewing the Lamp
Access Knob located on the lower back panel.
3. Remove the old lamp by disconnecting the wire harness connector from the lamp and
then pulling the lamp back against the retainer spring and up. Discard the old lamp.
4. Holding the new lamp by its housing, connect the new lamp to the wire harness
connector and install by pulling back on the retainer spring, aligning the pin on the
lamp with the notch in the housing, and allowing the spring to push the lamp forward
into position.
5. Reattach the lamp access door and tighten the Lamp Access Knob. The light source will
not turn on unless the Lamp access door is secure.
Lamp
Access
Knob
Lamp
Access
Door
Lamp Connection Assembly
Holding Spring
Align Pin
Lamp