Completing a test – Welch Allyn Audioscope 3 Portable Screening Audiometer - User Manual User Manual
Page 10
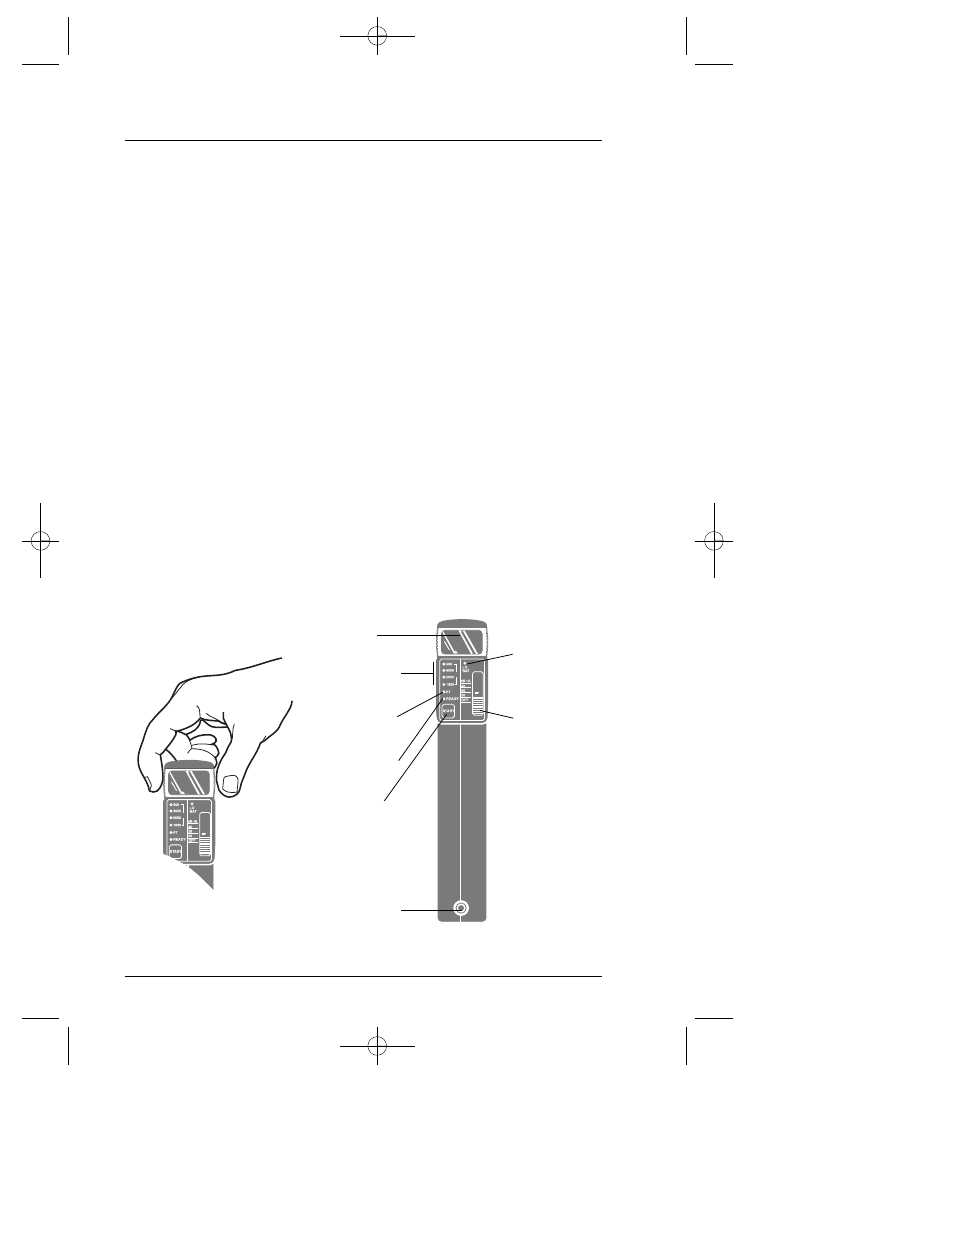
1. Before starting, check that the lens is centered in the instrument.
2. Select an area that is relatively quiet and free from distracting
conversation, fan noises, etc. (see p. 27 for allowable ambient
noise specifications).
3. Select a small, medium or large AudioSpec ear speculum. Use
the largest speculum that can be inserted comfortably into the
ear canal, yet still allow visualization of the tympanic membrane.
A snug fit assures an acoustic seal of the speculum in the ear
and occludes ambient noise. Secure the AudioSpec to
AudioScope 3 by twisting it clockwise onto the instrument.
NOTE: Use only gray-tipped Welch Allyn AudioSpecs.
Other types of specula will cause inaccurate results.
4. Turn AudioScope 3 “ON” by sliding the selection switch to the
desired screening level (20 dB HL, 25 dB HL, or 40 dB HL; see
p. 12 for guidelines). The white indicator band should completely
fill the square next to desired sound level. The green “READY”
indicator will become illuminated indicating that the instrument is
ready for service.
Should the yellow “LO BATT” indicator illuminate, see recharging
instructions (p. 17 - p. 18).
8
Step 4
Lens
Tone
Indicators
Pretone
Indicator
“READY”
Indicator
Start
Button
Charging
Jack
Low Battery
Indicator
dB Level
and ON/OFF
Switch
Centering
the lens
Step 1
Completing a Test
WANM-3999-COL AudioScope3 3/11/97 1:23 PM Page 8