Tjernlund SS1C SideShot (Discontinued Version - Pre UC1 Universal Control) 8504040 Rev 4 05/95 User Manual
Page 7
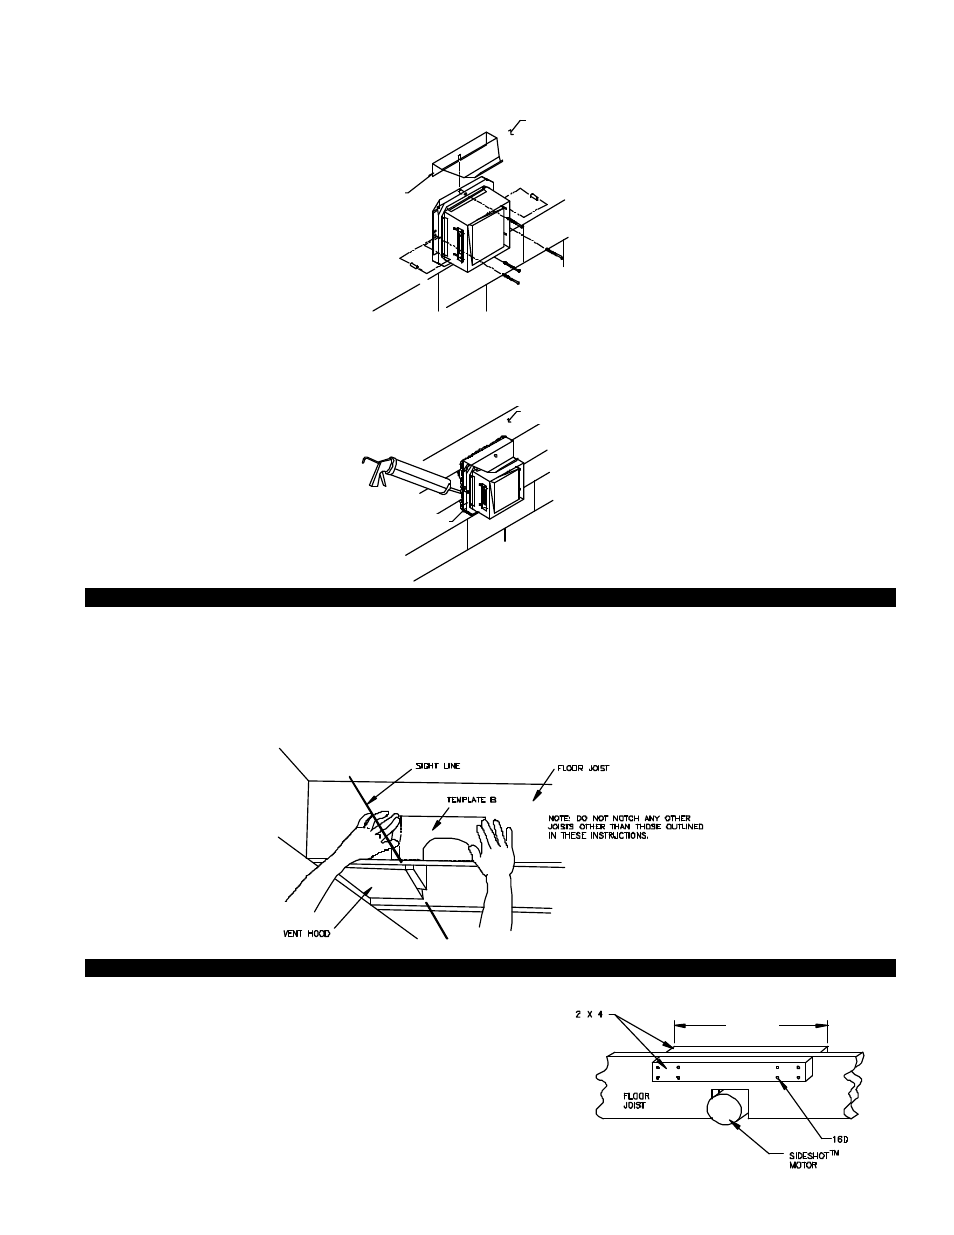
8. Slide the Vent Hood through the wall while taking care installing the rain shield as shown, (See Diagram E). The nuts located on
the Vent Hood outermost casing should be facing up when sliding it through the wall. Mount Vent Hood to the exterior using
four #8 x 3" wood screws and spacers provided, (See Diagram E). Wall anchors are provided for installation into masonry wall.
9. Connect the Plenum to the Vent Hood of the SideShot following the steps on pages 6, 7 and 8.
10. After the SideShot is completely installed, apply a bead of exterior rated caulk between the Vent Hood Terminus inner flange
and the exterior of the building, (See Diagram F).
INSTALLING PLENUM
Depending on building construction, it may be necessary to notch out a section of the floor joist to provide proper clearance for the
SideShot motor.
1. Attach Template B (Page 20) to the floor joist that is to be notched, aligning the sight line noted on the template with the end or
the outside casing of the vent hood.
2. Cut out notch on line shown on the template.
NOTCH BRACING
It is recommended and local codes may dictate that the joist be
reinforced as outlined below. Bracing of the rim joist is not
necessary.
1. Cut two 2 x 4 pieces of wood 71 cm (28 inches) in length.
2. Center both pieces on each side of the floor joist above the notch and
drive 8 16D or larger nails into each piece, (See Diag. H)
6
DIAGRAM E
RAINSHIELD
(INSTALL BETWEEN BUILDING
EXTERIOR AND INNER FLANGE
BUILDING
EXTERIOR
TERMINUS INTERIOR FLANGE
BUILDING
EXTERIOR
DIAGRAM F
DIAGRAM G
DIAGRAM H
71 CM
28”