Configuration using irev – Rice Lake iQUBE2 Quick-Start Guide User Manual
Page 3
iQUBE
2
Quick-Start Guide
3
Configuration using iRev
1. If you have not already done so, complete
Steps 1 - 4 on page 1.
2. From the
iRev4
File menu, select New.
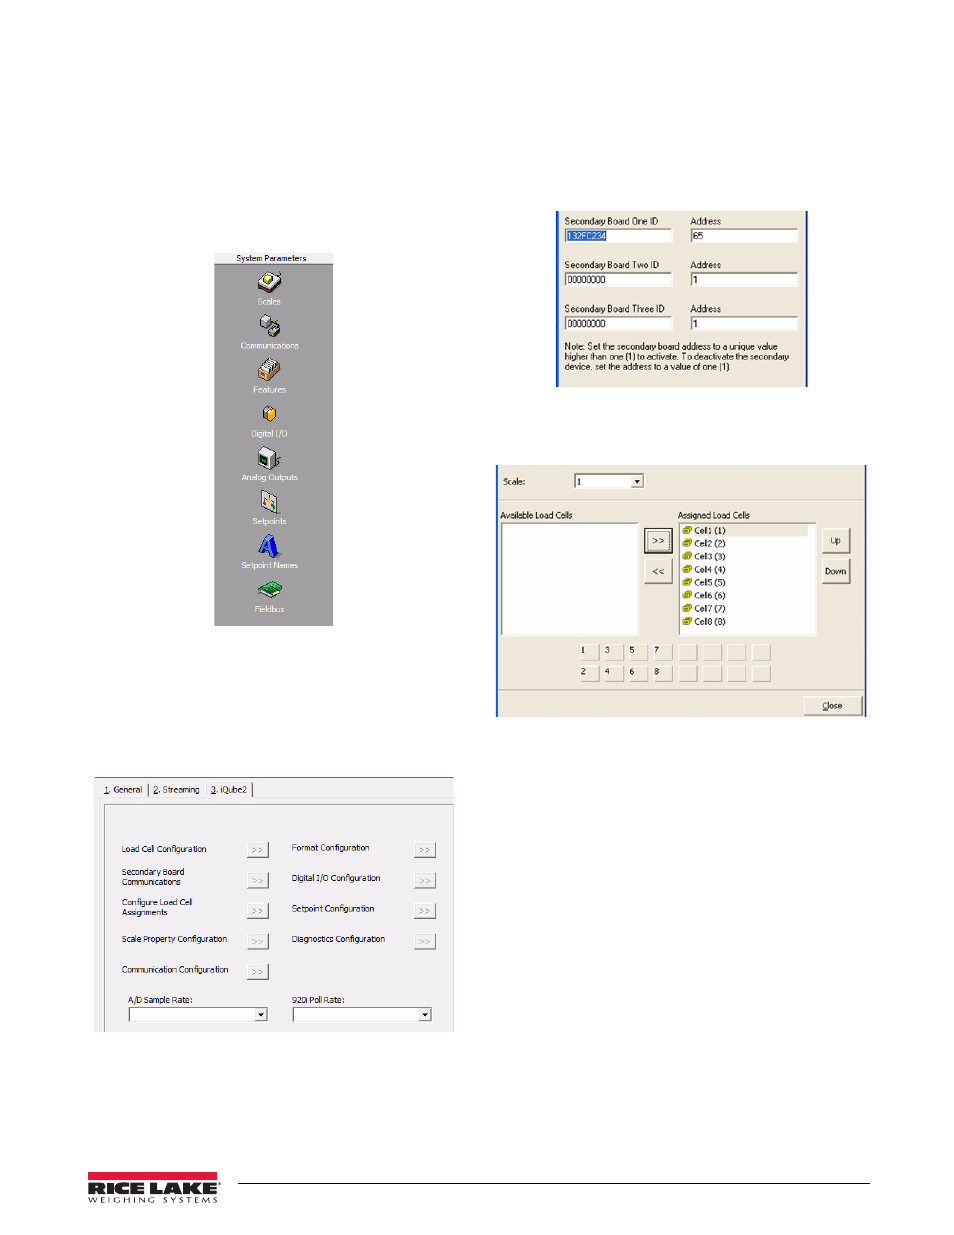
Configure Communications
1. From the System Parameters section, click the
Communications
button.
Figure 8. System Parameters section
2. Click on Port 4.
3. In the General tab, set the Input Type to
iQube2
and the Port Type to
RS-485
.
Configure and Add Load Cells and Secondary Board
1. Select the iQube2 tab.
Figure 9. Serial port iQUBE2 settings
2. Click Load Cell Configuration and update as
needed.
3. Click Secondary Board Communications.
In the Secondary Board One ID text box, enter
the serial number found on the secondary
board (see Figure 12 on page 4). In the Address
text box, enter a number higher than one.
Starting secondary board address numbering at
65 is recommended (see Figure 10).
Figure 10. Secondary Board Communications
4. Click Configure Load Cell Assignments and
move desired cells to the right.
Figure 11. Load cell assignments
5. Click Scale Property Configuration and update
as needed.
Configure Scale #1
1. From the System Parameters section, click the
Scales
2. Double-click
Scale #1
.
3. Under Source Types, select
iQube2 Systems
and
associate Port 4.
Save and Download Configuration to iQUBE
2
1. From the File menu, select
Save As
and save the
file with an appropriate name.
2. From the Communications menu, select
Connect
.
3. Download all configuration steps. Also mark
the Download to iQube2 checkbox.
4. On the
920i
, press the
Save and Exit
softkey.
A weight should now display on the
920i
.
5. Continue with calibration using Section 4.0 of
the installation manual.