Navigate to the config menu and press the, Softkey (see figure 3 ), Softkey – Rice Lake iQUBE2 Quick-Start Guide User Manual
Page 2: Green lights on the, Press the, Download to the, Softkey until available iqubes is displayed, Select port 4 - scale 1 and press the, Iqube, Figure 3. config menu
2
iQUBE
2
Quick-Start Guide
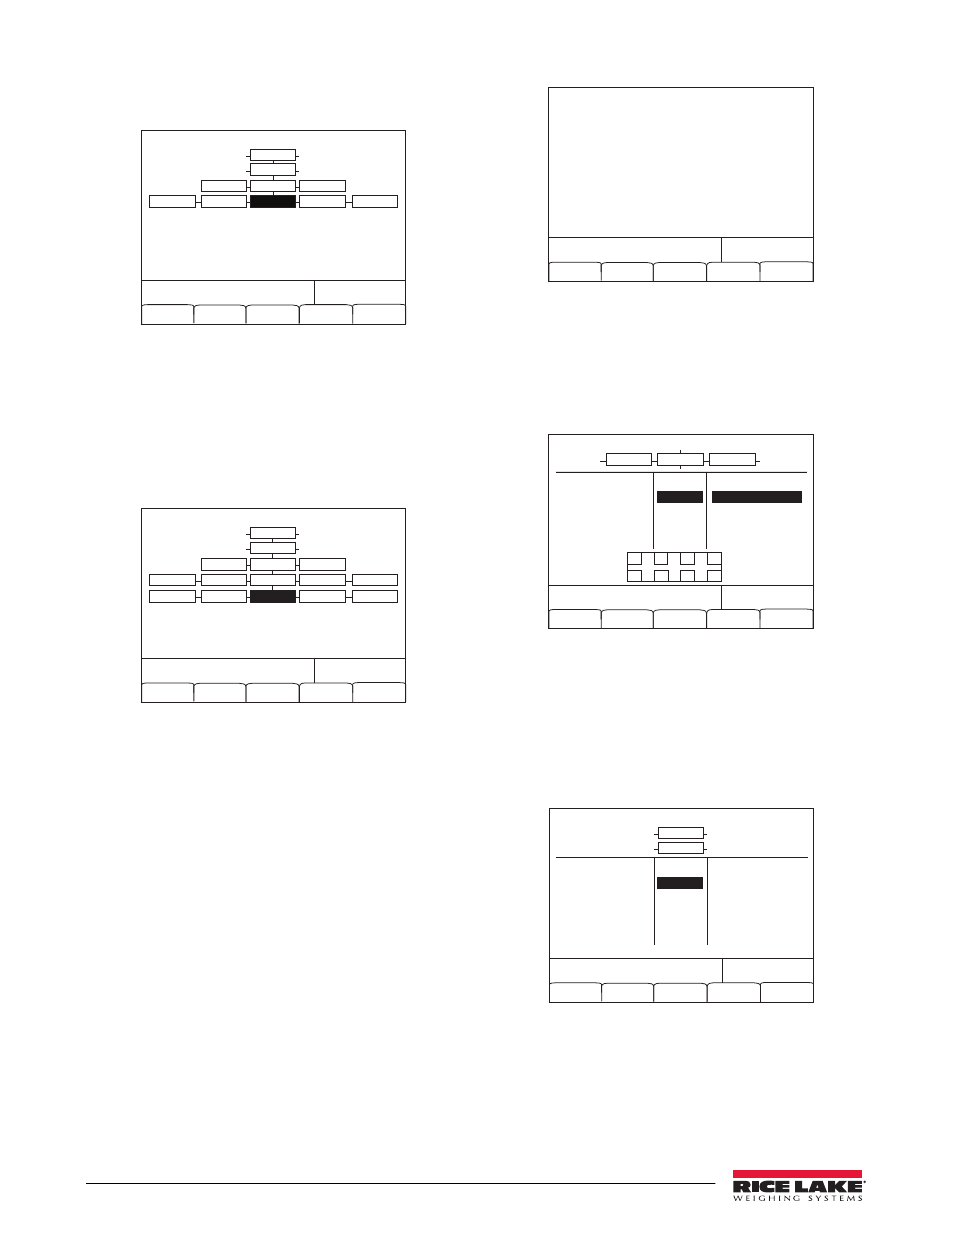
6. Navigate to the CONFIG menu and press the
Connect
softkey (see Figure 3).
12/20/2010
01:57PM
Connect
CONFIG
COMM SEL
UPDATE
iQube2 Configuration
Default
Save
and Exit
Upload
Download
IQUBE2
PORT4
SERIAL
PROGIN
DISPLAY
PORTTYPE
PORTTYPE
Figure 3. CONFIG menu
7. The serial number will show (i.e., 123XX456
*NONE* *NONE* NONE*)
If the serial number does not show, check
wiring and dip switches.
Add a Secondary Board to the System
1. Under CONFIG, navigate to the BOARDS
parameter and select the
Auto Assign
softkey.
12/20/2010
01:57PM
CONFIG
COMM SEL
UPDATE
iQube Boards
Number of iQube2 boards on port
Save
and Exit
Auto Assign
Manual
Assign
IQUBE2
PORT4
SERIAL
PROGIN
DISPLAY
PORTTYPE
PORTTYPE
BOARDS
CELLS
COMM
SCALES
DIGIO
Figure 4. BOARDS parameter
2. Green lights on the
iQUBE
2
CPU boards will
start blinking on all cells.
3. Press and release the SETUP button (S1) on
secondary board #1.
This makes cells 5-8 available to the system
and registers its serial number with the primary
board. The lights on the board will stop
blinking.
4. Once the secondary unit has been assigned,
press the SETUP button (S1) on the primary
board.
5. You will see a screen showing the primary
board serial number and any assigned
secondary board serial numbers.
12/20/2010
01:57PM
Auto Assign
Edit
Primary
0
123XX456
Secondary
1)
65
456XX789
2)
__
_________
3)
__
_________
Done
Figure 5. Primary and Secondary Boards screen
6. Press the
Done
softkey.
Configure and Add Load Cells
1. Under CELLS, set the capacity and m/v.
2. Add cells 5-8 to Scale 1 under the SCALES »
SERIAL menu.
12/20/2010
01:57PM
Remove
SCALES
AVAILABLE Cells
ASSOCIATED Cells
SCALES
CELL#1
CELL#2
CELL#3
CELL#4
CELL#5
CELL#6
Scale 1
Scale 2
Scale 3
Scale 4
Scale 5
CELLS
SMPRAT
A1 A3 B1 B3
A2 A4 B2 B4
Figure 6. Cells 5-8 added to Scale 1
3. Download to the
iQUBE
2
.
Add iQUBE
2
to the 920i
1. From the SCALES menu, drop down to
CONFIG.
2. Press the
Change Type
softkey until Available
iQubes is displayed.
12/20/2010
01:57PM
Connect
Default
Save
and Exit
Upload
Download
CONFIG
SCALES
AVAILABLE IQUBES
ASSOCIATED IQUBES
SCALES
Port 4 - Scale 1
Scale 1
Scale 2
Scale 3
Scale 4
Scale 5
Figure 7. Scale Association screen
3. Select Port 4 - Scale 1 and press the
ADD
softkey to add it to Associated iQUBES.
4. Press the
Save and Exit
softkey.
5. Continue with calibration using Section 4.0 of
the installation manual.