Installing option cards – Rice Lake 920i Six Card Expansion Board User Manual
Page 3
3
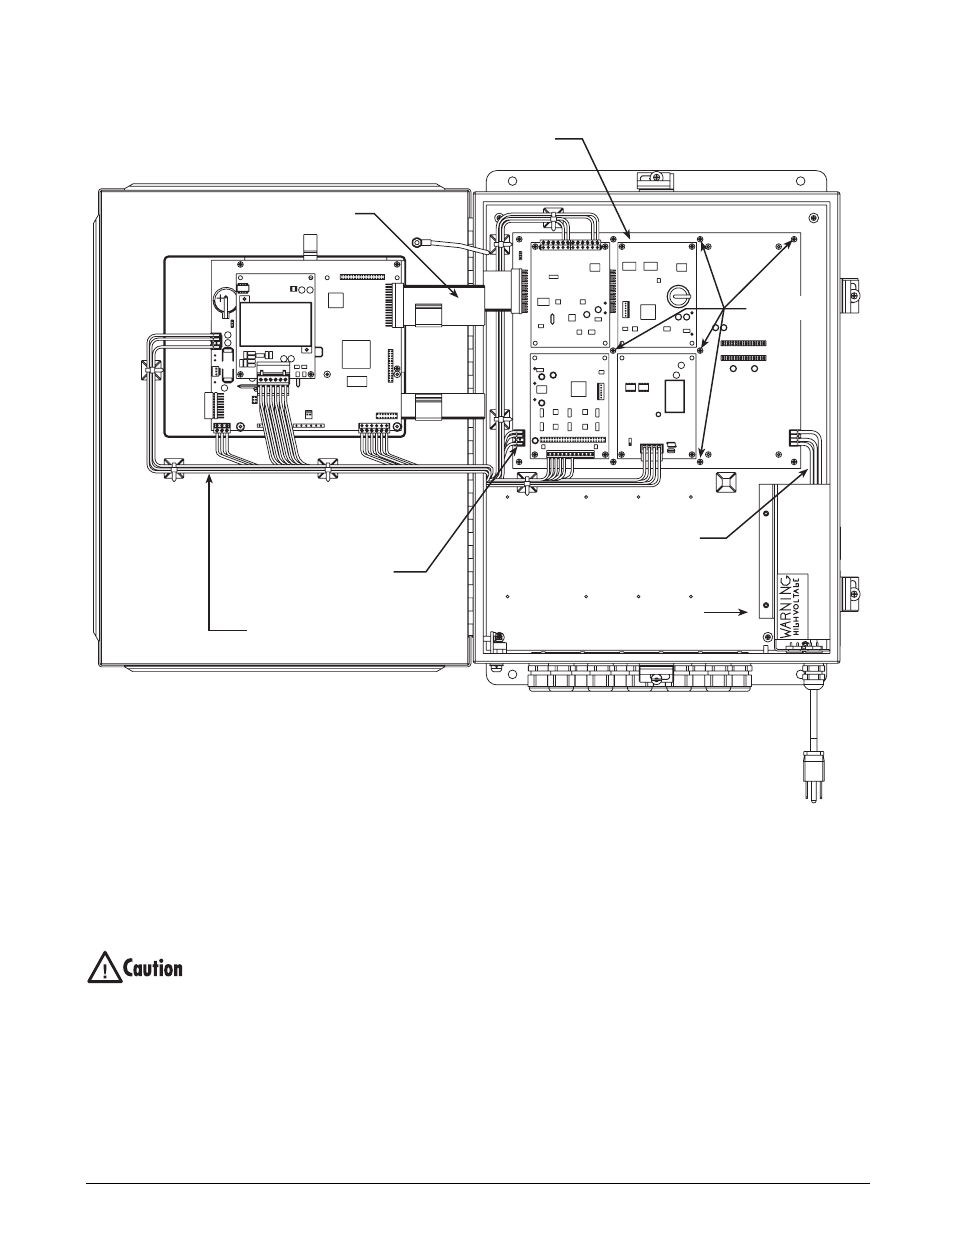
Figure 3. Six-Card Expansion Board Installed in Wall Mount Enclosure
Installing Option Cards
E a c h o p t i o n c a r d i s s h i p p e d w i t h i n s t a l l a t i o n
instructions specific to that card. The general procedure
for all option cards is as follows:
Option cards are not hot-pluggable.
Disconnect power to the
920i
before
installing option cards.
Ensure that option cards are aligned with standoffs and
installed on the correct connector. Installing cards on the
adjacent connector (for example, plugging a card intended for
J6 onto the J3 connector) may damage the card.
1. Carefully align the large option card connector
with connector J3–J8 on the expansion board.
Press down to seat the option card in the
expansion board connector.
2. Use the screws provided in the option kit to
secure the other end of the option card to the
threaded standoffs on the expansion board.
3. Make connections to the option card as
required. Use cable ties to secure loose cables
inside the enclosure.
4. When installation is complete, secure the
enclosure door and reconnect power to the
indicator.
The
920i
automatically recognizes all installed
option cards when the unit is powered on. No
hardware-specific configuration is required to
identify the newly-installed card to the system.
RIBBON CABLE
SIX-CARD
EXPANSION BOARD
POWER OUTPUT
TO CPU BOARD
POWER SUPPLY CABLE
TO EXPANSION BOARD
POWER SUPPLY
POWER SUPPLY
CABLE TO CPU BOARD
1/4"
SCREWS
(10)
J7
J1
J9
J10
PIN 1
PIN 1