Assembling and disassembling the appliance – Gastroback 41001 Design Mixer Advanced Electronic User Manual
Page 12
52
AsseMBlIng AnD DIsAsseMBlIng the ApplIAnce
Disassembling the Blender Jug
1.
Always turn the appliance off (all buttons are deactivated and
the LCD timer screen is switched-off), wait until the motor stops and
unplug the appliance before assembling/disassembling. Always
completely assemble your appliance before you put the plug into the
power outlet.
2.
Remove the blender jug from the motor base by grasping the han-
dle and lifting the jug in an upward direction.
3.
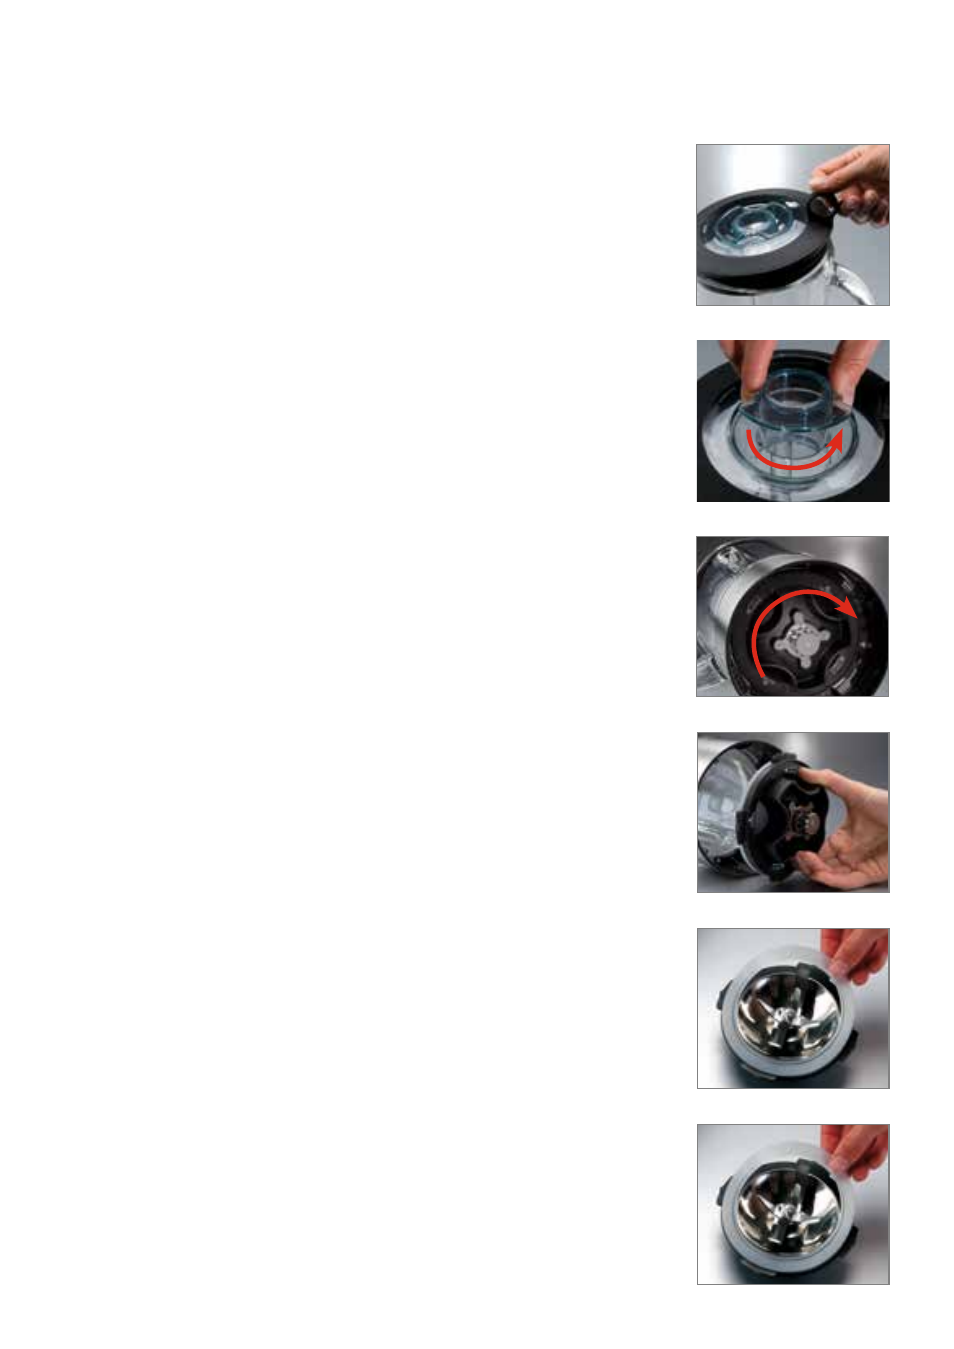
Take the lid off the blender jug and empty the blender jug (picture A).
4.
Take the clear refill lid and twist it anticlockwise to take it out.
note: The refill lid has two small guiding pins that fit in the matching
gaps of the lid. Pull the inner lid up to remove it (picture B).
5.
Remove the blade assembly housing by upturning the blender jug
and twisting the Blade Removal System clockwise to unlock (picture C
and D), then lift upwards and away from the base of the blender jug.
AttentIon: The circular plastic surround attached to the base of
the blender jug is not removable.
AttentIon: The circular plastic surround attached to the blades is
not removable.
wArnIng:
The blades are very sharp. Pay attention handling it
and if possible only hold on to the blade assembly housing.
6.
Remove the silicon seal from the blade assembly housing for clean-
ing (picture E).
7.
Clean the parts with a soft sponge in warm soapy water and
dry them off afterwards. Pay attention not cutting yourself handling
the blade. Do not use abrasive cleaners, cleaning pads, corrosive
chemicals (disinfectants, bleach) or any sharp or hard objects (i.e.
metal scouring pads) for cleaning, for this could damage the surfaces.
Always handle the entire appliance with care and without violence.
Assembling the Blender Jug
Ensure that the blender jug and all parts are clean before you assem-
ble the appliance.
1.
To reassemble the blender jug, replace the silicon seal onto the
blade assembly housing (picture F). Ensure the sealing ring is in
proper position. The sealing ring has to be clean and show no crusti-
fications, crinkles, cracks or look porous.
2.
Hold on to the blade assembly housing with your right hand and
with your left hand hold on to the handle of the blender jug. Upturn
the blender jug and insert the blade assembly housing into the jug
A
D
E
B
C
F