Reassembly – Elecraft K3EXREF User Manual
Page 10
10
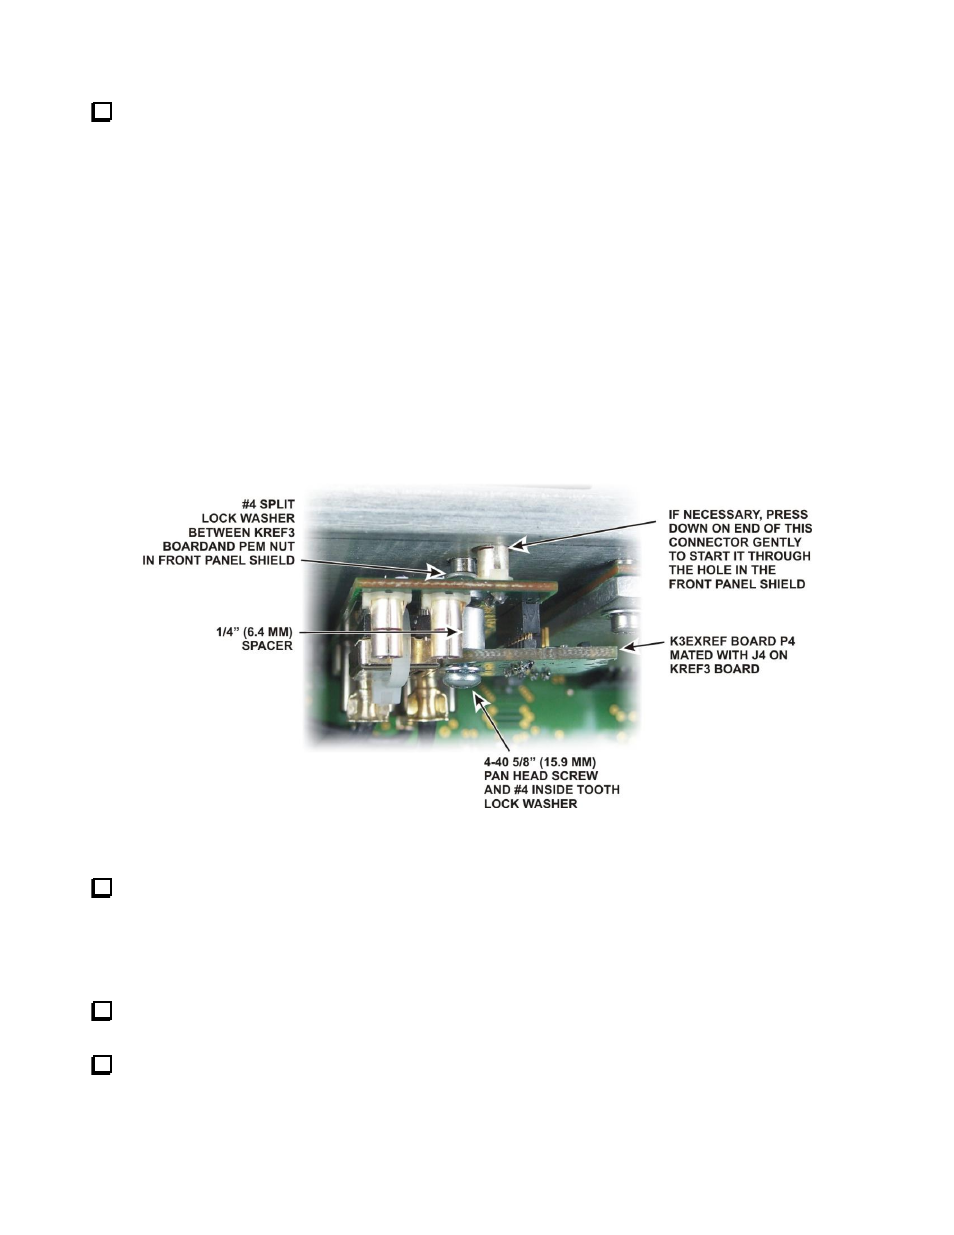
Install the K3EXREF board on the KREF3 board as follows (see Figure 9):
1. Place a #4 inside tooth lock washer on the 4-40, 5/8” (15.9 mm) pan head screw.
2. Slip the screw through the hole in the K3EXREF board with the head on the non-component side of the
board.
3. Place the 1/4” (6.4 mm) spacer over the screw on the component side of the K3EXREF board.
4. Mate P4 on the K3EXREF board with J4 on the KREF3 Board while passing the screw through the hole
in the KREF3 board. Look down from the top to be sure the connector pins are properly mated.
5. Place a #4 split lock washer on the screw behind the KREF3 board. This washer is important to ensure
adequate space between the KREF3 board and the front panel shield.
6. Press the assembly toward the front panel shield so the screw lines up with the PEM nut. If necessary,
press down gently on the TMP connector that passes through the front panel shield to fit it through the
hole.
7. Thread the screw into the PEM nut and tighten.
Figure 9. Mounting the K3EXREF Board on the KREF3 Board.
Plug the TMP connector on the end of the coaxial cable you installed earlier into the connector on the
KREF3 board that extends through the front panel shield. Handle the connector by the grip using your needle-
nose pliers. Be sure the connector is fully seated (see Figure 6 on pg 6).
Reassembly
Replace the two coaxial cables you removed from J2 and J1 (if used) on the KREF3 board earlier. If
needed, see page 12 for a diagram showing the coaxial TMP cables connected to the KREF3 board.
Replace the left side panel.