Elecraft KX3 Speaker Grille Instructions User Manual
Page 4
Elecraft KX3 Application Note – Installing the Speaker Grille Cloth
Page 4 of 9
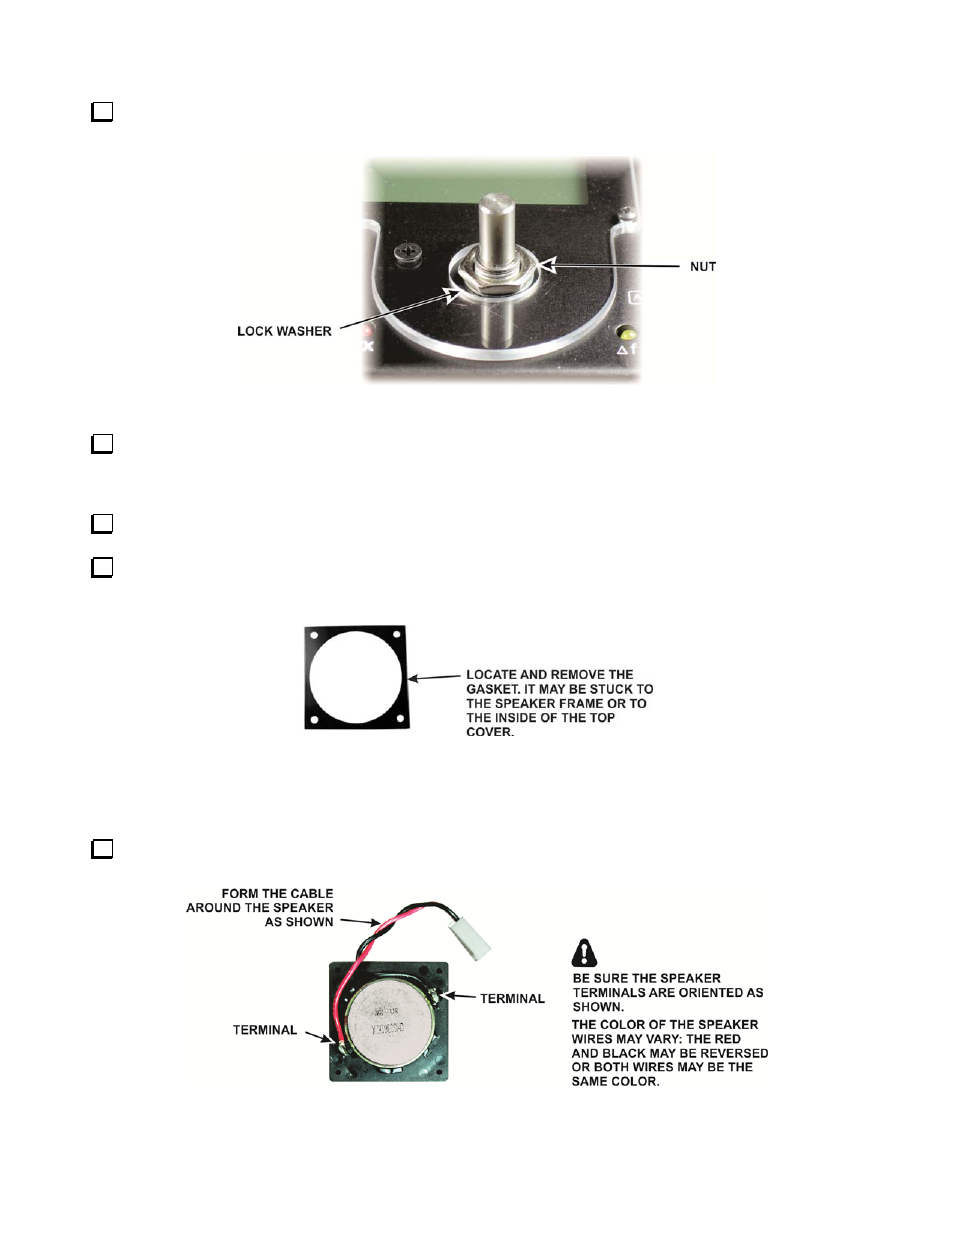
Remove the encoder nut and lock washer (Figure 4). Use your needle nose pliers since there is very little space for a
wrench.
Figure 4. VFO Mounting Hardware.
The encoder plugs into the CP board and is easily removed with a little pressure on the shaft. If your encoder has the
soldered shield (Figure 3), hold the KX3 with the encoder pointing upward as you pull the encoder shaft out of the hole in
the front panel to be sure the lock washer does not fall off and become lost between the CP board and the front panel.
Unplug the speaker cable from the CP board.
Remove the four screws holding the speaker in place and lift it and the gasket out of the KX3 (See Figure 5). The
gasket may be stuck to the face of the speaker or to the inside of the top cover. Discard the gasket and the four mounting
screws. They will not be used.
Figure 5. Speaker Gasket.
Installing the Grille Cloth
Arrange the speaker cable as shown in Figure 6. This is important to ensure you orient the speaker correctly when
replacing it in the top cover.
Figure 6. Orienting the Speaker Cable.