Vi: glazing preparation – EFCO S5900 Structural Glazed User Manual
Page 14
EFCO CORPORATION 6/2012 PART NO. Y354
Page 14 of 23
Series 5900 Silicone Structural Glazed Curtain Wall Installation
2"
2"
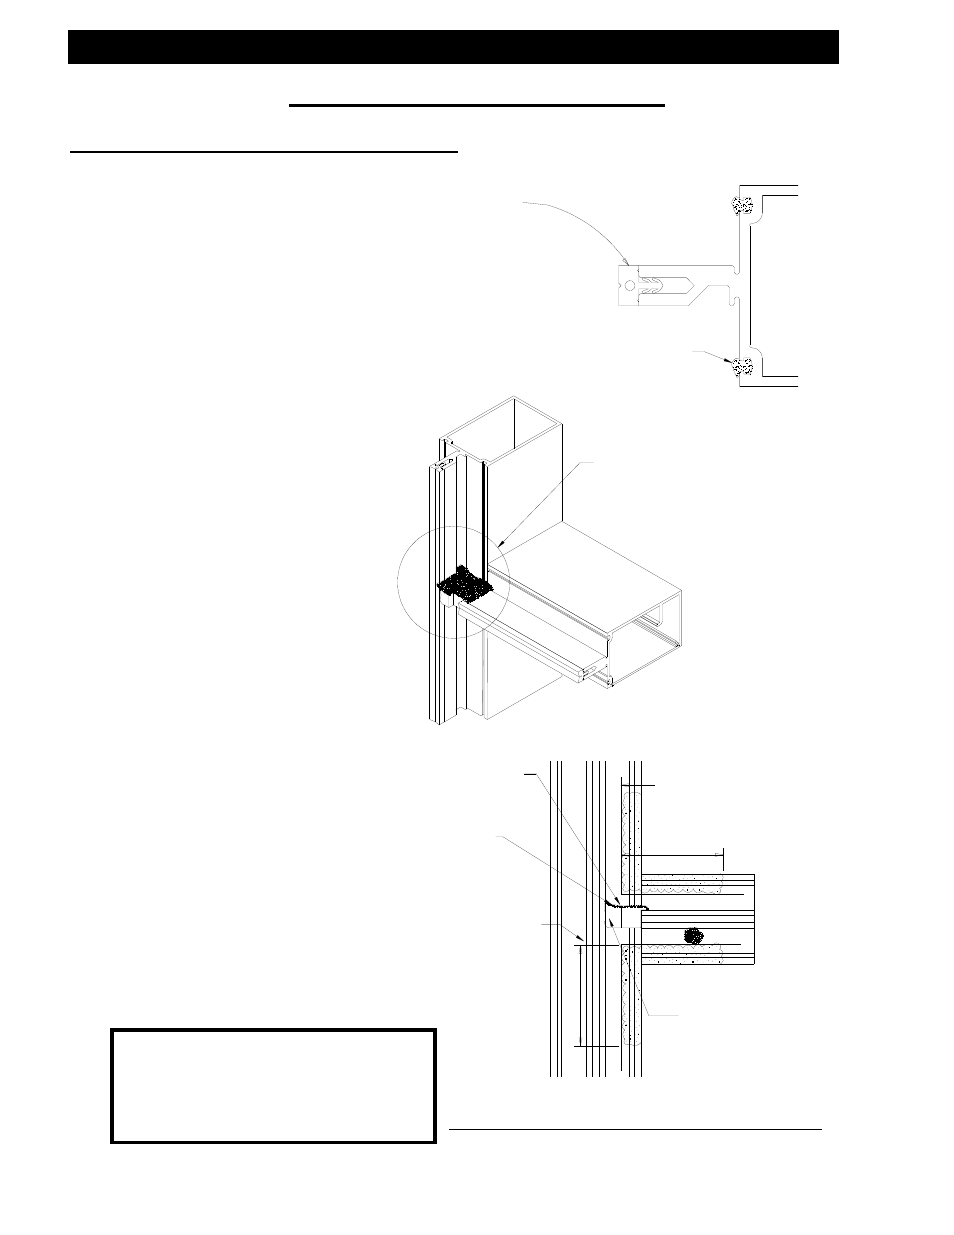
Place and seal the mullion plug. Prior to
installation, apply sealant on all contact
surfaces, and tool off excess sealant to
prevent obstructing the water path.
Seal vertical mullion
gasket raceway 1” prior to
installation of joint plugs.
Seal gasket race 2” in each
direction at all corners with
sealant, making sure that all
fastener heads are sealed.
(Captured system shown,
SSG system similar.)
Closed cell sponge joint plugs
Provide a downward slope with
sealant, without interfering with
the edge of the glass, to allow
for drainage of condensation.
Edge of glass
Apply sealant to the face of
the joint plug prior to the
installation of the pressure
plate. See page #19.
VI: Glazing Preparation
Glazing Preparation At Captured Mullions
A.)
Install the thermal isolator in the vertical
mullion, run continuously, and butt joint
as required.
B.)
Seal vertical mullion raceway 1” long
prior to the installation of the joint
plugs.
C.)
Place and seal the joint plug.
D.)
Tool off all excess sealant.
E.)
Apply sealant to the face
of the joint plug prior to
installation of the pressure
plate. See page #19.
Elevation of Joinery Prior to Setting the Glass
Note: Each daylite opening should
be sealed individually with
gaskets and glazing installed
immediately following with
pressure at the corners.