Dataram DRIX1066RQ User Manual
Page 2
DRIX1333R, DRIX1333RD, DRIX1333U,
DRIX1333R2, & DRIX1066RQ Installation Manual
06721 A
2of 2
(continued from previous page)
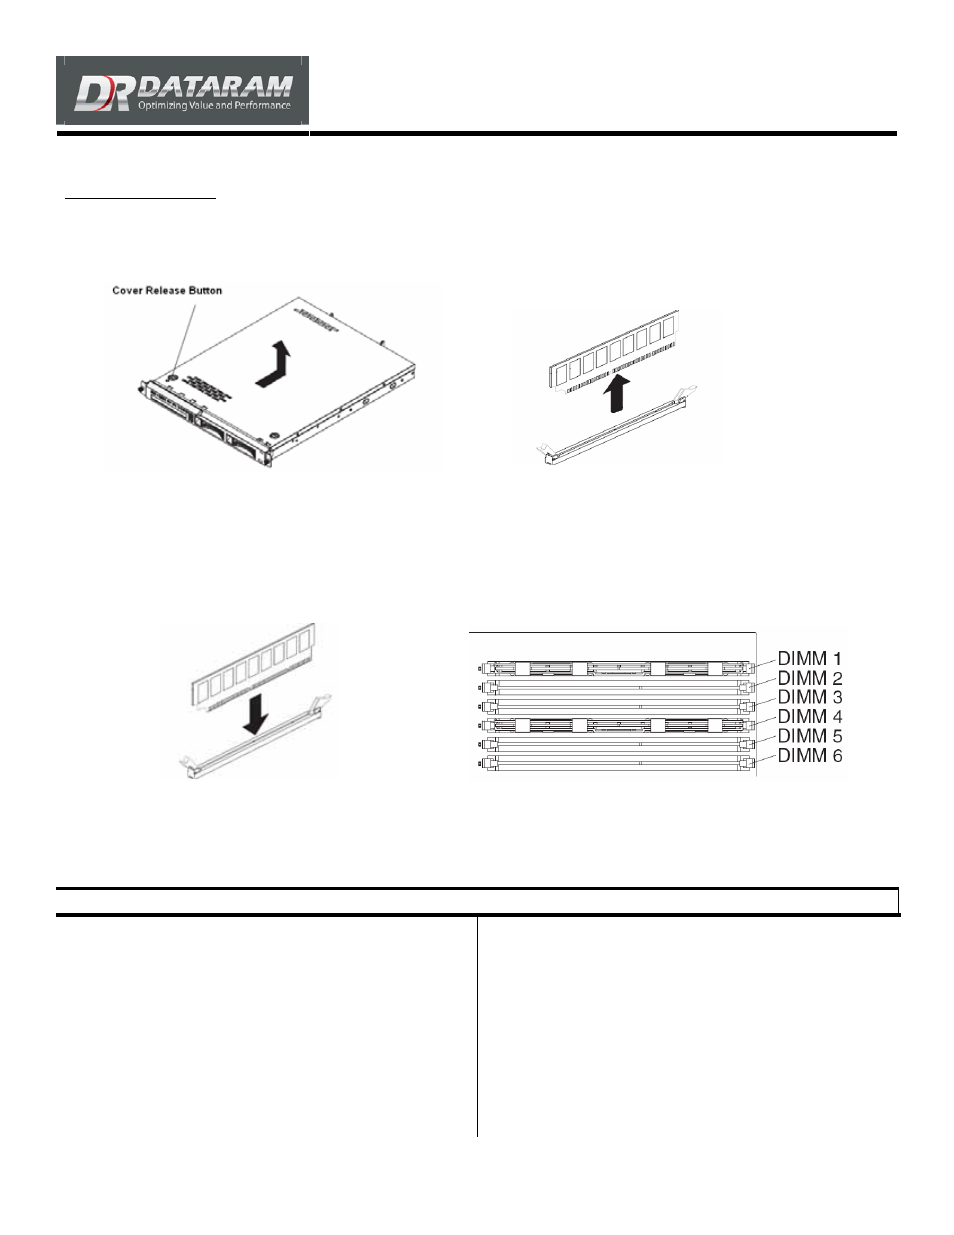
MEMORY INSTALLATION
1.
Power down the system and remove all power cables.
2.
Remove the system cover by pressing the cover release button and sliding the cover off (Figure 1).
Figure 1 Figure 2
3.
Remove any DIMMs to replace by pressing down on the latches on the side of the slot and pulling the DIMM straight up. (Figure 2)
4.
Install Dataram memory according to the guidelines on previous page. Make sure the key is lined up correctly so you do not damage the
DIMM. When the DIMM is installed correctly the latches will snap back into place. (Figure 3).
5.
Refer to Figure 4 below to insure you are installing the memory in the correct slots.
6.
Put the cover back on, plug in the power cords and power on the system. When you restart the system it will indicate that the memory
configuration has changed.
Figure 3 Figure 4
Dataram Customer Support
In Europe:
Dataram's Technical Support Program goes beyond the lifetime
warranty, routine calls and questions. As memory specialists since 1967,
we want to provide the most comprehensive level of service and support
in the industry.
+45 70 212 217 (Phone)
+45 70 212 216 (FAX)
[email protected] (E-mail)
Our Customer Support representatives can answer your questions and
give you information on system/memory configurations, upgrade options,
product specifications, compatibility and other technical topics or issues.
In the U.S.A. and all other countries:
800-599-0071 (Toll Free)
609-799-0071 (Phone)
609-799-6734 (FAX)
[email protected] (E-mail)
If a Dataram memory board does not function properly we will issue a
Return Material Authorization number (RMA#) for the return of the
defective module(s) and express ship a repair or replacement to you at
no charge.