Rs-232c command table, Transferring the captured image to pc – AVer CP355 user manual User Manual
Page 27
English
繁體中文
简体中文
日本語
ภาษ
าไทย
R
R
S
S
-
-
2
2
3
3
2
2
C
C
C
C
o
o
m
m
m
m
a
a
n
n
d
d
T
T
a
a
b
b
l
l
e
e
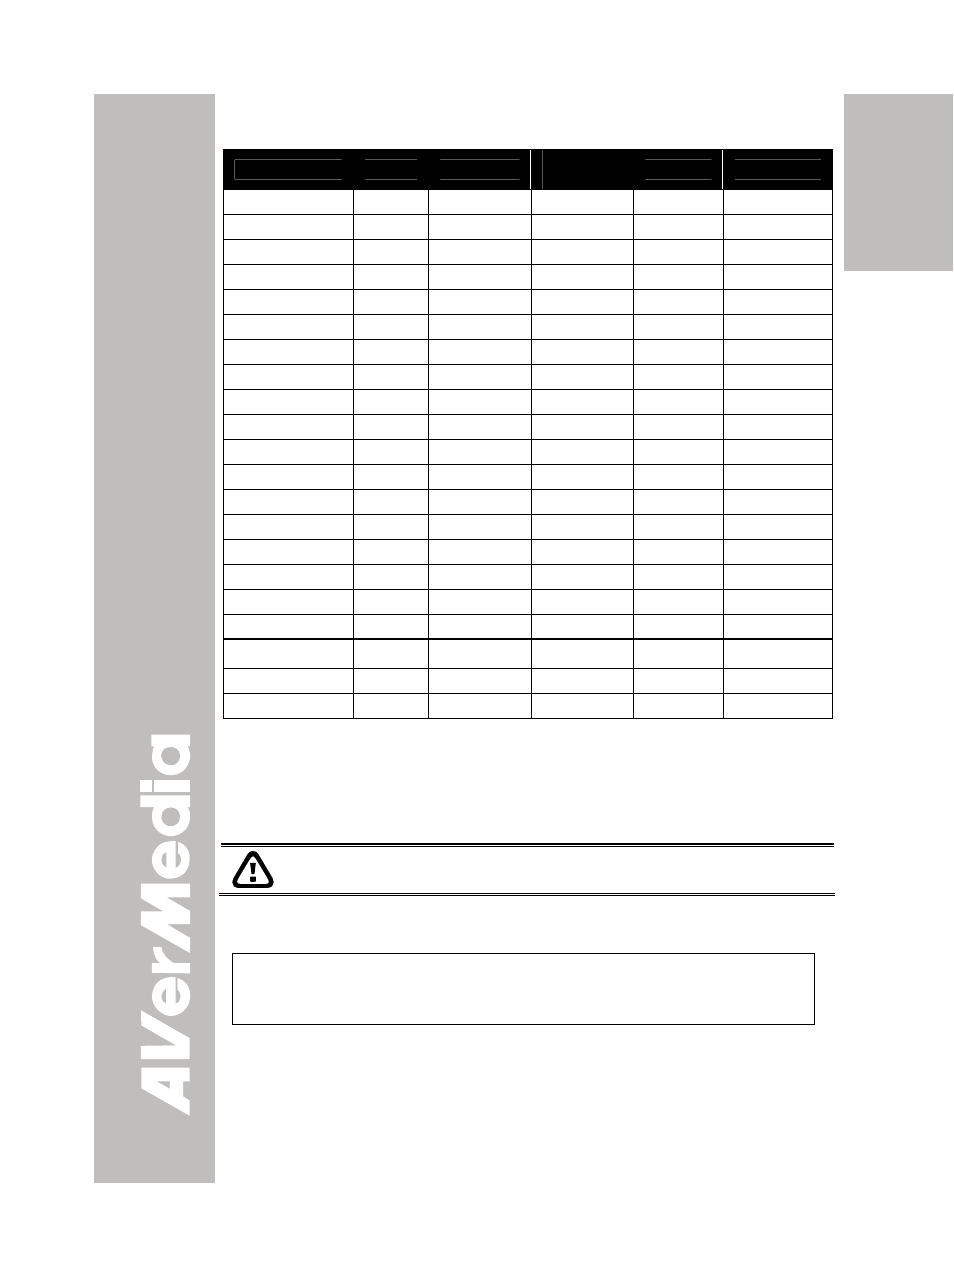
Function
Start
Type
Data
Length
Data
Checksum
POWER FF
70 1 1 70
ENTER FF
70 1 2 73
UP FF
70
1
3
72
DOWN FF
70 1 4 75
LEFT FF
70
1
5
74
RIGHT FF
70 1 6 77
PLAYBACK FF 70
1
7
76
MENU FF
70 1 8
79
PC/CAMERA FF
70
1
9
78
AUTOIMAGE FF
70
1
A
7B
AUTOFOCUS FF
70
1
B
7A
FREEZE FF 70 1 C 7D
CAPTURE FF 70
1
D 7C
REVERSE FF 70
1
E
7F
TIMER FF
70 1 F 7E
EFFECT FF
70 1 10 61
PBP FF
70
1
11
60
PRESENTER FF
70
1
12
63
PIP FF
70
1
13
62
POWER ON
FF
70
1
40
31
POWER OFF
FF
70
1
41
30
T
T
r
r
a
a
n
n
s
s
f
f
e
e
r
r
r
r
i
i
n
n
g
g
t
t
h
h
e
e
C
C
a
a
p
p
t
t
u
u
r
r
e
e
d
d
I
I
m
m
a
a
g
g
e
e
t
t
o
o
P
P
C
C
This enables you to transfer the captured image from the built-in memory
to PC.
The instruction below MUST be read and followed BEFORE
connecting the USB cable.
1. MUST set the USB CONNECTION as IMG DOWNLOAD before
connecting the USB cable.
To set the USB CONNECTION as IMG DOWNLOAD, press MENU
> select USB CONNECTION in SETTING menu list and press
ENTER, select IMG DOWNLOAD and press ENTER.
2. When “IMG DOWNLOAD” appears at the lower right corner of the
presentation screen, you may now connect the USB cable.
3. Upon connecting the USB cable, the system automatically detects
the new removable disk. You may now transfer the captured image(s)
from the CP355 built-in memory to PC hard disk.
23