2a 2b – Alumax P-DRC1Y User Manual
Page 9
9
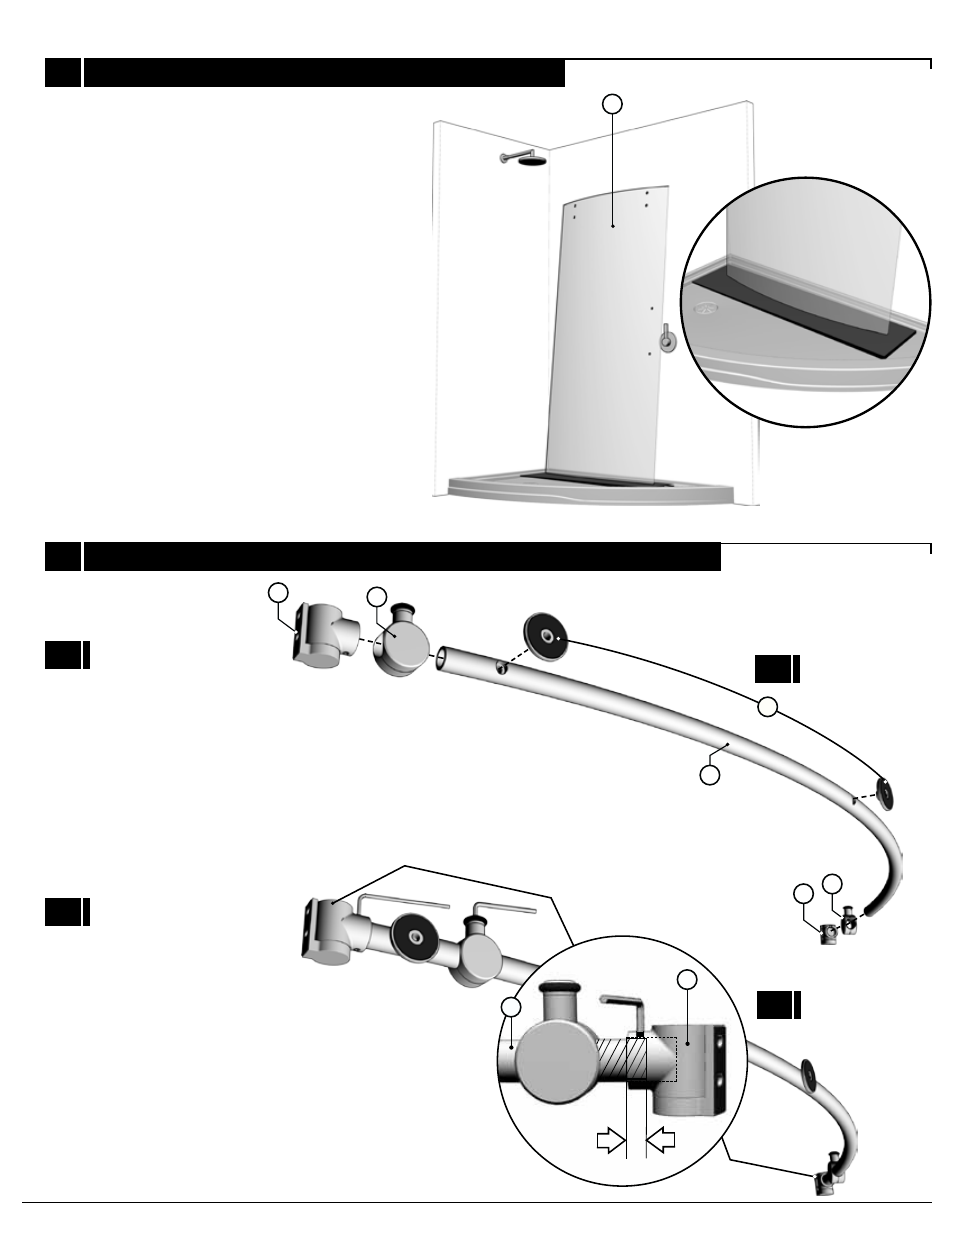
DOOR PLACEMENT
1
Position the glass fasteners (4), stoppers (3)
and wall brackets (2) on the running rail (1)
as illustrated.
2A
Temporarily secure the mentioned
components. The running rail (1) must be
minimally inserted into the wall bracket
support blocks (2). Ensure that the set
screws grab the running rail (1).
2B
COMPONENTS INSTALLATION
2
Place door panel (7) within the showering
area to simplify following installation
procedures. Ensure placing the
panel onto a cushioned surface, such as
a towel or cardboard, to prevent damage
either to the panel or the base.
2A
2B
3
2
7
4
2
3
MINIMUM
1
2
1
See also other documents in the category Alumax For Home:
- 300c (9 pages)
- 300cv (8 pages)
- 300d (9 pages)
- 338 (9 pages)
- 340 (9 pages)
- 340 Deluxe (9 pages)
- 390c Supplement (5 pages)
- 390cv Supplement (4 pages)
- 391 (12 pages)
- 392 (11 pages)
- 393 (11 pages)
- 394 (11 pages)
- 640S (8 pages)
- 640 (8 pages)
- 640D (7 pages)
- 641 Side Panel (6 pages)
- 694 (6 pages)
- 700c (7 pages)
- 733 (8 pages)
- 738 (8 pages)
- 738 Towel Bar (1 page)
- 740D (8 pages)
- 790c Supplement (4 pages)
- 791 (11 pages)
- 792 (12 pages)
- 793 (12 pages)
- 793 Buttress Supplement (1 page)
- 794 (11 pages)
- 794s (9 pages)
- 795 (10 pages)
- 890 (9 pages)
- 890c (8 pages)
- 1040 (9 pages)
- Deluxe Towel Bar (1 page)
- Transportation Latch (1 page)
- DesignLine Hinge (5 pages)
- P-DR1W-48-60 (14 pages)
- P-DR1W-72 (15 pages)
- P-DR1WT-60 (14 pages)
- P-DR2W-48-60-CRP (18 pages)
- P-DR2W-48-60-CW (19 pages)
- P-DR2W-72-CRP (19 pages)
- P-DR2W-72-CW (19 pages)
- P-DR3W-60 (32 pages)
- P-DRA1Y (16 pages)