Alumax P-DRC1Y User Manual
Page 24
24
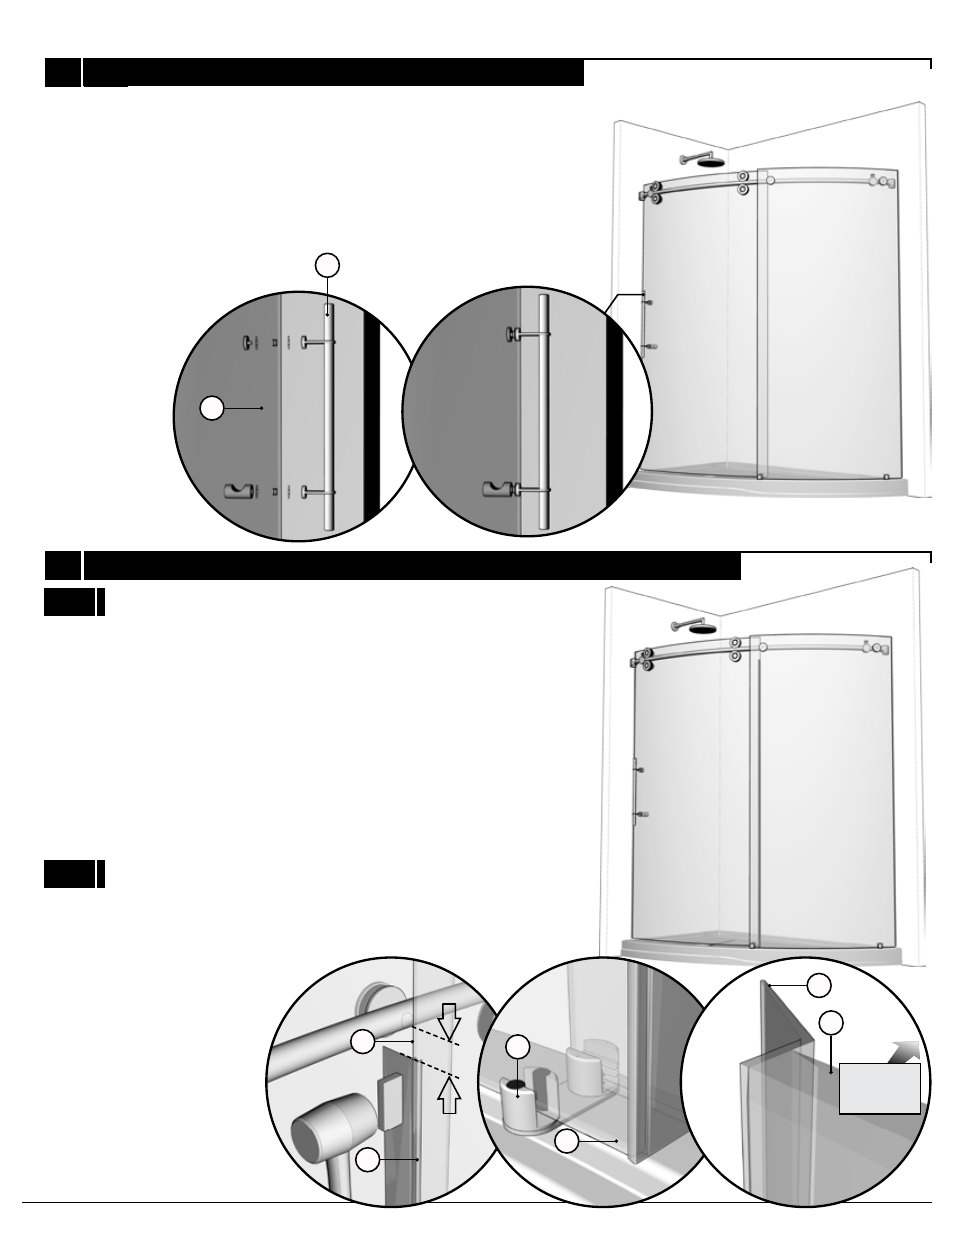
HANDLE INSTALLATION
GASKETS INSTALLATION
11
Fasten the running rail (1) to the fixed
panel (7) with the glass holders (4).
Secure them temporarily in place.
10
Thoroughly clean the edge of
the sliding door (6), closest to
the side where the handle is
located with a cloth and
degreasing solution . Apply
the door gasket (other half
of gasket from Step 1) (10) to
this edge of the sliding door (6).
11B
Install the door mid-gasket (9) to the door
panel (6) by way of a protective block and
mallet. Start from the bottom edge of the
door panel and work the gasket up. Ensure
that a 1/2’’ gap remains between the
running rail (1) and the top edge of the
mid-gasket (9) for clearance.
11A
8
6
6
9
1/2’’
12
6
10
6
INTERIOR
SHOWER SIDE
See also other documents in the category Alumax For Home:
- 300c (9 pages)
- 300cv (8 pages)
- 300d (9 pages)
- 338 (9 pages)
- 340 (9 pages)
- 340 Deluxe (9 pages)
- 390c Supplement (5 pages)
- 390cv Supplement (4 pages)
- 391 (12 pages)
- 392 (11 pages)
- 393 (11 pages)
- 394 (11 pages)
- 640S (8 pages)
- 640 (8 pages)
- 640D (7 pages)
- 641 Side Panel (6 pages)
- 694 (6 pages)
- 700c (7 pages)
- 733 (8 pages)
- 738 (8 pages)
- 738 Towel Bar (1 page)
- 740D (8 pages)
- 790c Supplement (4 pages)
- 791 (11 pages)
- 792 (12 pages)
- 793 (12 pages)
- 793 Buttress Supplement (1 page)
- 794 (11 pages)
- 794s (9 pages)
- 795 (10 pages)
- 890 (9 pages)
- 890c (8 pages)
- 1040 (9 pages)
- Deluxe Towel Bar (1 page)
- Transportation Latch (1 page)
- DesignLine Hinge (5 pages)
- P-DR1W-48-60 (14 pages)
- P-DR1W-72 (15 pages)
- P-DR1WT-60 (14 pages)
- P-DR2W-48-60-CRP (18 pages)
- P-DR2W-48-60-CW (19 pages)
- P-DR2W-72-CRP (19 pages)
- P-DR2W-72-CW (19 pages)
- P-DR3W-60 (32 pages)
- P-DRA1Y (16 pages)