Нёсокйпца ptoturs ilskig auiomrtic, 1 hold the camcorder as illustrated, 2 make sure that the vtevriinder is pulled out – Sony CCD-TR7 User Manual
Page 12: 6 slide standby up, 7 press start/stop, To pause (to stop momentarily), To stop
Attention! The text in this document has been recognized automatically. To view the original document, you can use the "Original mode".
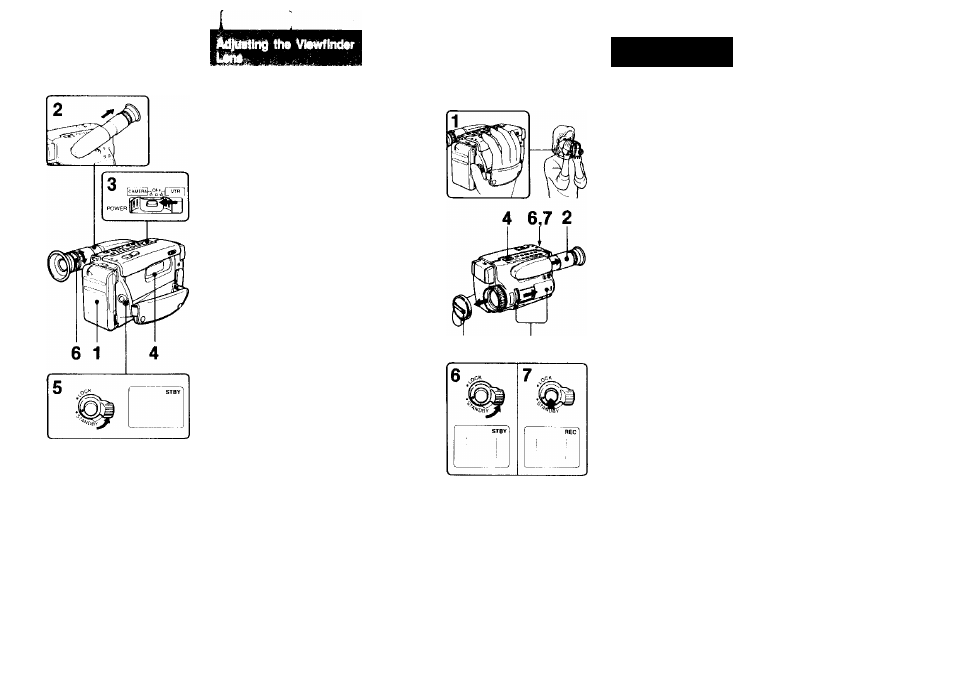
The position of the viewfinder lens for optimum
vision varies depending on the person. Adjust
when using the first time, or when using after
someone else.
(F-1)
1
Make sure a power source is connected.
2
Pull the viewfinder out until it clicks.
3
While pressing the green button, set
POWER to CAMERA.
4
Insert a cassette.
5
Slide STANDBY up.
6
Turn the viewfinder lens adjustment ring so
that the “STBY" display in the viewflr>der
screen comes into sharp focus.
24
Нёсокйпца Ptoturs
ilskig Auiomrtic
Before recording "once-onty" events, we
strongly recommend making a trial recording
and checking that everything is working
properly
(F-2)
1
Hold the camcorder as illustrated.
Put your hand through the grip strap and
check that your thumb can easily touch
START/STOP.
2
Make sure that the vtevriinder Is pulled out.
3
Remove the tens cap and clip It on the grip
strap.
4
While pressing the green button, set the
POWER to CAMERA.
5
Close the AUTO LOCK cover and turn the
zoom lever downwards.
6
Slide STANDBY up.
"STBY" and the auto-focus frame appear in
the viewfinder. The camcorder is now in the
standby mode, and focus is adjusted
automatically irtside the frame (auto-focus
adjusting range). Do not turn or stop the
focus ring forcibly.
7
Press START/STOP.
"REC" appears and the red lamp lights up
in the viewfinder. The camcorder is now
recording.
To pause (to stop momentarily)
Press START/STOP again.
"STBY" appears in the viewfinder. The
camcorder is in the standby mode again.
To stop
Slide STANDBY down and set POWER to OFF.
25