To chartge the lithium battery, Cautions, 4 press ne)(t to set the second – Sony CCD-TR7 User Manual
Page 10: To correct the date and time setting, To advance the digits faster, To check the preset date and time, Г г »it
Attention! The text in this document has been recognized automatically. To view the original document, you can use the "Original mode".
(D-1)
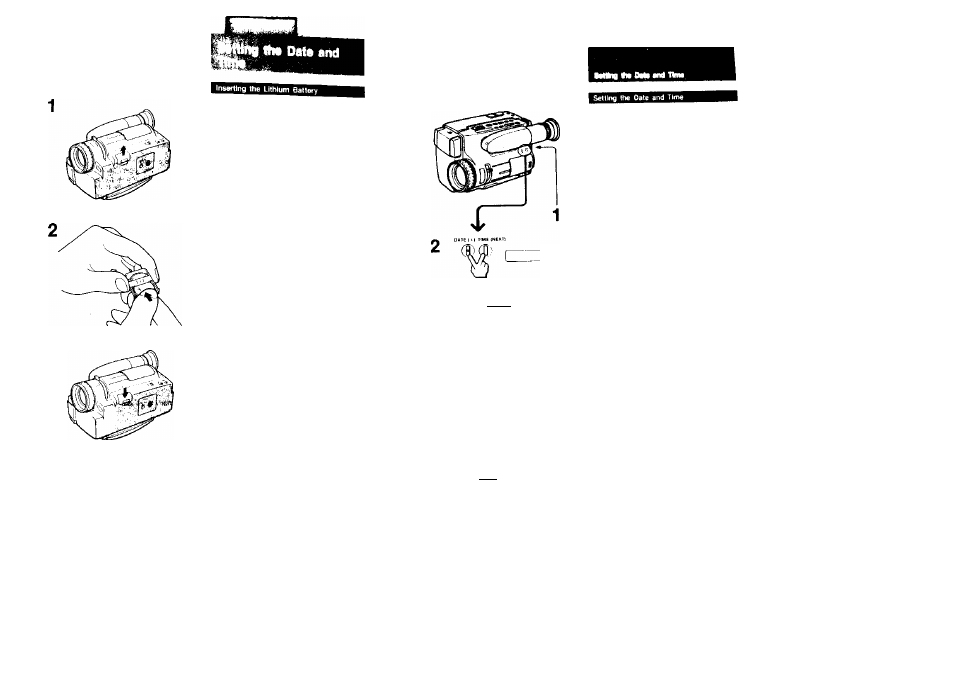
This camcorder uses a fithium batlery to
activate the clock and to keeo titles in
memory. Before operating it for the first time,
install the supplied lithium battery.
1
Pull out the lithium battery hoMer Irom the
bottom of the camcorder.
2
Install the supplied CR202S lithium battery
with the
*
side facing the < 4) on the
batlery holder.
3
Put the lithium battery holder back into the
camcorder.
To chartge the lithium battery
Remove the lithium battery holder from the
camcorder, and pull out the lithium battery and
insert a new one.
Note on baitery life
The battery lasts for approximately 1 year under
normal operation. When the lithium battery
becomes weai<, the time indication keeps blinking
in the display window and blinks In the viewfinder
for about 5 seconds when the POWER switch
to CAMERA When this happens, replace the
battery with a Sony CR2025 or Duracell DL 2025
lithium battery. Use of another battery may present
a risk of fire or explosion. While replacing the
lithium battery, keep the battery pack or other
power source attached. M the battery pack or other
power source was not attached while replacing,
readjustment of the date and lime is necessary.
set
Cautions
• Keep the lithium battery out of the reach of
children.
Should the battery be swallowed, consult a
doctor immediately.
• Wipe the battery with a dry cloth to assure
good contact.
• Be sure to install the battery with the
correct polarity
• Do not hold the battery with metallic
tweezers, as a short-circuit may occur.
WARNING
Battery may explode If misireated. Do rrot
recharge, disassemble, or dispose of in a lli
20
3®Ж
г г »it-»
ъ
I
о
Ф с::
(Ш
ф г -
1
Маке SUI* «bat а potMf аоиге* 1а
eonnacted. аа« POWER «о CAMERA, and
sIWa STANOev up.
2
Prase DATE and TIME ahmiNanaoiialy tor
mora than Э seconds untH the data
Indicstion sppaars In the display window.
DATE now functfons as + (to advance
numbers) and TIME functions as NEXT (to
execute).
3
Set the year, month, day. hour and minute.
In this Older.
First adjust the blinking digits with 4 and
then press NEXT.
4
Press NE)(T to set the second.
The clock starts operating.
To correct the date and time setting
Repeat steps 2 to 4.
To advance the digits faster
Keep 4 pressed.
To check the preset date and time
Press DATE or TIME. When you press the
same button again, the indication goes off.
Ф
21