Unit installation – Tomei Powered HICASS LOCK II TYPE B User Manual
Page 21
UNIT INSTALLATION
① Locate the HICAS computer.
Check on the separate "HICAS Computer Information"
documentation for the location of the HICAS computer.
②Check the wiring.
Check the 3rd wire as per reference on the supplied "
HICAS Computer Information" documentation.
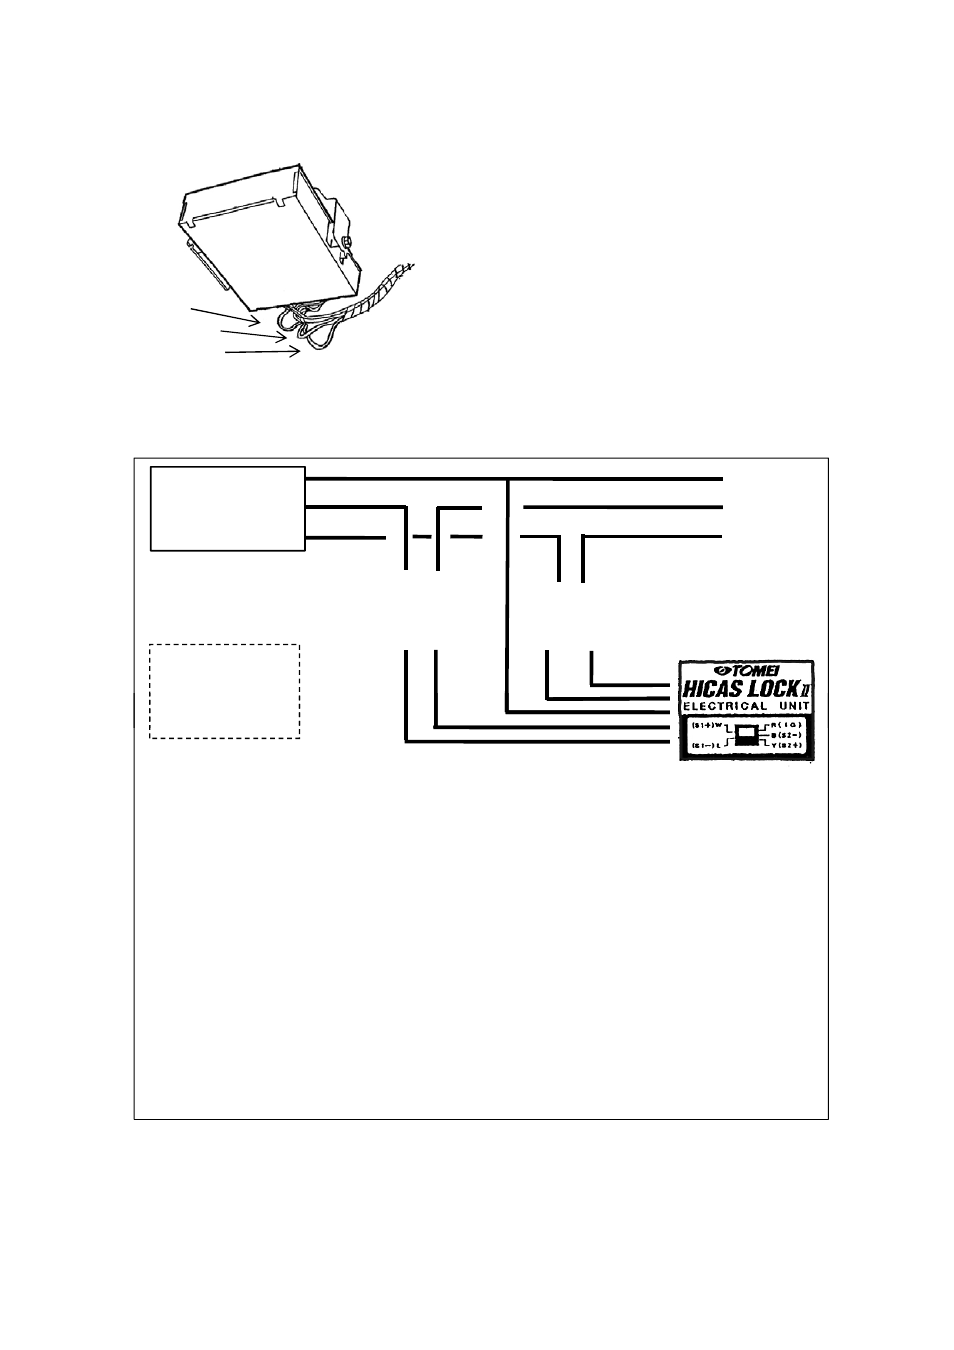
③ Follow the illustration below for the correct wiring method.
HICAS
Computer
Power
Wire A
Wire B
① Power
② Wire A
③ Wire B
□ ▽
▽ □
□
□
△
△
Cut
Cut
Blue
White
Red
Black
Yellow
Symbol Keys
■ Electro-Tap
△ Male Connector
HICAS
Computer
(1) Connect the red power wire to the vehicles HICAS ECU power wire with the supplied Electro Tap.
(2) Cut wire A, and connect the male connector on the vehicle side and the female connector on the
computer side . The Blue Hicas Lock unit's wire with the male connector then connects to the female
connector is then to be connector on the computer side (that you have just made).
The White wire then connects to the vehicle side male connector.
(3) Cut Wire B, and connect the female connector on the vehicle side and the male connector on the
computer side. Then connect the Black Hicas Unit wire with the female connector on the computer sides
male connector (that you have just made).
The Hicas Units Yellow wire male connector is then to be connected to the vehicle side female
connector (that you have just made).
(4) Use the small cable tie to keep it tidy and use the double sided tape to secure the unit in your
chosen location.
(5) Connect the battery's negative terminal.
21
■ Electro-Tap
△ Male Connector