Assembly configuration caution, Stud bolt tightening caution – Tomei Powered RB26DETT CAM CAP STUDS BOLTS User Manual
Page 6
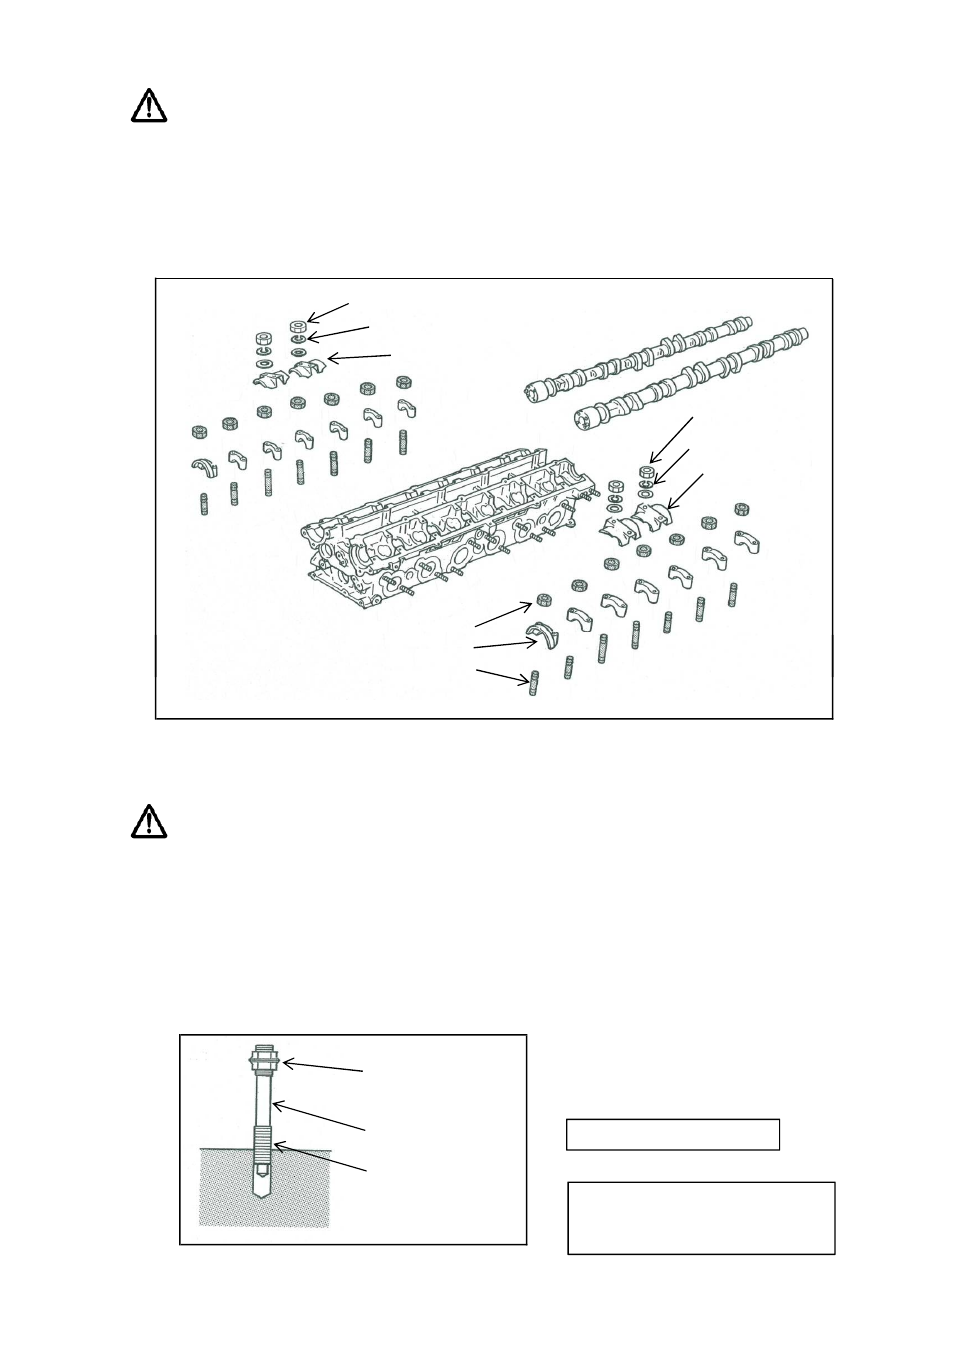
ASSEMBLY CONFIGURATION
CAUTION
■ Have the official workshop service manual handy, for reference on how to remove and install
all other components during the Stud Bolt installation. This Manual is basic to fill in the gaps
related to this product that is not found in the workshop service manual.
■ Do not change the position or the Cam Caps.
■ This product will have a larger axis diameter, with improved precision and accuracy for the cam caps.
Nut (Stock)
Washer (Stock)
Baffle Plate (Stock)
Baffle Plate
(Stock)
Washer (Stock)
Nut (Stock)
TOMEI Nut (28 pcs)
Cam Cap (Stock)
TOME Stud Bolt (28 pcs)
6
STUD BOLT TIGHTENING
CAUTION
■ The threads of the bolt and the holes must be absolutely clean and free of any grit/grime.
Apply thread lock paste on the Stub Bolts threads.
■ Tighten the bolts to the recommended torque settings, then remove the nuts. If the bolt
moves whilst undoing the two nuts, the process will have to be repeated.
■ If the torque specs are not followed as below there will be a risk of distorting the Cylinder Head.
Be sure to tighten up the bolts to the specified torque specs as noted on this manual.
■ When the Cam Cap is not seated properly, due to the outer diameter axis of the Stud Bolt.
You can then adjust it with a plastic hammer one by one.
① Fit both nuts on the top of the stud in the
Use the double nut
double nut arrangement.
method to install.
② Tighten with a Torque Wrench.
Stud Bolt
Apply threadlock paste.
③ Remove the double nut.
TOMEI Nut (28 pcs)
Cam Cap (Stock)
TOME Stud Bolt (28 pcs)
Torque Specs 0.6∼0.8kgm
When the nuts are removed, the bolt
must not move. If the bolt moves then
the process will have to be repeated.
6