ProTemp PT-30P-DDF-A User Manual
Page 6
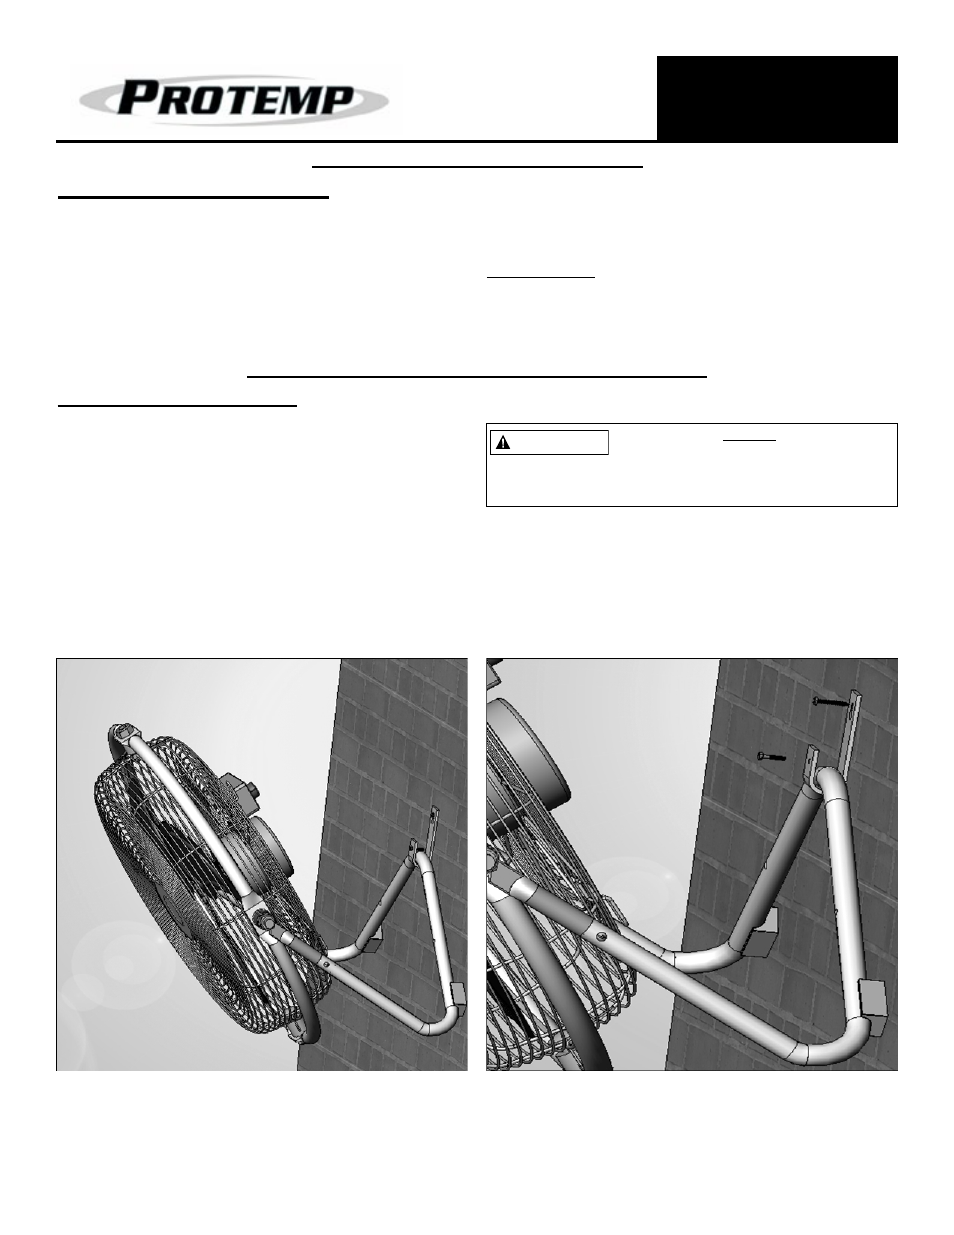
1. Attach wall mount to stud (Item #24*)
2. Attach Lower Support Frame (Item #21*) to the Wall
Mount (Item #24*) by replacing rear part of Lower
Support Frame into hook of Wall Mount and resting
front and rear feet of fan (Items #17* and #18*) onto
the wall.
* On Page 7
NOTE: Fan must be mounted to wall so that both feet
are positioned against the wall surface. Mounting
this fan to a bare stud without both fan feet posi-
tioned against a flat surface will result in damage
to the fan.
NEVER LEAVE A FAN
UNATTENDED WHILE
OPERATING OR WHILE
CONNECTED TO A POWER
SOURCE
© 2014, Pinnacle Products International, Inc.
6
HVF Air Circulator User’s Manual
1. Remove 1 screw from each Frame Support L and R
(Items #7* and #19*).
2. Slide Frame Support L and Frame Support R into
Support Frame (Item #21*) and line up holes for screw.
3. Re-attach screw to Frame Support L and Frame
Support R.
4. Place the fan on level ground in a safe, desired position
then connect to an approved power source.
Tools Needed:
- Phillips head screwdriver.
-10 mm adjustable wrench.
20” FLOOR FAN: PT-20F-DDF-A
Installation and Assembly
The installer MUST be
certain that the support bracket is
mounted to a minimum of a 2x4”
stud, and that it is able to support 50 pounds
continuously.
WARNING
20” FLOOR FAN - OPTIONAL WALL MOUNT
Wall Mount Installation
Figure 2: Wall Mount Installation
Figure 3: Wall Mount Installation - Close Up