Installing the cd/diskette drive tray, Removing the cd and diskette drives – Dell PowerEdge 650 User Manual
Page 60
1.
Open the system. See "
Opening the System
" in "Troubleshooting Your System."
2.
Disconnect the interface cable from the CD/diskette drive's interposer card.
3.
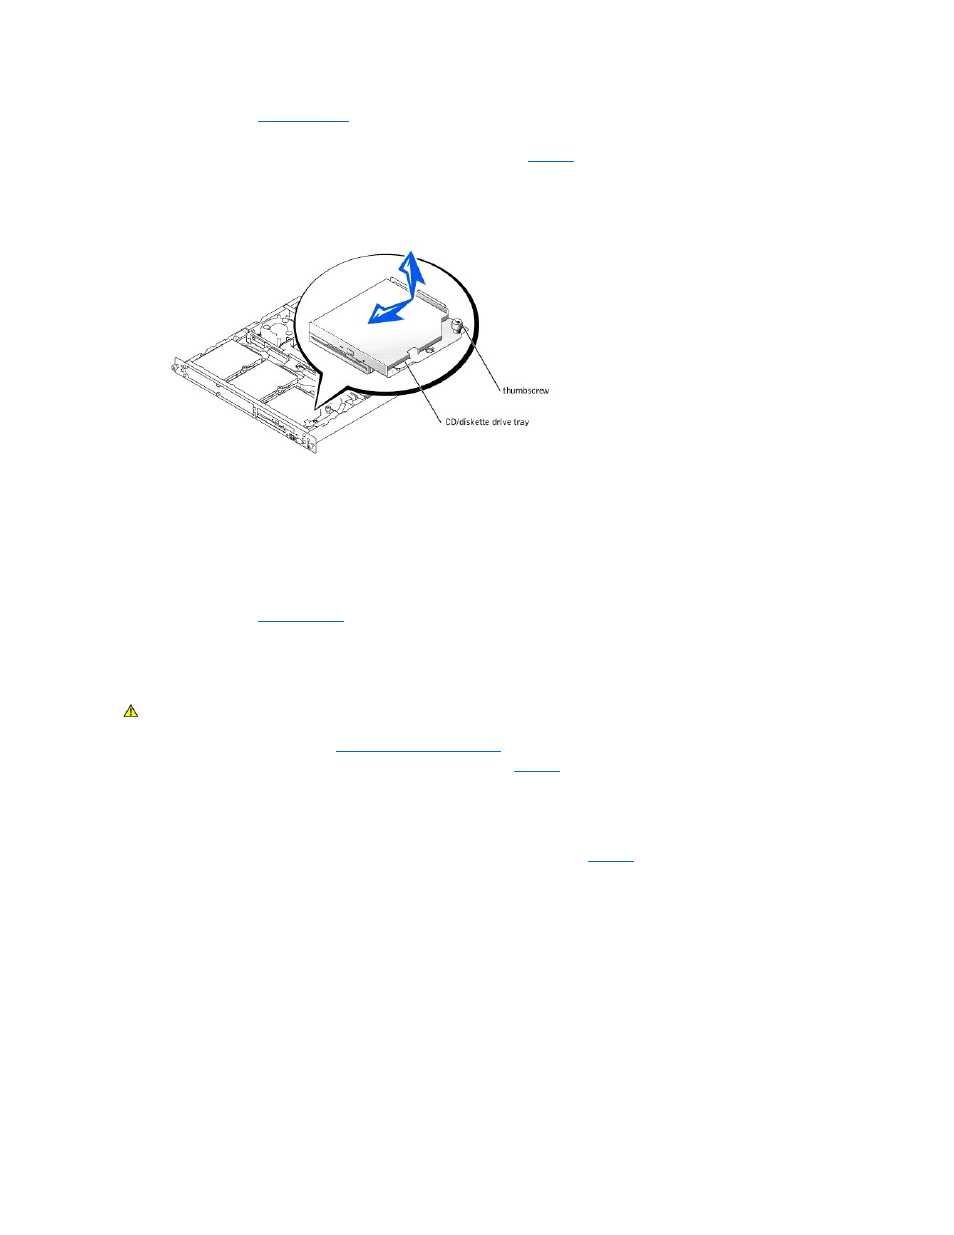
Loosen the thumbscrew that secures the CD/diskette drive tray to the chassis. See
4.
Slide the tray backward and lift it out of the chassis.
Figure 7-3. Removing the CD/Diskette Drive Tray
Installing the CD/Diskette Drive Tray
1.
Align the drive tray so that the shoulder washers on the tray slide into the mounting notches in the chassis.
2.
Slide the tray forward until it stops.
3.
Tighten the thumbscrew that secures the drive tray to the chassis.
4.
Connect the interface cable to the CD/diskette drive's interposer card.
5.
Close the system. See "
Closing the System
" in "Troubleshooting Your System."
Removing the CD and Diskette Drives
1.
Remove the CD/diskette-drive tray. See "
Removing the CD/Diskette Drive Tray
."
2.
Remove the two fasteners that secure the interposer card to the drive tray. See
a.
On the side of the card that is between the card and the drive, push the plunger of each fastener back into the fastener barrel, using the flat
surface of a flat-tipped screwdriver or other small flat object.
b.
On the side of the interposer card closest to the backplane board, grasp the plunger head and pull the plunger completely out of the drive tray.
3.
Disconnect the interposer card from the CD drive.
4.
While squeezing the tabs on the drive tray securing lever, rotate the lever all the way open. See
5.
Remove the CD and diskette drives from the drive tray.
If you are replacing the diskette drive, disconnect the interface cable from the diskette drive that connects to the interposer card.
Figure 7-4. Removing the CD and Diskette Drives
CAUTION:
See your System Information Guide for complete information about safety precautions, working inside the computer, and protecting
against electrostatic discharge.