Power distribution board, Installing a power supply, Removing the power distribution board – Dell PowerEdge 1750 User Manual
Page 36
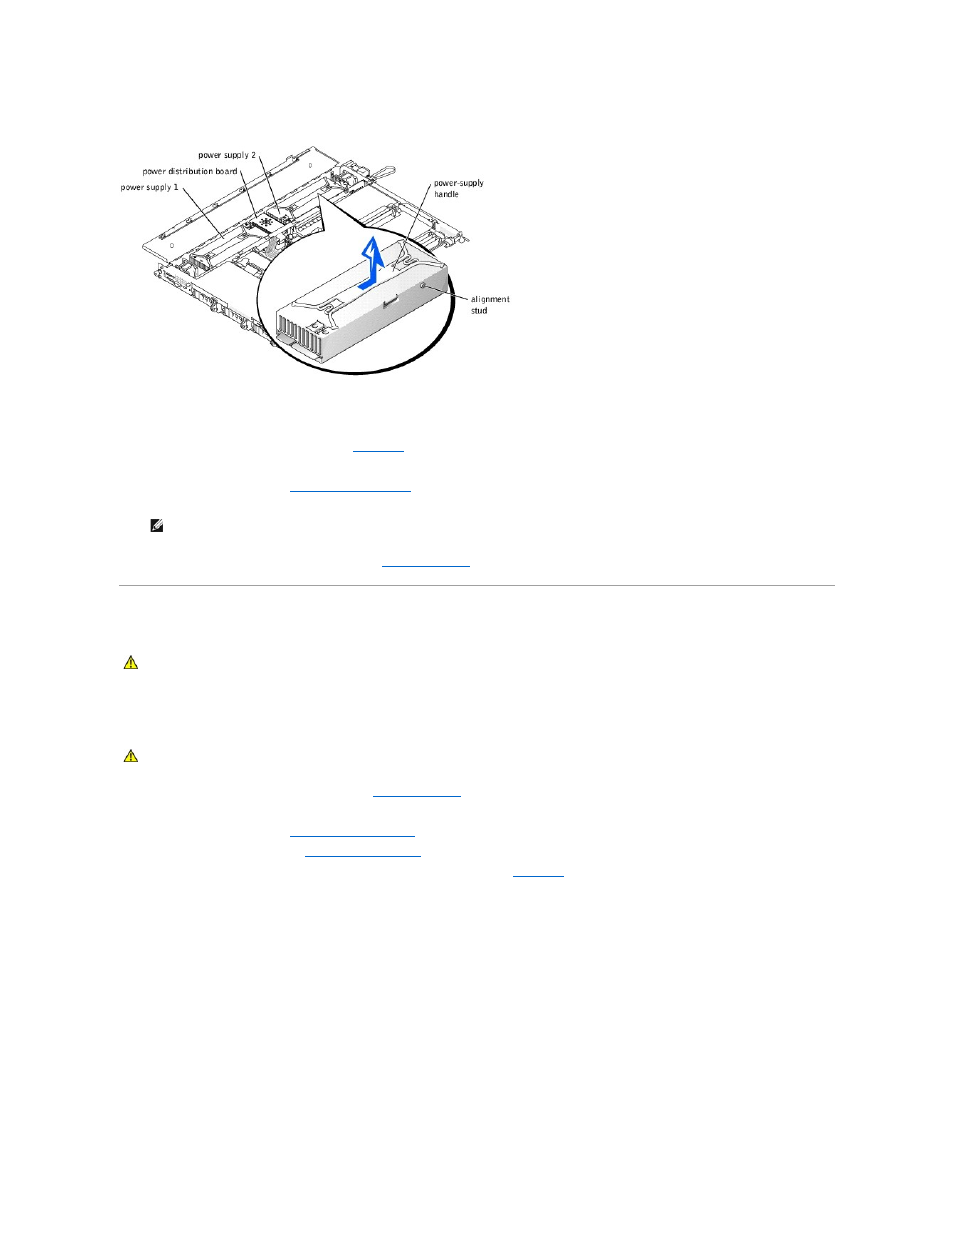
Installing a Power Supply
1.
To install the replacement power supply, align the stud on the side of the power supply with the corresponding notch in the chassis wall, and then
lower the power supply into the chassis. See
.
2.
Slide the power supply toward the PDB until the power supply connector is fully seated in the PDB connector.
3.
Close the system covers. See "
4.
Replace the optional front bezel, if applicable. See "
Power Distribution Board
Removing the Power Distribution Board
1.
Remove the optional front bezel, if present. See "
."
2.
Turn off the system, including any attached peripherals, and disconnect the system from the electrical outlet.
3.
Open the system covers. See "
."
4.
Remove the power supplies. See "
."
5.
Remove the screw that secures the cover to the PDB, and lift out the cover. See
Figure 4-19. Power Distribution Board
NOTE:
If the cover does not close completely over the power supplie(s), one or both power supplies are not properly installed. Remove the power
supplie(s) and repeat steps 1 and 2 until the cover closes properly.
CAUTION:
Only trained service technicians are authorized to remove the system cover and access any of the components inside the system. See
your System Information Guide for complete information about safety precautions, working inside the system, and protecting against
electrostatic discharge.
CAUTION:
Avoid touching the cable connectors on the power supplies. Wait 10 to 20 seconds after disconnecting the power cables before
removing the power supplies or coming into contact with their cable connectors.