Figure 4, Installing a microprocessor – Dell PowerEdge 1750 User Manual
Page 29
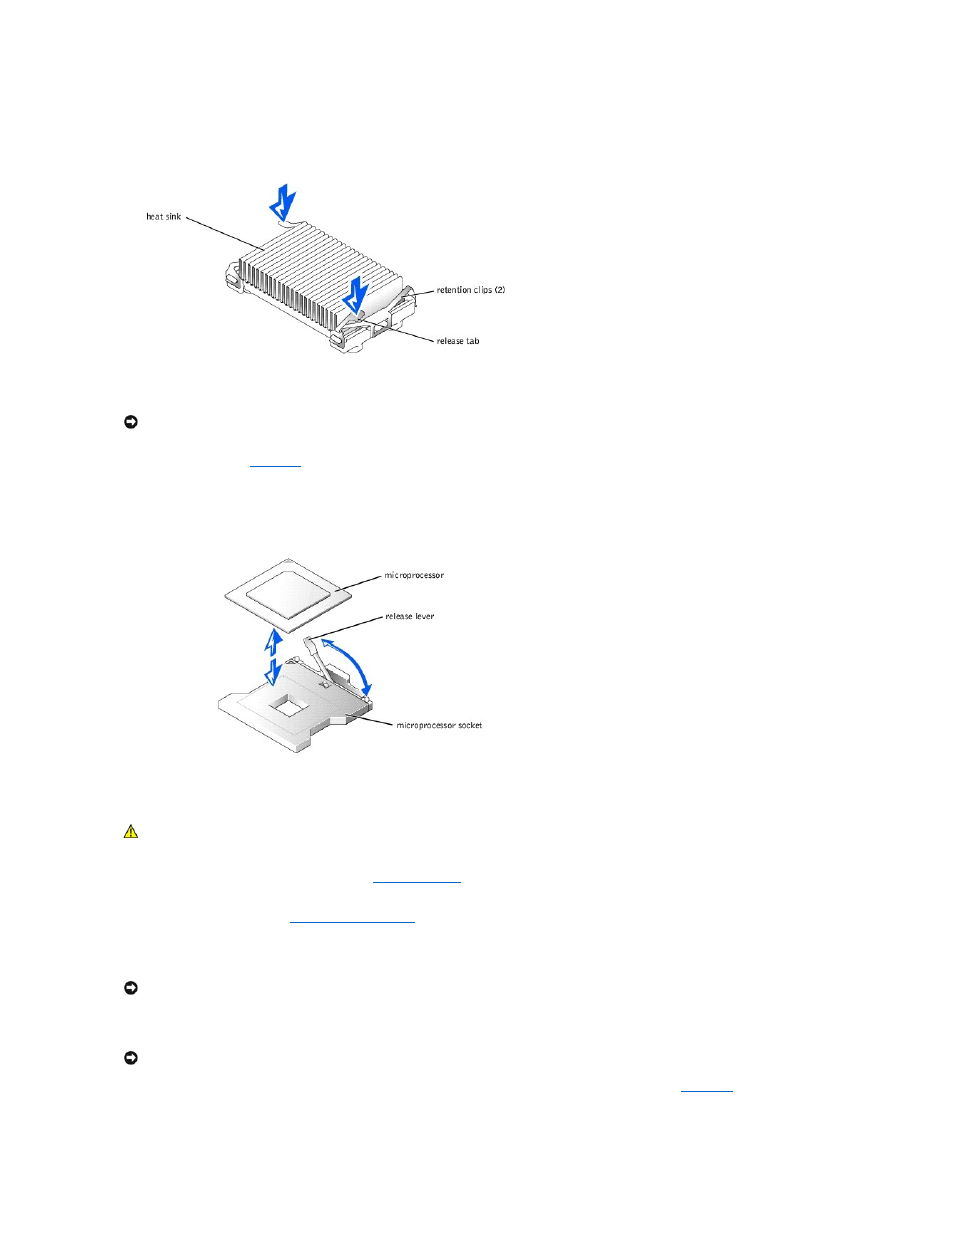
Figure 4-9. Retention Clip
5.
Remove the heat sink.
6.
Remove the microprocessor from the socket by pulling the socket release lever straight up until the processor is released, and then lift the processor
out of the socket. See
.
If you are installing a new microprocessor, leave the release lever up so that the socket is ready for the new microprocessor.
Figure 4-10. Removing the Microprocessor
Installing a Microprocessor
1.
Remove the optional front bezel, if present. See "
."
2.
Turn off the system, including any attached peripherals, and disconnect the system from its electrical outlet.
3.
Open the system covers. See "
."
4.
Some systems have a plastic heat-sink filler plate installed over an unused microprocessor socket. If you are installing a second microprocessor and the
plate is present, remove the plate by pressing in the two top tabs and lifting the plate away.
5.
Unpack the new microprocessor.
6.
Identify the pin-1 corner of the microprocessor, indicated by a tiny gold triangle on the top of the microprocessor. See
Figure 4-11. Pin-1 Identification
NOTICE:
Be careful not to bend any of the pins when removing the microprocessor. Bending the pins can permanently damage the microprocessor.
CAUTION:
Only trained service technicians are authorized to open the system covers and access any of the components inside the system. See
the System Information Guide for complete information about safety precautions, working inside the system, and protecting against electrostatic
discharge.
NOTICE:
Be careful not to bend any of the pins when unpacking the microprocessor. Bending the pins can permanently damage the microprocessor.
NOTICE:
Identifying the pin-1 corners is critical to positioning the processor correctly.