Bio-Rad Aurum™ Total RNA 96 Kit User Manual
Page 11
7
Preparing the Aurum™ Vacuum Manifold
Tubing provided in the Aurum™ Vacuum Manifold kit is 4 ft long and must be
cut into appropriate pieces before proceeding.
Prior to setup, you may ensure that the gauger pointer is adjusted to zero
by removing the lens cover, followed by turning the adjustment pin located
beneath the dial face.
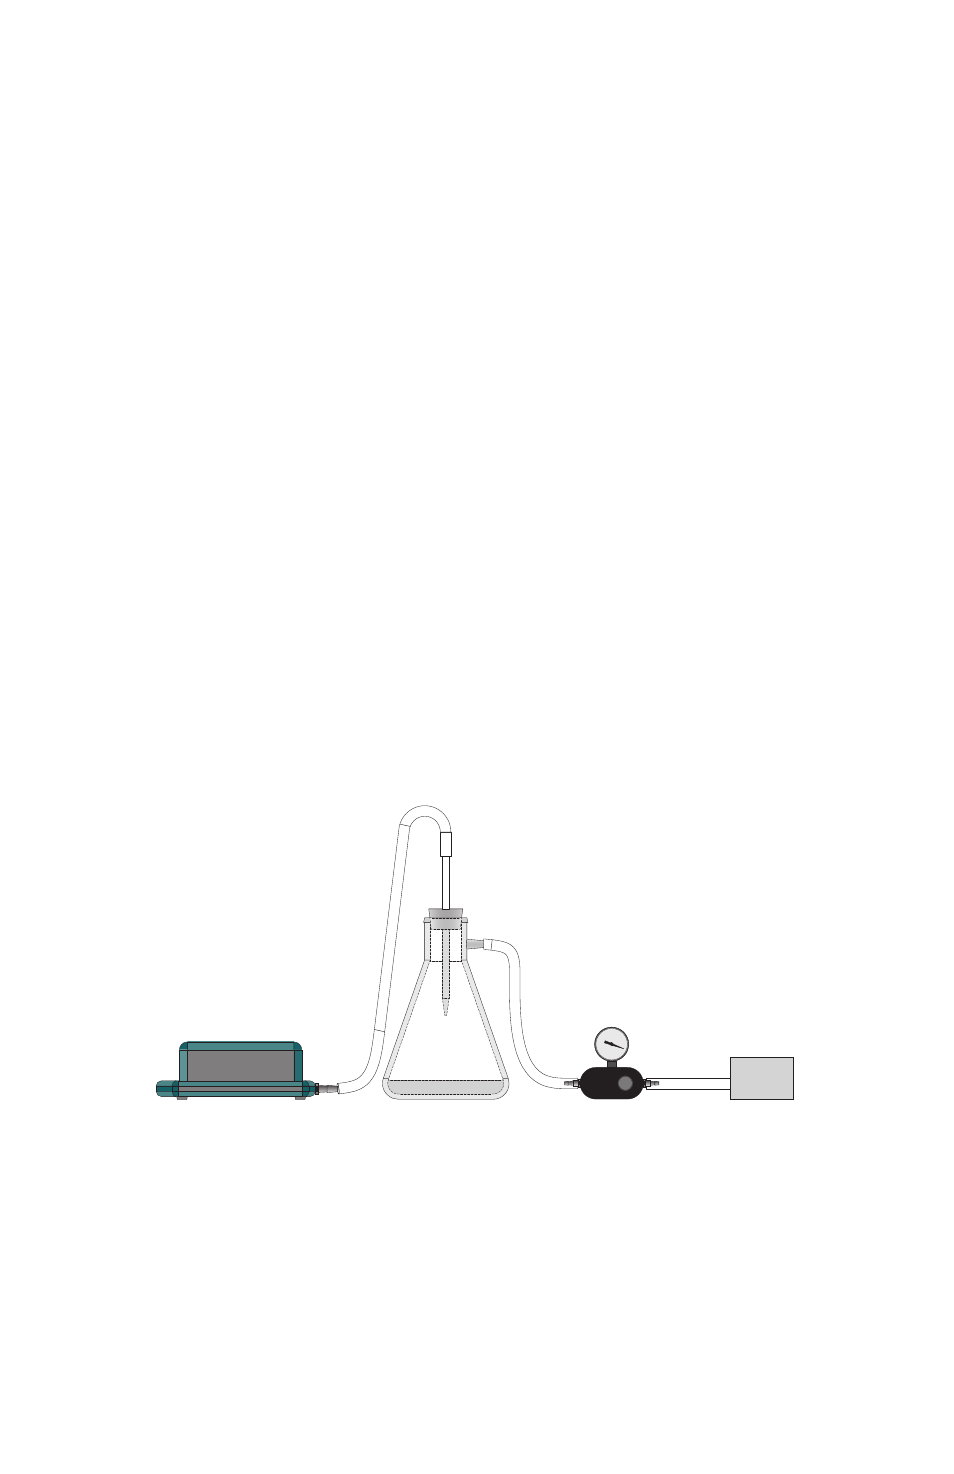
Vacuum Setup (Figure 2)
1. Cut tubing into three pieces of appropriate length.
2. Use one piece of tubing to connect the right side of the vacuum
regulator to the vacuum source.
3. Use another piece of tubing to connect the left side of the vacuum
regulator to the sidearm of the filter flask.
4. Place a rubber stopper with hole into the mouth of the filter flask. Insert
a serological pipette (or comparable) into the hole of the stopper.
5. Snap in the black sealed end of the quick connect fitting into the
manifold base.
6. Finally, use the last piece of tubing to connect the filter flask to the quick
connect fitting of the nozzle of the manifold.
Note: Use of the Aurum™ vacuum regulator is strongly recommended
to ensure full control of the negative pressure of the manifold.
Manifold Wash Setup (Figure 3A)
1. Place the manifold top on the base, ensuring complete and uniform
contact between the manifold top and base.
Fig. 2. Vacuum setup conditions.
Vacuum source
Vacuum regulator
Filter flask
Vacuum manifold