Mount a left wheel, Mount a right wheel, Mount a left wheel mount a right wheel – Great Plains 207-216K Operator Manual User Manual
Page 16
12
UMRC
Great Plains Manufacturing, Inc.
204-085M-A
2014-02-12
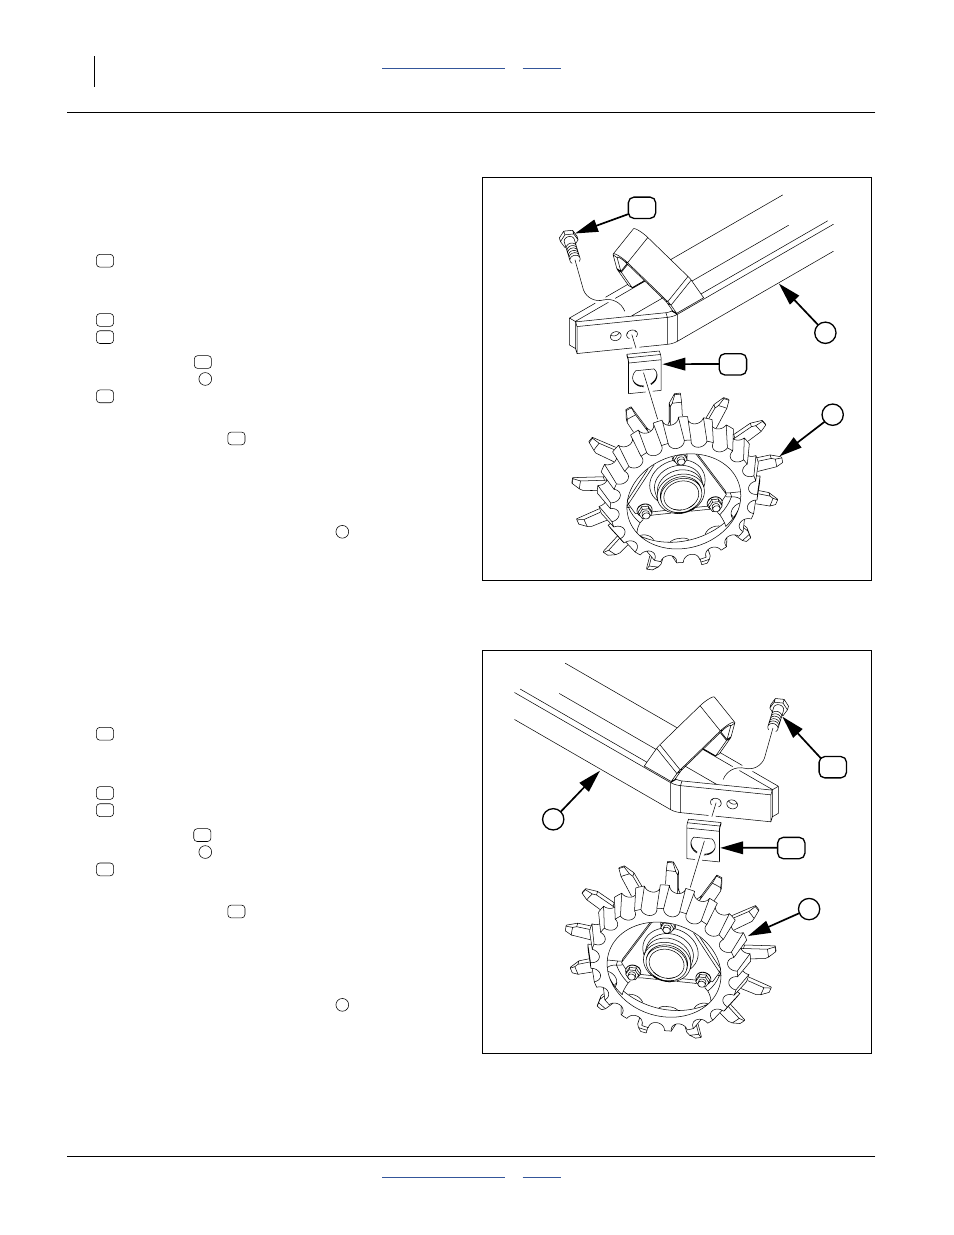
Mount a Left Wheel
Refer to Figure 12 (which depicts mounting the wheel
assembly in the aft arm hole of a single arm; left side
dual-wheel mounting is identical)
11. Select one:
207-143V RIGID ROW CLEANER ASM LH
12. Partially disassemble it (some parts may be attached
by cable ties), freeing the:
802-228C HHCS 5/8-11X1 1/2 GR5 NYL
13. Insert the bolt
through the selected arm hole from
inside the arm
. If a
804-195C WASHER FLAT 1.31ODX.65IDX.188T
is present, it is not used.
14. Place the hub lock
over the bolt threads from
outside the arm, with the bent edge of the lock up
and toward the inside of the arm. This lock prevents
the back face of the hub from rotating while you
secure the bolt in the next step.
15. Place the cleaner wheel assembly
on the bolt,
and screw the bolt into the wheel hub. Use the lock,
up against the hub, to prevent hub rotation. Torque
bolt to specifications once hub and lock are fully
seated.
Mount a Right Wheel
Refer to Figure 13 (which depicts mounting the wheel
assembly in the aft arm hole of a single arm; right-side dual
mounting is identical)
16. Select one:
207-142V RIGID ROW CLEANER ASM RH
17. Partially disassemble it (some parts may be attached
by cable ties), freeing the:
802-228C HHCS 5/8-11X1 1/2 GR5 NYL
18. Insert the bolt
through the selected arm hole from
inside the arm
. If a
804-195C WASHER FLAT 1.31ODX.65IDX.188T
is present, it is not used.
19. Place the hub lock
over the bolt threads from
outside the arm, with the bent edge of the lock up
and toward the inside of the arm. This lock prevents
the back face of the hub from rotating while you
secure the bolt in the next step.
20. Place the cleaner wheel assembly
on the bolt,
and screw the bolt into the wheel hub. Use the lock,
up against the hub, to prevent hub rotation. Torque
bolt to specifications once hub and lock are fully
seated.
Figure 12:
Left RC Wheel Install
27320
51
47
1
2
31
47
51
51
1
52
47
2
Figure 13:
Right RC Wheel Install
27320
51
47
3
4
38
47
51
51
1
52
47
2