Install umrc mount weldment, Install umrc cleaner arm – Great Plains 207-216K Operator Manual User Manual
Page 13
Great Plains Manufacturing, Inc.
Assembly Instructions
9
2014-02-12
204-085M-A
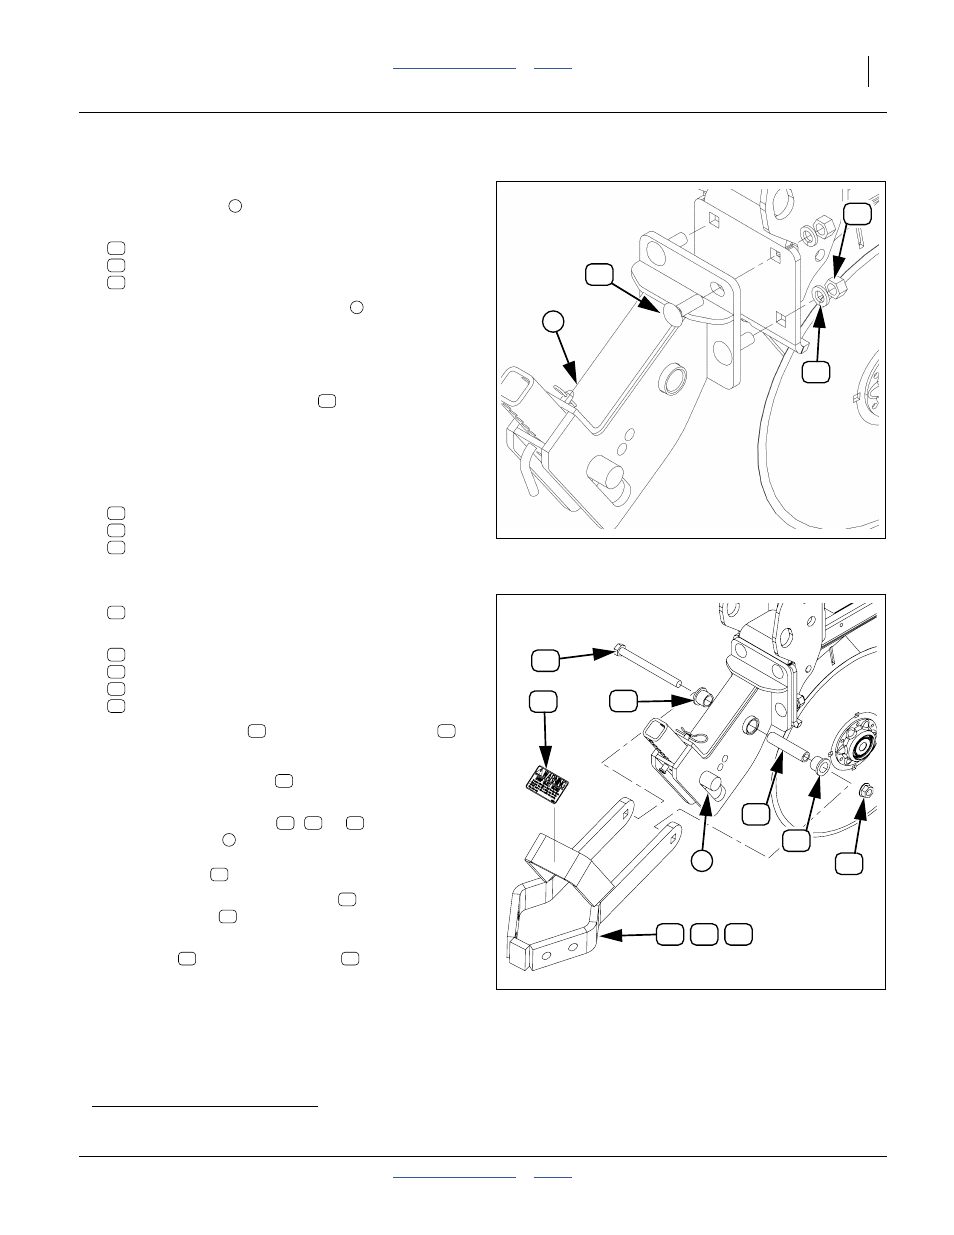
Install UMRC Mount Weldment
Refer to Figure 6 (which depicts a shank mounting)
5.
Select the mount
partially assembled above.
6.
Select four sets of:
802-106C RHSNB 1/2-13X1 1/2 GR5
804-015C WASHER LOCK SPRING 1/2 PLT
7.
Attach the UMRC mount weldment
to the row unit
shank face using the four sets of fasteners. Loosely
tighten fasteners, as the alignment of the complete
unit may require adjustment before final tightening.
Note: Depending on tools available, it may be more
convenient to insert the bolt
from behind row
face, and install the lock washers and nuts in front.
Install UMRC Cleaner Arm
Refer to Figure 7 (which depicts a dual RC arm)
8.
Select one of the following, depending on kits:
(odd rows)
207-095H SINGLE ARM RC WLD RH
(even rows)
9.
Select two:
817-084C PARALLEL ARM PIVOT BUSHING
10. Select one each:
207-106D ROW CLEANER PIVOT PIPE
818-525C DECAL SHARP OBJECT WARNING
802-046C HHCS 1/2-13X5 1/2 GR5
11. Insert the pivot pipe
in one end of a bushing
.
12. Insert these in the pivot hole
a
, as shown in the figure.
13. Place the other bushing
on the other end of the
tube.
14. With the arm weldment (
,
or
) above the
adjustment tube
, align the end holes of the arm
with the bushing assembly, and temporarily hold in
place with bolt
.
15. Apply thread adhesive to the bolt
.
Secure with nut
.
16. Clean and dry the surface of the gusset on the arm
weldment
and apply the decal
.
17. Repeat UMRC step 1 through step 16 for all rows.
Skip to “Install Cleaner Wheel Assemblies” on
page 11.
a. 2013 and earlier weldments may have two pivot holes. Only the upper hole is used.
Figure 6:
UMRC Weldment Mounting
27314
17
23
20
1
1
17
23
20
1
17
30
39
40
Figure 7:
UMRC Arm Mounting
27315
30
18
12
26
26
20
37
39 40
2
26
12
37
18
20
12
26
26
30
39
40
2
18
18
20
40
37