Great Plains PT8030 V1015 Operator Manual User Manual
Page 42
40
Section 5 Maintenance and Lubrication
PT6030 and PT8030 Pull-Type Planter 401-032M-B
4/12/05
Great Plains Mfg., Inc.
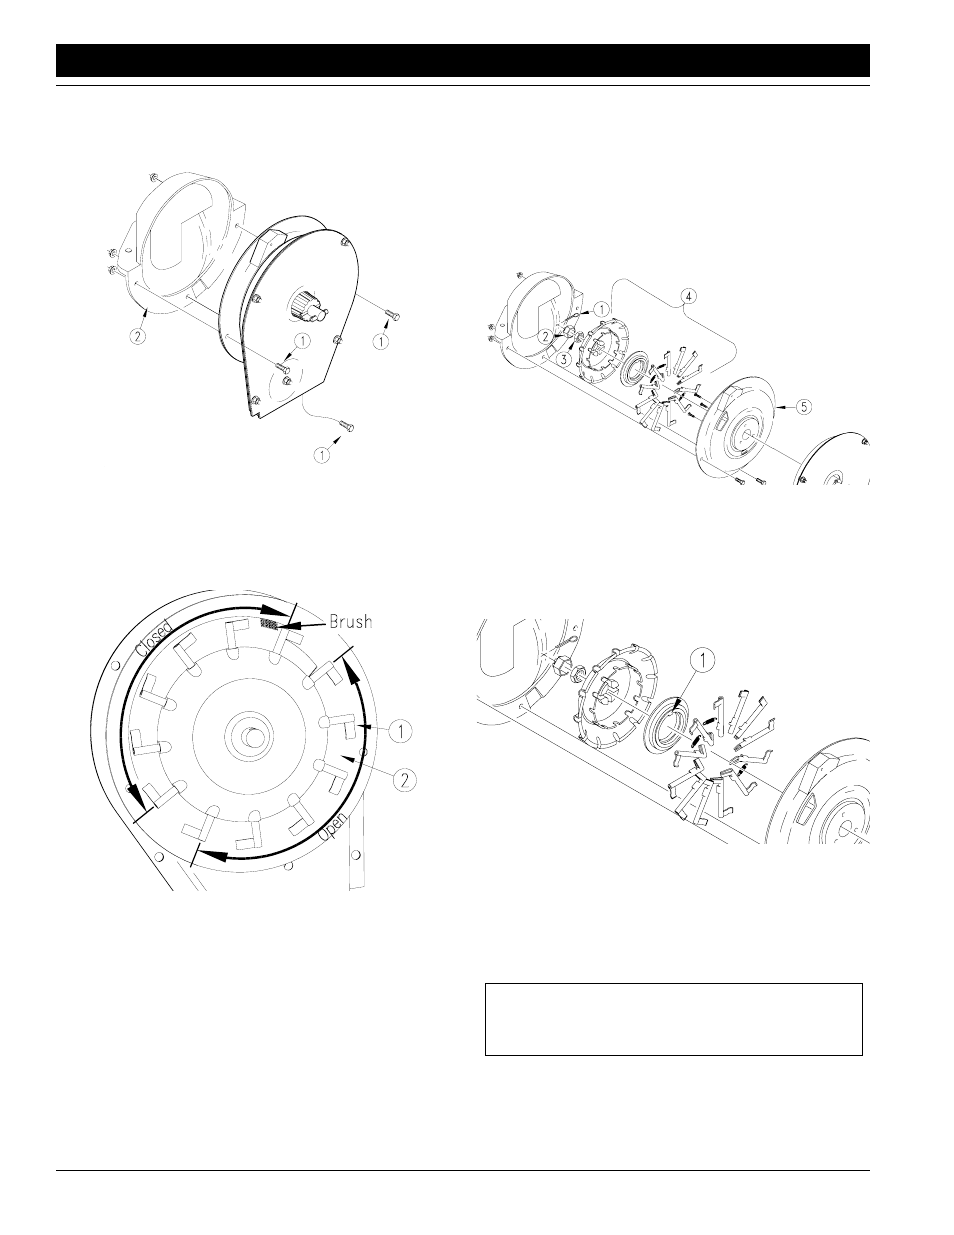
Finger Pickup Meter
To inspect and repair finger-pickup meters, remove meter
from hopper, then remove three 1/4-inch bolts (1) on the
meter baffle (2) to gain access to the finger mechanism.
17744
Figure 5-1
Disassemble Finger-Pickup Meter
Rotate meter-input shaft by hand to check the fingers. The
fingers (1) should be against the carrier plate (2) in the
area marked “closed” in Figure 5-2 and raised in the area
marked “open”.
12353
Figure 5-2
Inspecting Meter Fingers
Inspect the brush for wear. The brush should cover at least
half of a finger tab. Replace brush after every 100 acres of
planter operation.
Clean chaff and debris from meter after every 50 hours of
planter operation. To clean meter, see Figure 5-3.
1.
Remove cotter pin (1), cage nut (2) and adjusting nut
(3) from shaft.
2.
Lift finger assembly (4) off shaft and clean. Replace
worn fingers and springs after 250 to 300 acres of row
operation. To remove a finger, lift finger out of slot.
When replacing a finger, place the springs so the open
side of the spring loop faces the inside of the spring
housing.
3.
Inspect carrier plate (5) for seed indentations and
wear. Replace carrier plate when wear affects seeding
accuracy.
17743
Figure 5-3
Disassemble Meter for Cleaning
4.
Reassemble finger housing onto carrier plate. When
reassembling, align notch in finger-housing cam (1)
with notch on bearing housing so finger housing is
flush with the carrier plate. The meter will function im-
properly if the notches are not aligned.
17745
Figure 5-4
Meter Reassembly
5.
With finger assembly against carrier plate, tighten ad-
justing nut until it is snug, then turn an additional one-
third turn. Proper torque is 22 to 25 inch-pounds at the
meter-input shaft.Turn meter by hand to make sure
the meter is not over tightened.
IMPORTANT: Check tightness of the adjusting nut
on the meter after the first day of operation and peri-
odically thereafter.
6.
Reassemble cage nut and cotter pin. Reassemble
baffle and attach meter to hopper.