Great Plains PT8030 V1015 Operator Manual User Manual
Page 32
30
Section 3 Adjustments
PT6030 and PT8030 Pull-Type Planter 401-032M-B
4/12/05
Great Plains Mfg., Inc.
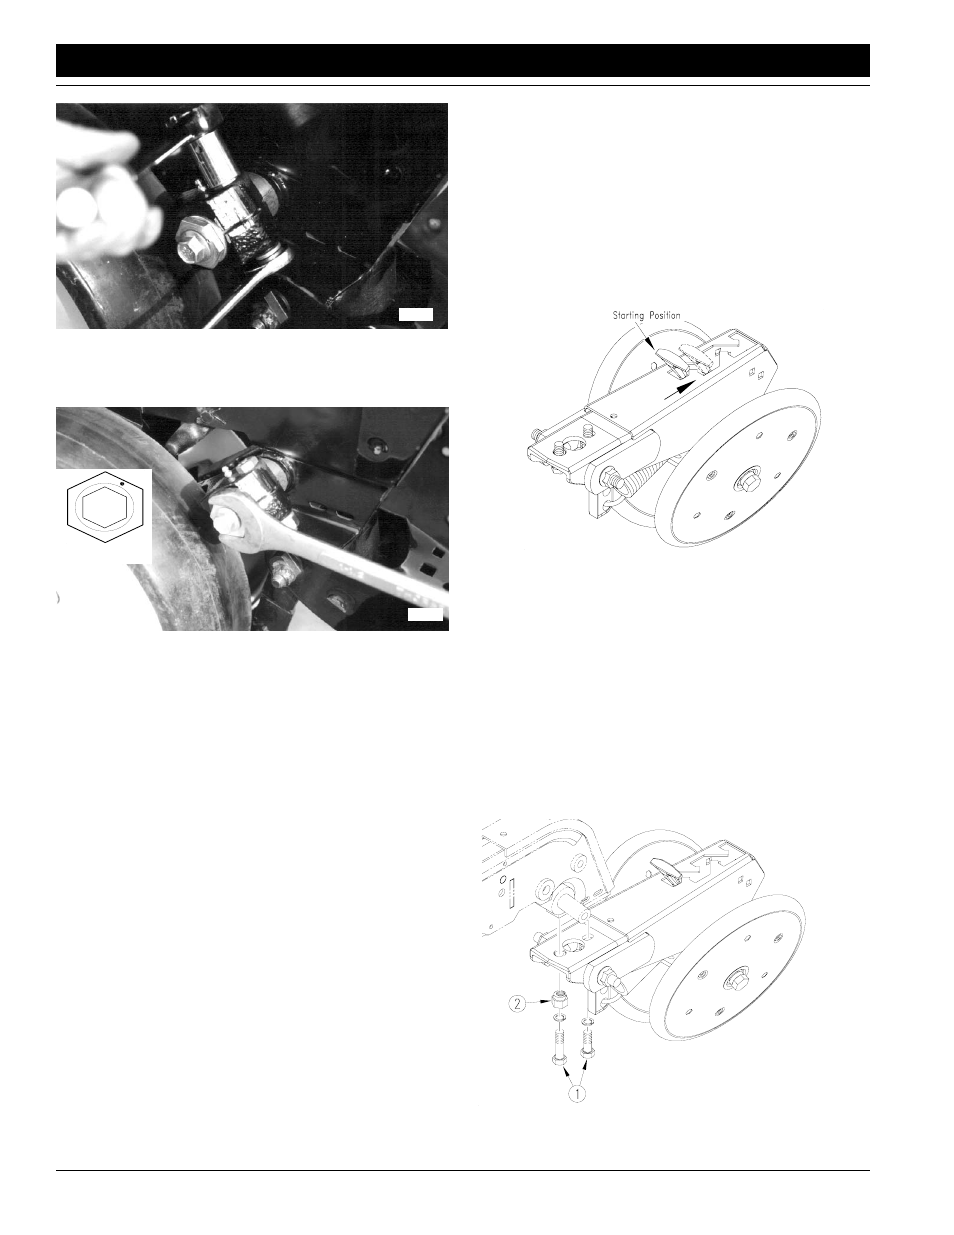
Figure 3-14
17916
Loosen Hex-Head Bolt
3.
Loosen pivot bolt. Turn hex adjuster so roll pin (1) is at
1 o’clock. Use this as the starting point for adjustment.
17914
Starting Point
Figure 3-15
Turn Hex Adjuster
4.
Move wheel arm in so side gauge wheel contacts
opener disk. Tighten hex-head bolt to clamp arm
around bushing and shank.
5.
Check the wheel-to-disk contact. Lift wheel and arm.
When let go, the wheel should fall freely.
• If wheel does not contact disk from 4 to 8 o’clock,
move hex adjuster until wheel is angled for proper
contact with disk.
• If wheel does not fall freely, loosen hex-head bolt
and slide wheel arm out just until wheel and arm move
freely. Retighten hex-head bolt.
6.
Keep turning hex adjuster and moving wheel arm until
the wheel is adjusted properly. When satisfied, tighten
pivot bolt to 110 foot-pounds.
1 x 12 Closing Wheel Option
The closing wheels can be adjusted for down pressure,
alignment and offset.
Down Pressure. Adjust the closing wheels so they have
enough down force to close the seed trench without unnec-
essary compaction.
Start with T-handle in first notch. See Figure 3-16. If the
seed trench does not close, move handle to next notch
and try again. Keep moving handle back just until the seed
trench closes.
17888
Figure 3-16
Closing Wheel Down Pressure
Alignment. If one closing wheel is running in the seed
trench or closing wheels are not centered over the seed
trench, adjust closing wheels as follows.
1.
Raise planter slightly to remove weight from closing
wheels.
7.
Loosen two 1/2-inch mounting bolts (1) shown in Fig-
ure 3-17.
8.
Turn adjuster cam (2) left or right to center wheels over
the seed trench.
9.
Torque 1/2-inch mounting bolts as recommended on
Torque Value Chart, “Appendix,” page 55
17889
.
Figure 3-17
Closing Wheel Alignment