Install rear hitch (optional) – Great Plains 4336 DH Predelivery Manual User Manual
Page 27
Great Plains Manufacturing, Inc.
Assembly
23
05/22/2012
556-100Q
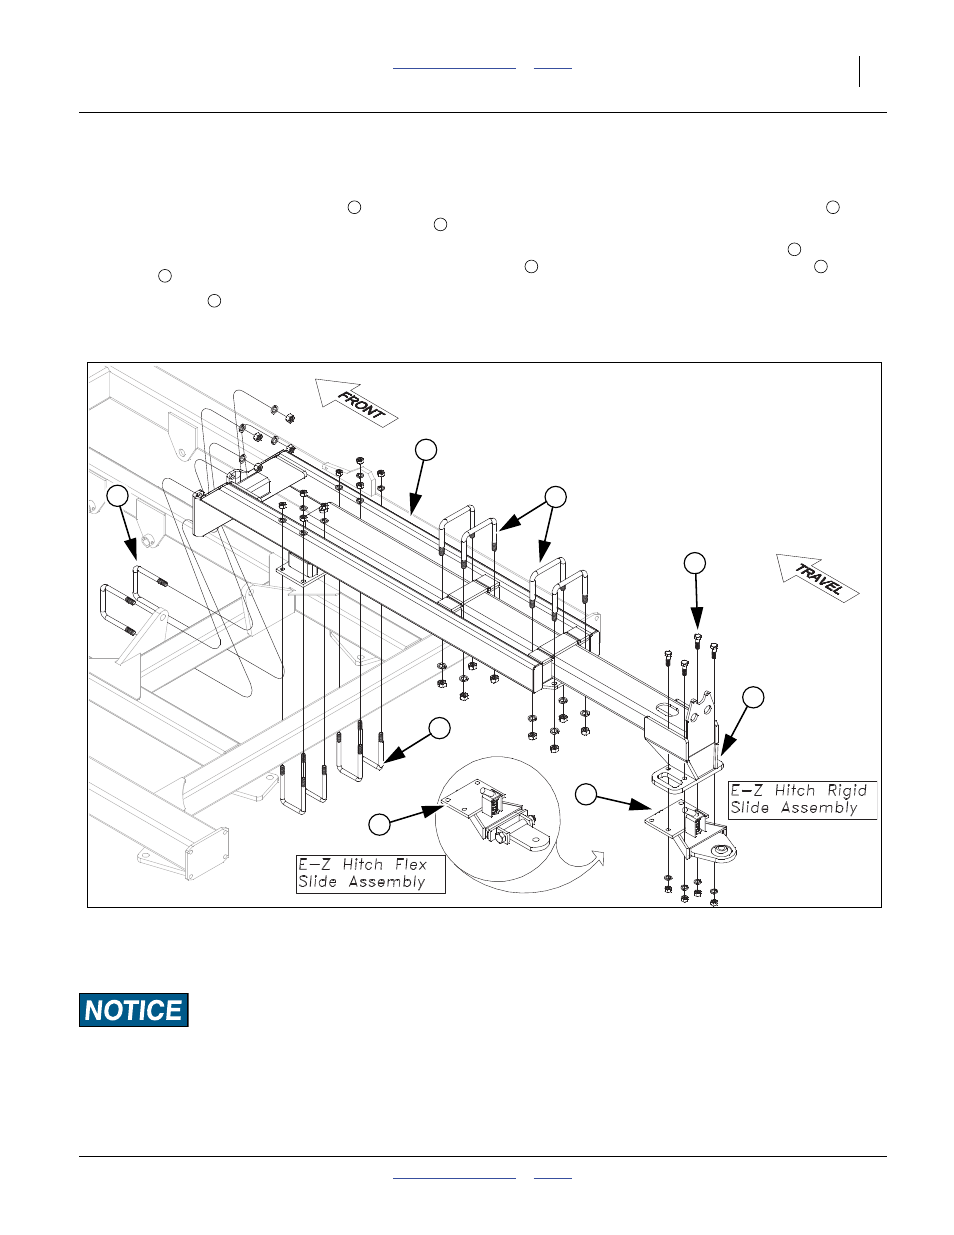
Install Rear Hitch (optional)
Refer to Figure 23
73. Attach front of rear hitch assembly
to tube of cen-
ter frame as shown with 3/4 x 5 1/32 x 6 u-bolts
, 3/
4 lock washers and 3/4 nuts. Attach the other plates
to rear tube of center frame with 5/8 x 4 1/32 x 6 1/2
u-bolts
, 5/8 lock washers and 5/8 nuts.
74. The rear hitch
will slide back and forth to clear
attachment on rear. Secure rear hitch in position
desired with the 3/4 x 6 1/32 x 5 5/8 u-bolts
, 3/4
lock washers and 3/4 nuts.
75. The bolt on sleeve assembly with rigid
or flex slide
may be fastened using 5/8 x 2 hex bolts
, secure
with 5/8 lock washers and 5/8 nuts.
76. Tighten all bolts to specs, See “Torque Values
If machine is equipped with a rear attachment, be sure you
install the rear jack stand, see “Parts Manual” Rear Jack
Stand, so machine doesn’t tip backwards when unhooking
machine from tractor.
77. Once the options are installed, fold the Disk Harrow
to check for clearance and interferences, also watch
that hoses do not get pinched.
Note: Double check that all bolts are tightened to specs,
See “Torque Values Chart” on page 24.Consult
the “Operator’s Manual”, for the first time field
adjustments before going to the field.
1
2
3
4
5
6
7
8
Figure 23
Rear Hitch
42152
5
2
7
8
6
1
4
3