LaMotte 5 Series TDS Meter User Manual
Page 18

2. If the temperature (t °C) of the conductivity calibration solution is below 0
°C or above 50 °C (0°C < t °C > 50 °C), an error message “Err 2” will be
displayed when performing the auto calibration, and meter will return to
measurement mode.
3. All new calibration data will over-ride existing stored calibration data for
each measuring range calibrated.
4. It is important to use fresh conductivity calibration standards.
5. Low conductivity standard solutions (less than 20 µS /cm) can become
contaminated as soon as they are exposed to the air. Exercise caution
during calibration in the first measurement range (0.00 to 20.0 µS /cm).
Manual Calibration (Conductivity or TDS)
In Manual Calibration mode (see page 23) the meter can be calibrated with
customized conductivity calibration standards that are
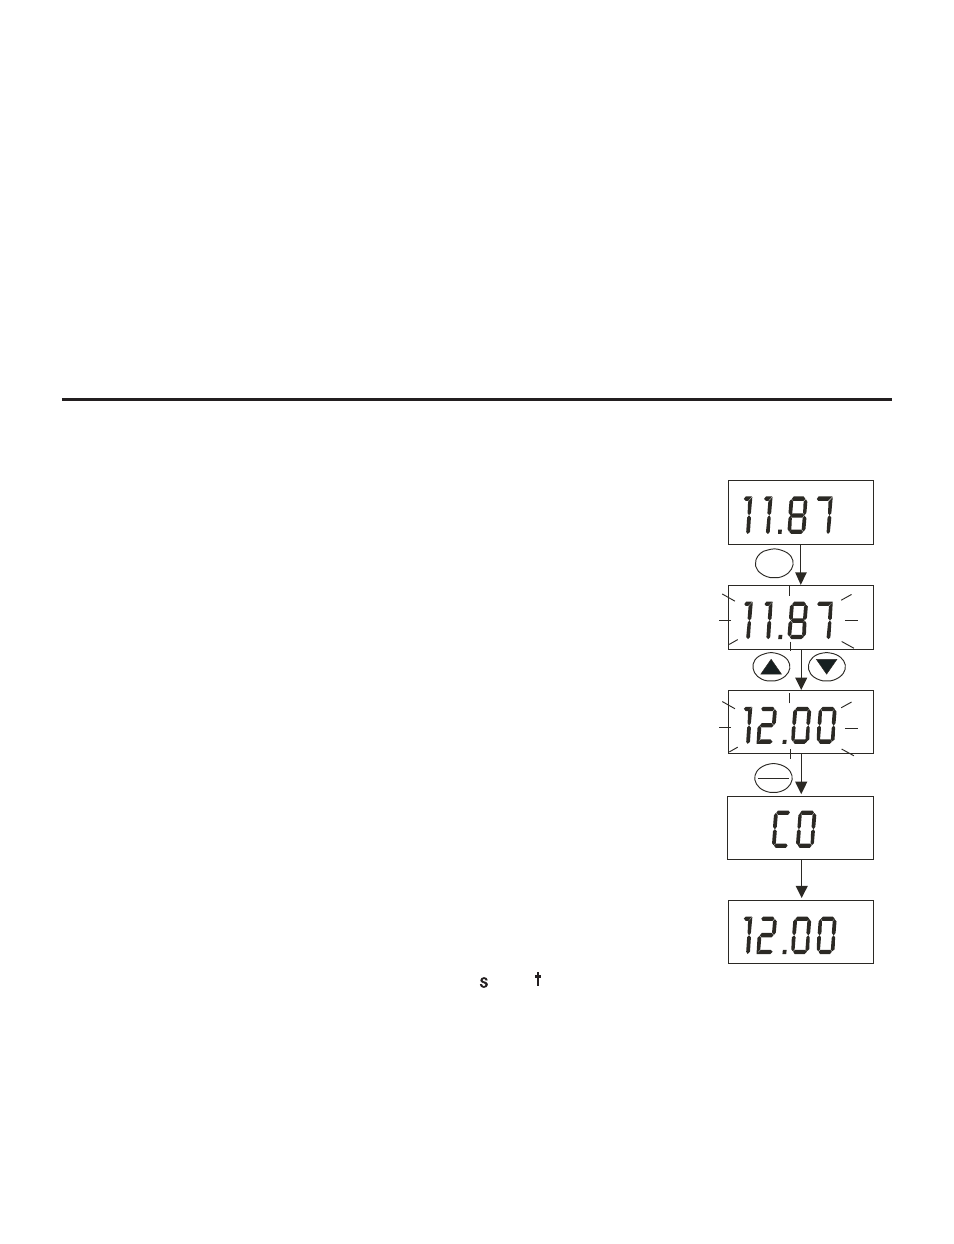
specific to a particular application. The following example
shows the calibration sequence of a 12.00 mS conductivity
calibration standard.
This procedure is for the CON 6 and TDS 6 meters.
1. If necessary, press the MODE button to select the
conductivity mode.
2. Rinse the probe thoroughly with deionized water or a
rinse solution, then rinse with a small amount of
calibration standard.
3. Dip the probe into the calibration standard. Immerse
the probe tip beyond the upper steel band. Gently stir
the sample with the probe to create a homogeneous
sample. Allow time for the reading to stabilize.
4. Press CAL button to enter conductivity calibration
mode. The [CA] indicator will appear for 1.5 seconds,
and a value will appear flashing.
NOTE: To exit calibration without confirmation, press
CAL button again to go back to measurement mode.
5. Wait for the value to stabilize. Press
or
button and
adjust the value to the calibration standard used.
6. Press the ENTER button. The [CO] indicator will appear for 1.5 seconds,
and the calibration has been successfully performed. The meter will return
to the measurement mode.
7. To perform the next point calibration in the multi-point calibration for the
next range, repeat steps 1-6 until all points have been calibrated.
mS
mS
mS
mS
CAL
HOLD
ENTER
Measurement Mode
18
