Operating gas pressure – Tweco 7-5227 User Manual
Page 4
July 28, 2004
4
Manual 0-4647
4. Hand tighten the shield cup until it is seated on the torch
head. Do not use tools to tighten the cup. If resistance is
felt when installing the cup, check the threads before pro-
ceeding.
NOTE
When operating the torch in a normal condition,
a small amount of gas vents through the gap be-
tween the shield cup and the torch handle. Do not
attempt to overtighten the shield cup as irrepa-
rable damage to internal components may result.
Operating Gas Pressure
Set gas pressure at the power supply regulator according to the
following charts. These charts are a guide only; adjust as nec-
essary for best performance.
Torch
Tip
Gas Pressure
Setting
SL60
Torch
50A
65 psi / 4.5 bar
70A
60 psi / 4.1 bar
90A
65 psi / 4.5 bar
SL100
Torch
Cutting
tting or Gouging
The torch can be held comfortably in one hand or steadied
with two hands. Choose the holding technique that feels
most comfortable and allows good control and movement.
Sequence of Operation
1. Turn on power and adjust gas pressure on the Power
Supply pressure gauge. Refer to the charts for opti-
mum pressure settings for the torch tip in use.
2. Adjust current output on the Power Supply to match
the selected tip and attach the work clamp firmly to the
work.
WARNING
Maximum current for is 60 Amps for SL60 Torches,
or 100 Amps for SL100 Torches. Operation of this
torch at higher outputs may damage the torch, the
leads, or the Power Supply. DO NOT operate the
SL60 Torch at more than 60 Amps, or the SL100 at
more than 100 Amps.
CAUTION
Do not operate the torch with the torch tip in con-
tact with the work at outputs greater than 40 amps
as this can cause irreparable damage to the torch
parts.
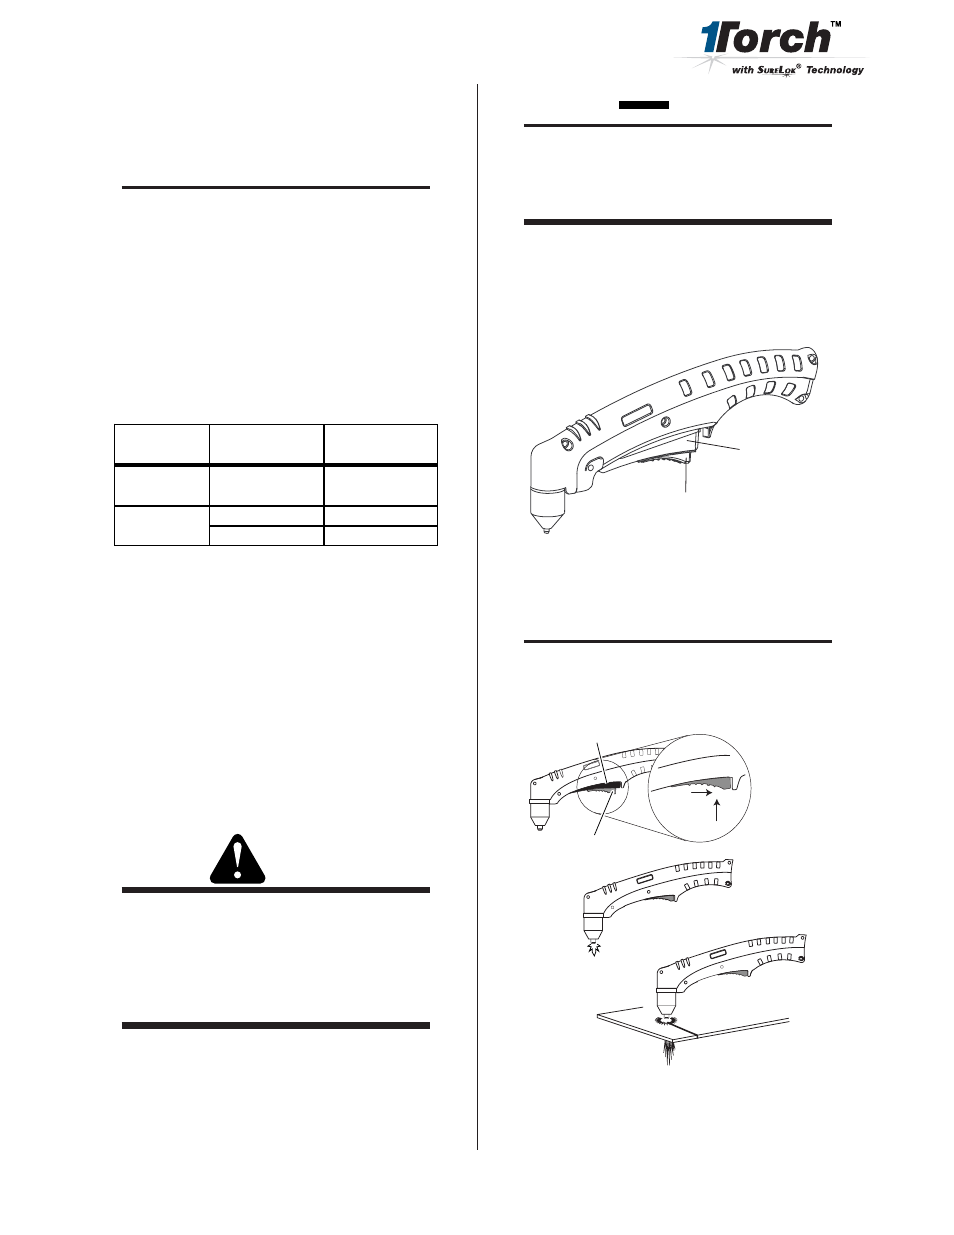
3. Hold the torch away from your body.
4. Slide the trigger release toward the back of the torch while
simultaneously squeezing the trigger. The pilot arc will
start.
Art # A-03962
Trigger
Trigger Release
5. Bring the torch within transfer distance to the work.
The main arc will transfer to the work, and the pilot
arc will shut off.
NOTE
The gas preflow and postflow are a characteristic of
the power supply and not a function of the torch.
3
4
Art # A-03383
Trigger
2
1
Trigger Release
6. Cut as usual. Simply release the trigger assembly to
stop cutting.