04 torch parts selection, 04 torch parts selection -2 – Tweco Maximizer 300 Torch for BNFL User Manual
Page 24
OPERATION
4-2
Manual 0-2990
4.04 Torch Parts Selection
Depending on the type of operation to be done determines
the torch parts to be used.
Torch parts:
Shield Cup Body, End Cap, Tip, Electrode, Gas Dis-
tributor
Type of operation:
Standoff cutting or gouging
Refer to Section 6.04, Torch Consumables, for the various
torch parts.
CAUTION
Do not interchange parts. Make sure both the tip
and electrode in the torch correspond with the
plasma and secondary in use and the type of op-
eration (cutting or gouging).
To change the torch parts for a different operation use the
following procedure (See Note):
NOTE
A multipurpose wrench is supplied for changing
the tip, electrode and gas distributor in the torch
head.
Multi-Purpose Wrench
(Catalog Number 20-0001)
Used for Electrodes
Used for 11/16" ( 17.5 mm)
Across Tip Flats
Gas Distributor Notch
Used with 11/16" (17.5 mm)Tip
Used for 5/8" (15.9 mm)
Across Tip Flats
Gas Distributor Notch
Used with 5/8" (15.9 mm)Tip
This Side
Towards Torch
A-01639
Figure 4-1 Multi-Purpose Wrench
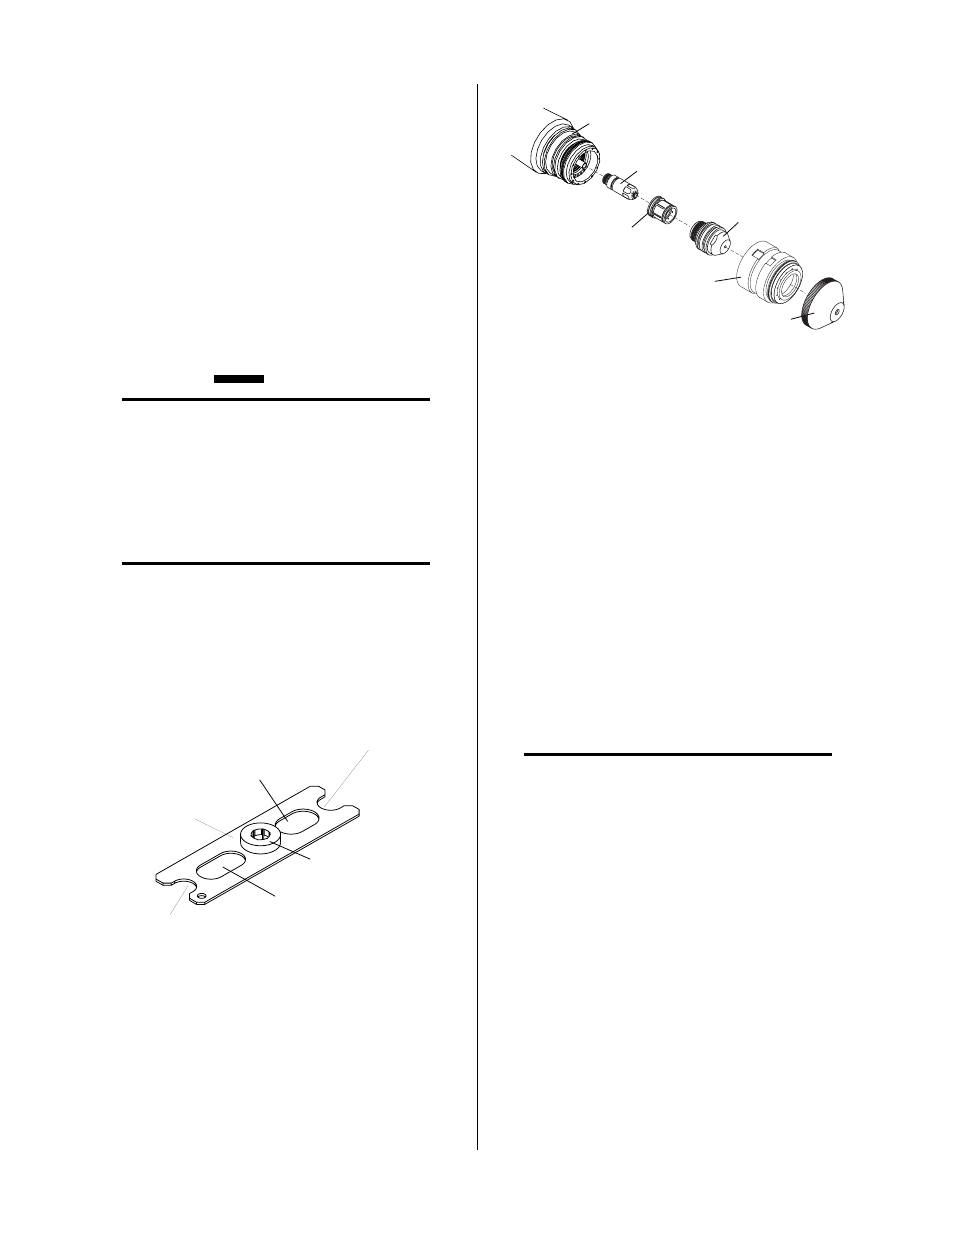
1. Unscrew and remove the shield cup body and end
cap from the torch head.
Torch Head
Electrode
Tip
Gas Distributor
Shield Cup Body
Art # A-02207
End Cap
Figure 4-2 Liquid Cooled Torch Parts
2. Using the multipurpose wrench (5/8 inch slot) remove
the tip.
3. Tilt the torch head to remove the gas distributor. The
end of the multipurpose wrench can be used to help
remove the gas distributor.
4. Using the multipurpose wrench (electrode area) re-
move the electrode.
5
. Install the desired electrode for the operation into the
torch head. The circular area around the wrench used
for electrodes will also align the electrode in the torch
head. This will prevent installing electrodes on an
angle and cross threading the electrode in the torch
head.
6. Install the desired gas distributor and tip for the op-
eration into the torch head.
NOTE
Be careful not to overtighten the electrode and tip
when reinstalling.
7. Hand tighten the shield cup body and end cap until it
is seated on the torch head. If resistance is felt when
installing the cup, check the threads before proceed-
ing.