Cutmaster a120 – Tweco A120 CutMaster User Manual
Page 40
CUTMASTER A120
OPERATION
Manual 0-4989
4T-6
3
4
Art # A-03383
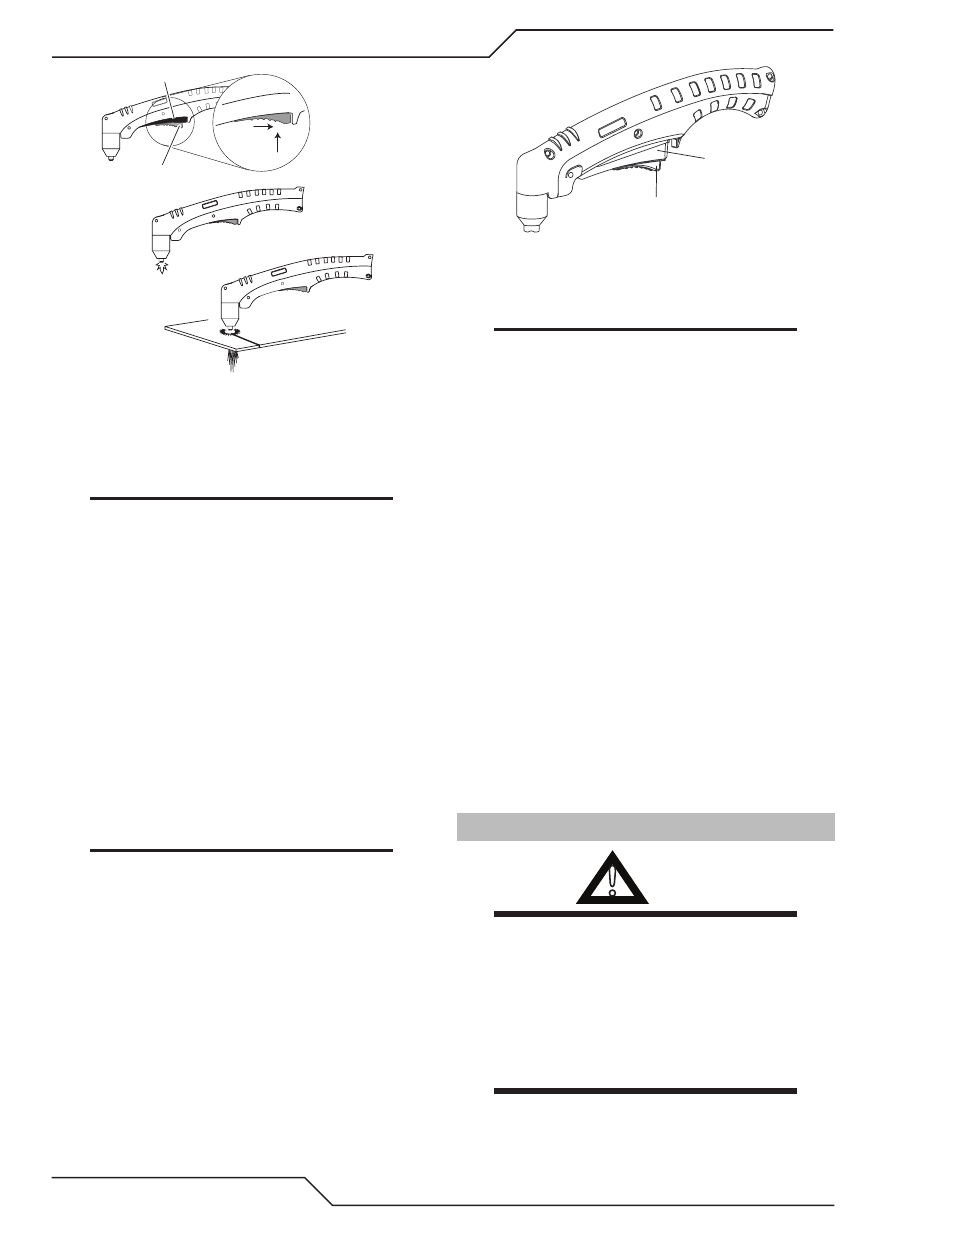
Trigger
2
1
Trigger Release
8. Cut as usual. Simply release the trigger assembly to
stop cutting.
9. Follow normal recommended cutting practices as
provided in the power supply operator's manual.
NOTE
When the shield cup is properly installed, there
is a slight gap between the shield cup and the
torch handle. Gas vents through this gap as part
of normal operation. Do not attempt to force the
shield cup to close this gap. Forcing the shield cup
against the torch head or torch handle can damage
components.
Piercing With Hand Torch
1. The torch can be comfortably held in one hand or
steadied with two hands. Position the hand to press
the Trigger on the torch handle. With the hand torch,
the hand may be positioned close to the torch head for
maximum control or near the back end for maximum
heat protection. Choose the technique that feels most
comfortable and allows good control and movement.
NOTE
The tip should never come in contact with the
workpiece except during drag cutting operations.
2. Angle the torch slightly to direct blowback particles
away from the torch tip (and operator) rather than
directly back into it until the pierce is complete.
3. In a portion of the unwanted metal start the pierce off
the cutting line and then continue the cut onto the line.
Hold the torch perpendicular to the workpiece after the
pierce is complete.
4. Hold the torch away from your body.
5. Slide the trigger release toward the back of the torch
handle while simultaneously squeezing the trigger. The
pilot arc will start.
A-02986
Trigger
Trigger Release
6. Bring the torch within transfer distance to the work.
The main arc will transfer to the work, and the pilot arc
will shut OFF.
NOTE
The gas preflow and postflow are a characteristic
of the power supply and not a function of the torch.
When the shield cup is properly installed, there
is a slight gap between the shield cup and the
torch handle. Gas vents through this gap as part
of normal operation. Do not attempt to force the
shield cup to close this gap. Forcing the shield cup
against the torch head or torch handle can damage
components.
7. Clean spatter and scale from the shield cup and the tip
as soon as possible. Spraying the shield cup in anti -
spatter compound will minimize the amount of scale
which adheres to it.
Cutting speed depends on material, thickness, and the opera-
tor’s ability to accurately follow the desired cut line. The fol-
lowing factors may have an impact on system performance:
• Torch parts wear
• Air quality
• Line voltage fluctuations
• Torch standoff height
• Proper work cable connection
4T.07 Gouging
!
WARNING
Be sure the operator is equipped with proper
gloves, clothing, eye and ear protection and that all
safety precautions at the front of this manual have
been followed. Make sure no part of the operator’s
body comes in contact with the workpiece when
the torch is activated.
Disconnect primary power to the system before
disassembling the torch, leads, or power supply.