Mounting, Mounting an embrace on a wall – Revel Embrace User Manual
Page 12
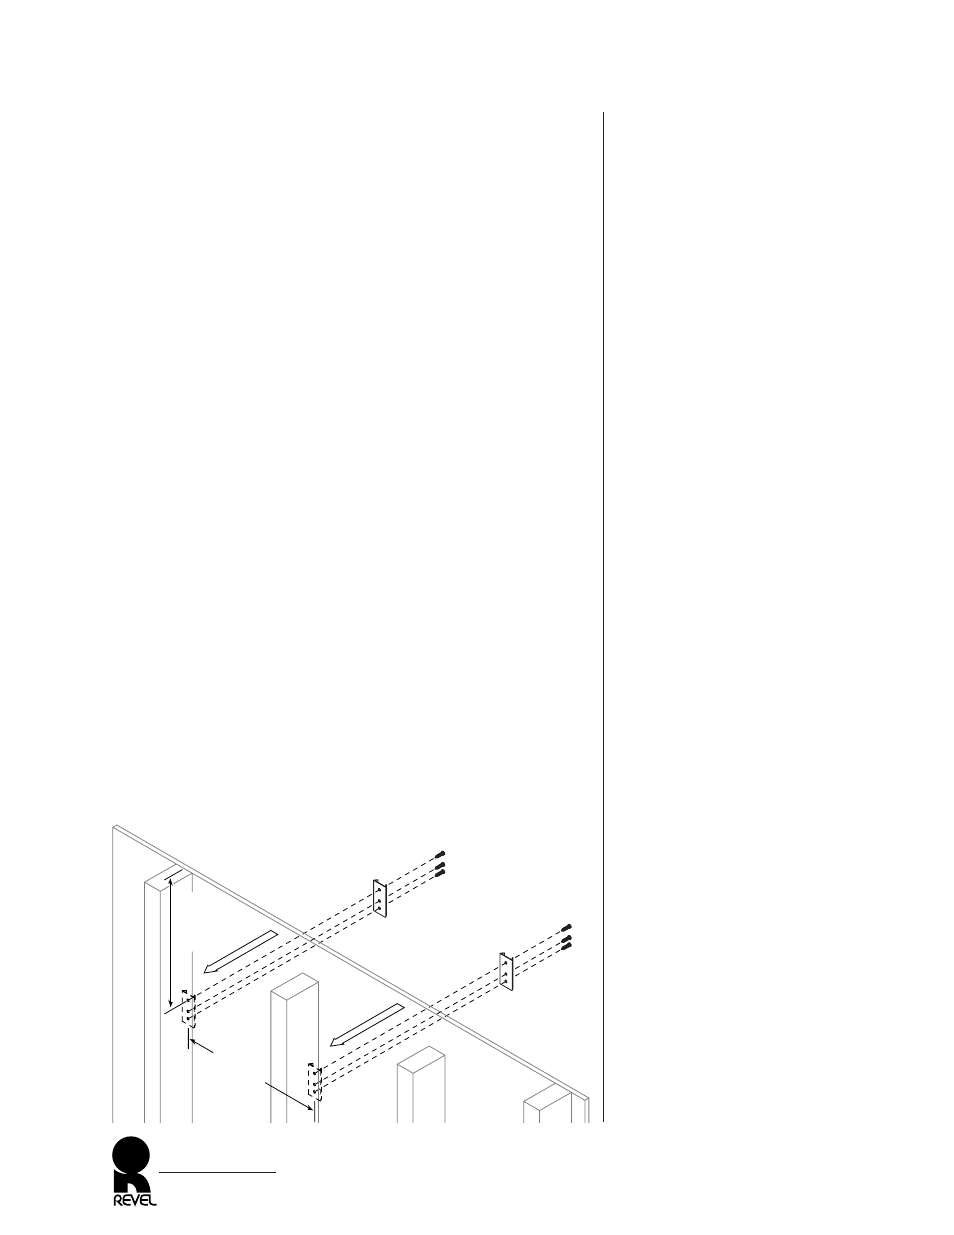
Figure 10. Installing closed-end
outer brackets on a wall.
MOUNTING
EMBRACE surrounds are available in two versions. The wall-mount
version includes a pair of wall brackets and hardware. The ceiling-
mount version includes additional hardware for ceiling installations.
MOUNTING AN EMBRACE ON A WALL
1. Determine wall locations for each pair of left and right
EMBRACE surrounds (see Placement starting on page 6).
2. At each proposed site, use a stud finder to locate the nearest
studs, which should be on 16-inch centers.
NOTE: The EMBRACE wall-mount hardware must be securely
attached to studs at their centers. Do not attach the hardware to
drywall or plaster!
3. Use tape to attach the enclosed wall-mount templates to the
walls, leaving a minimum clearance of 3
1
⁄
2
" (89 mm) from the
cabinet top to the ceiling. Use a level to verify tilt is zero.
NOTE: Be sure to account for any mouldings when determining a
minimum clearance distance. Refer to Figure 10 below.
4. At each site, drill six (6)
3
⁄
32
" (2.5 mm) holes at the designated
locations on the wall-mount template. Also create a cutout for
speaker wire within the noted boundary.
NOTE: The cutout should be wide enough to provide adequate
clearance to connect large spade lugs on terminal sides. Bi-wired or
Dual Drive™ connections will require even larger openings.
5. Install a pair of closed-end brackets, as shown in Figure 10.
EMBRACE
Owner’s Manual
12
OUTER
BRACKET
closed
end
wallboard
(top)
stud
stud
(6) #1
0 x 1
3
⁄
4
" L. Screws
OUTER
BRACKET
closed
end
16" centers
5
1
⁄
4
"
(134 mm)
minimum