0 installation and commissioning, 1 mounting & site selection – HF scientific AccUView UV %Transmission Monitor User Manual
Page 10
3.0 Installation and Commissioning
Prior to use for the first time, the supplied desiccant pouch will need to be installed. Refer
to section 9.2 Replacing or Installing the Desiccant Pouch.
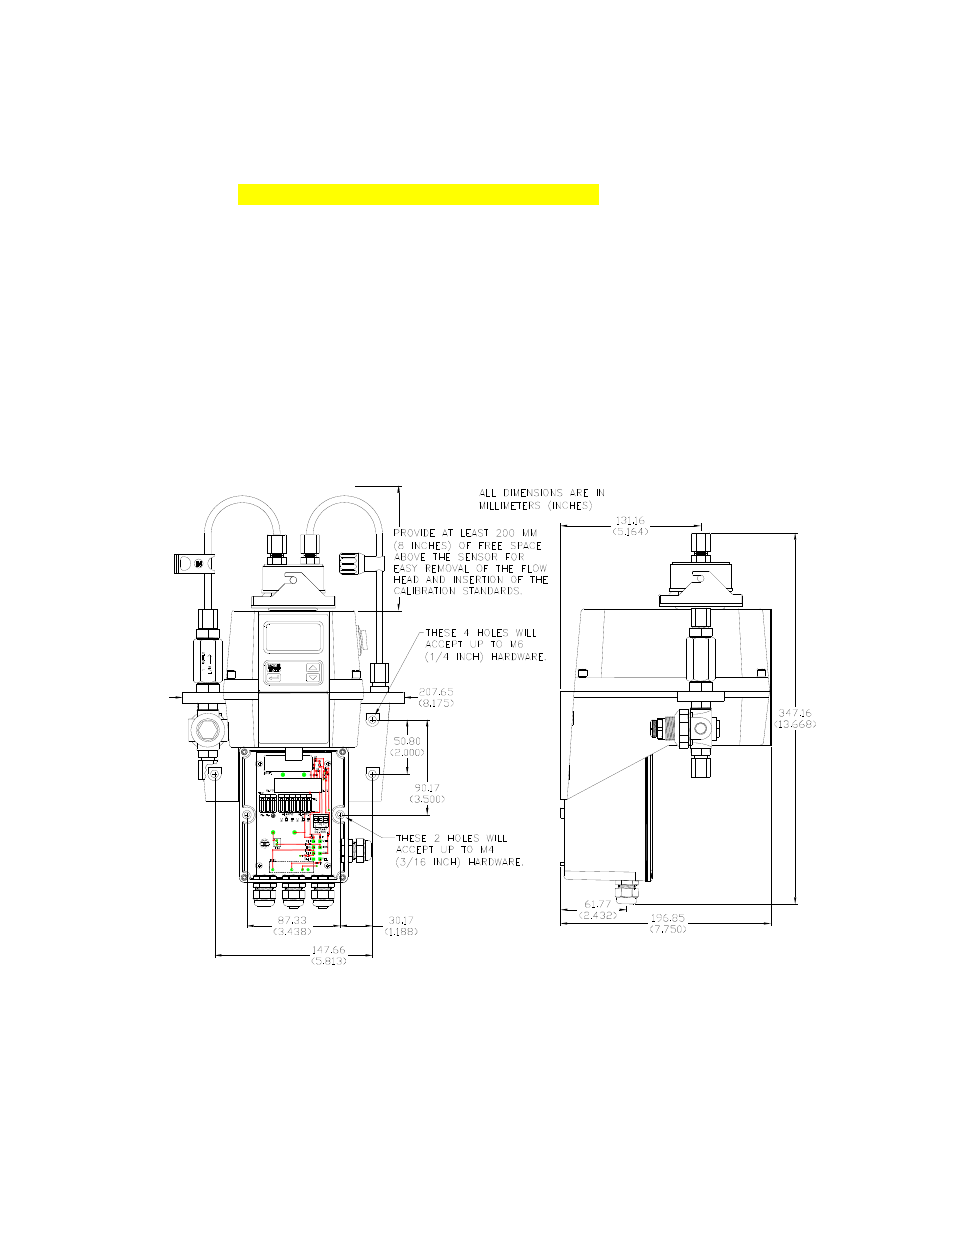
3.1 Mounting & Site Selection
The instrument is designed for wall mounting. For ease of service there should be about
20 cm (8”) free area above the instrument; this will ensure enough room for calibration
and cuvette maintenance. Choose a location that is easily accessible for operation and
service and ensure that the front display rests at eye level. The overall mounting
dimensions of the instrument are shown in Figure 3. The recommended mounting screws
are M6 (¼”) for the instrument enclosure and M4 (3/16”) for the field terminal box. The
AccUView is designed to have the field terminal box cradled under the sensor portion of
the instrument. It is recommended that the field terminal box be mounted first, and then
the rest of the instrument be mounted on top. The template included on the last page of
this manual may be used to establish mounting-hole locations.
Figure 3: Overall Mounting Dimensions of the Instrument
It is critical that the instrument be mounted as close as possible to the sampling point to
ensure a quick response time (within 2-3 meters (6-10 ft) of the sampling point).
AccUView (6/10)
Rev. 4.0
5