Installing the aileron servos and linkages – E-flite Alpha 450 Sport ARF User Manual
Page 4
4
E-flite Alpha Sport 450 ARF Assembly Manual
Installing the Aileron
Servos and Linkages
Required Parts
Radio system
Wing panel (right and left)
Servo with hardware (2)
4
1
/
2
-inch aileron pushrod (2)
3-inch (76mm) servo extension (2)
Micro pushrod connector (2)
Micro pushrod connector backplate (2)
2mm x 4mm machine screw (2)
Required Tools and Adhesives
Pliers
Dental floss or string
Pin drill
Drill bit: 1/16-inch (1.5mm)
Thin CA
Phillips screwdriver: #0, #1
Threadlock
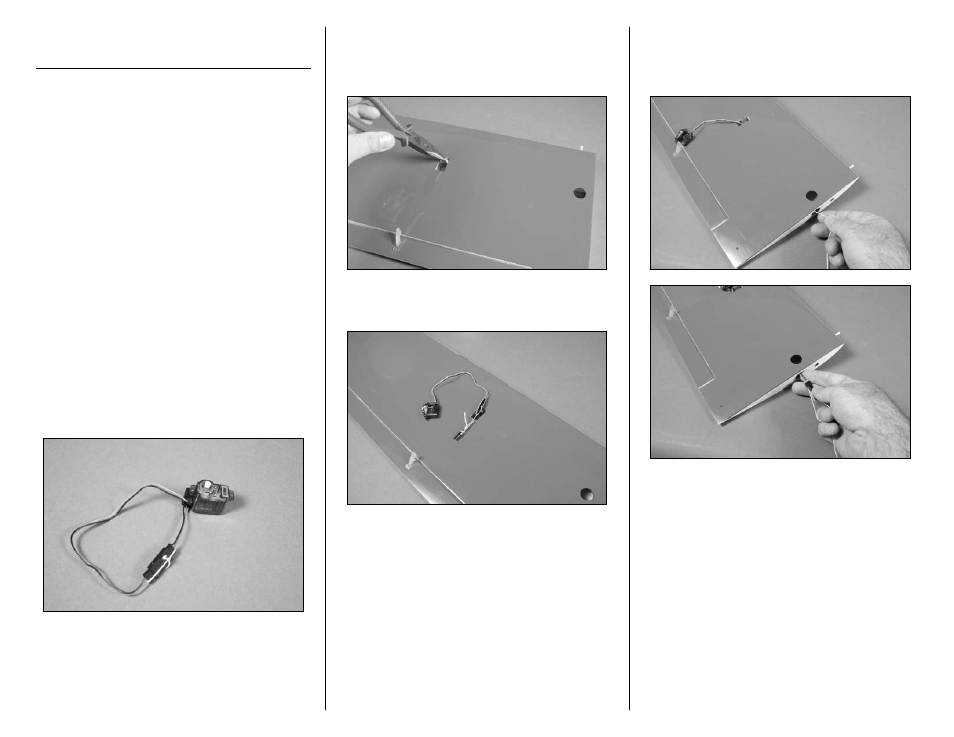
1. Use a #0 Phillips screwdriver to remove the
servo horn from the servo. Connect a 3-inch
(76mm) servo extension to the lead from the servo.
Use string or dental floss to secure the extension
to the servo lead so it will not unplug while inside
the wing. Make sure not to lose the screw from the
servo as it will be used at the end of this section.
Note: Use the radio system to center
the aileron servo at this time.
2. Use pliers to carefully pull the string out of the
wing through the hole for the aileron servo. Use
care not to detach the string from the end of the
wing where it is taped.
3. Use a knot to tie the string to the end of the
servo extension that will plug into the Y-harness.
4. Use the string to carefully pull the extension and
servo lead through the wing as shown. The end of
the extension will eventually come out of the same
hole the string was inserted in.