Installing the tail surfaces – E-flite Alpha 450 Sport ARF User Manual
Page 14
14
E-flite Alpha Sport 450 ARF Assembly Manual
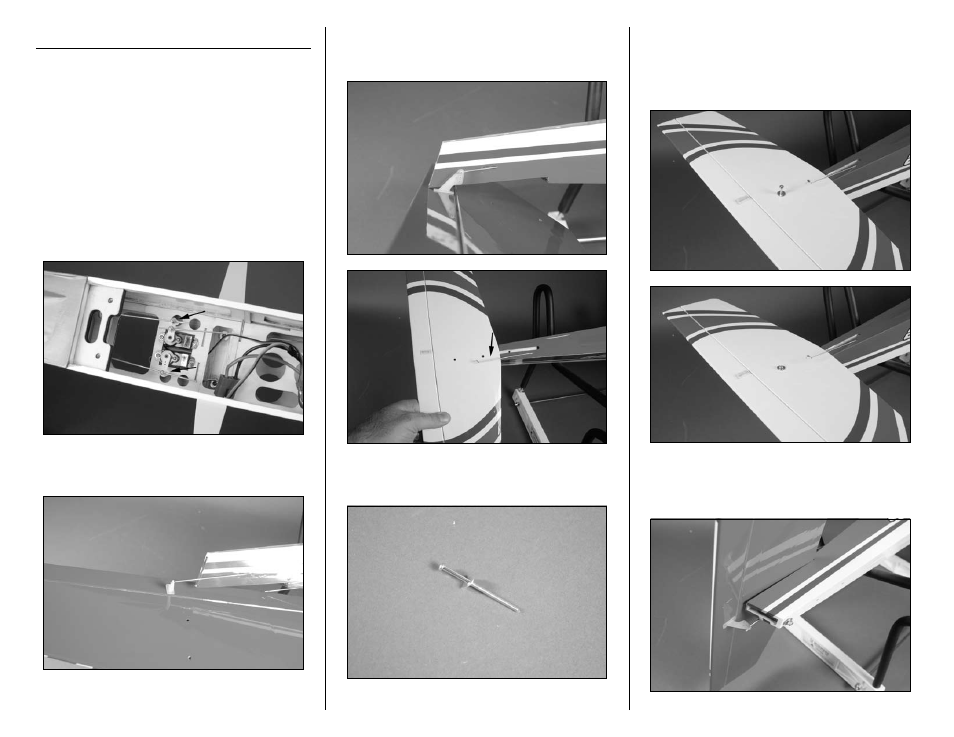
Installing the Tail Surfaces
Required Parts
Fuselage assembly Elevator assembly
Rudder assembly
3mm x 50mm machine bolt
3mm locknut (3)
3mm steel washer (4)
Required Tools and Adhesives
Nut driver: 5.5mm Phillips screwdriver: #1, #2
1. Use a #1 Phillips screwdriver to loosen the
screws that secure the rudder and elevator pushrod
to the connectors at the servo. This will allow you to
move the pushrods without damaging the servos to
install the rudder and elevator assemblies.
2. Insert the bend in the elevator pushrod wire into
the outer hole of the elevator control horn.
3. Rotate the elevator into position, making sure
the pushrod wire for the rudder is on the top
side of the elevator.
4. Slide a 3mm steel washer on the 3mm x 50mm
machine bolt.
4. Insert the 3mm x 50mm machine bolt through
the hole in the stabilizer that is the closest to the
rear of the aircraft. The bolt will pass through the
fuselage through holes that have been previously
made in the fuselage for this purpose.
5. Slide a 3mm steel washer on the bolt and then
thread a 3mm locknut on the bolt. Leave the nut
slightly loose at this time.