Removing the wing panels, Motor battery, propeller and pilot installation – E-flite Rhapsody 25e ARF User Manual
Page 17
17
E-flite Rhapsody 25e ARF Assembly Manual
Removing the Wing Panels
Required Parts
Assembled airframe
Wing transport truss (2)
Rubber band (4)
Required Tools and Adhesives
Hex wrench: 3/32-inch
Note: This section is to show you how to
remove the wings using the transport trusses.
The wings are reinstalled repeating the
procedure starting from Step 3 and going to
Step 1.
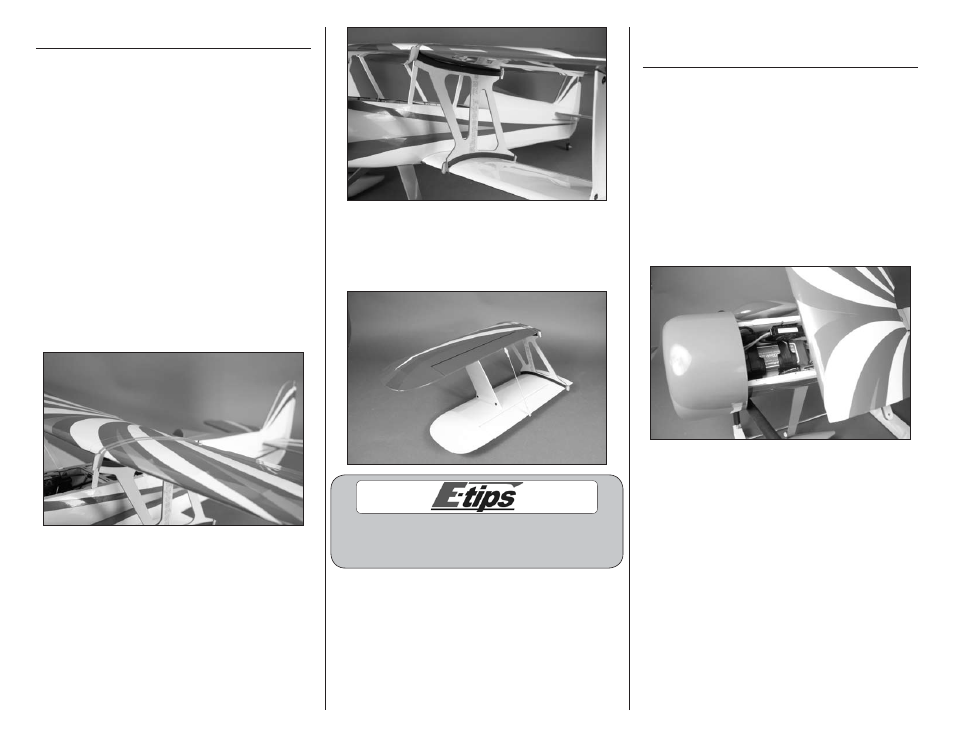
1. Locate the wing transport trusses and four
rubber bands. Slide the braces between the top
and bottom wing as shown. Use a rubber band to
hold the truss to the top and bottom wing. Make
sure the truss is positioned on the wing and not the
center sections attached to the fuselage.
2. Use a 3/32-inch hex wrench to remove the 4-40
screws that attach the panels to the center section.
Slide the panels from the tube and disconnect the
servo lead for the aileron servo.
Using the transport brace allows the removal of the
wing without the need to remove the aileron linkage
and the outer strut between the top and bottom wings.
3. Repeat Steps 1 and 2 to remove the remaining
wing panels from the fuselage.
Note: To reattach the wings, simply step
through Steps 1 through 3 in reverse order.
Motor Battery, Propeller and Pilot
Installation
Required Parts
Fuselage assembly Canopy hatch
Propeller
Transmitter
Propeller adapter Motor battery (charged)
Required Tools and Adhesives
Medium CA
Hex wrench: 3/32-inch
Optional Accessories
Civilian Pilot, Blue (EFLA151)
1. Use the hook and loop straps to secure the
motor battery in the fuselage.